Baue dein Licht - wie es dir gefällt
Gips kombiniert mit LED-Profilen in montagefertigen Trockenbau-Paneelen
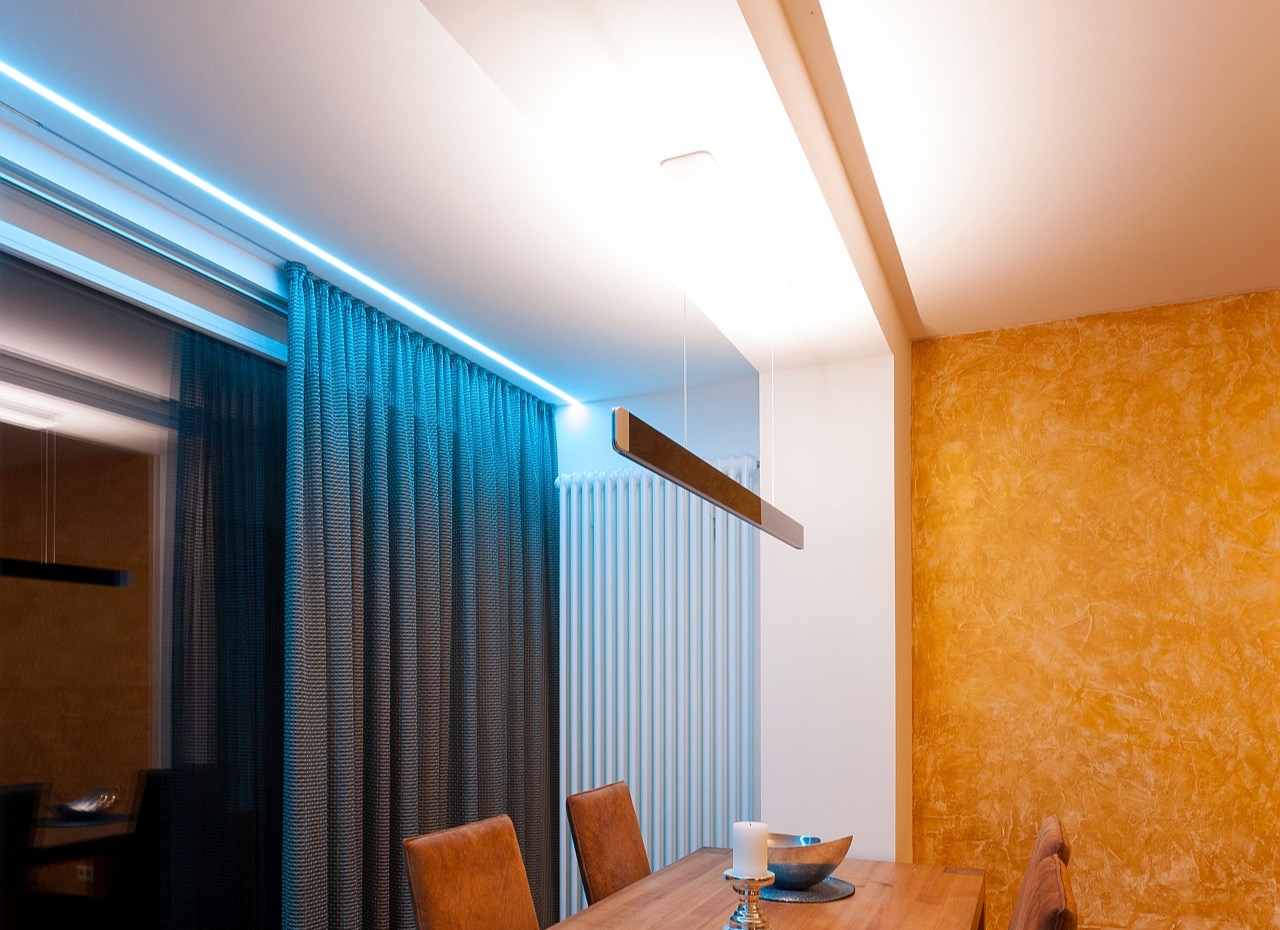
Genau die passende Beleuchtung: endlich ausreichendes und funktionales Licht! Kreiere aus 15 verschiedenen Gipskarton-Paneelen deine individuelle direkte und flächenbündige Beleuchtung. Dunkle Ecken im Gang gehören der Vergangenheit an und werden hell - der Einbau ist simpel und zeitsparend. Die Profile sind bereits fertig integriert und können mit beiliegendem Zubehör perfekt gerade ausgerichtet werden.
-
durchdachtes System
-
simpel und zeitsparend
-
flächenbündiger Einbau
-
passende Diffusoren für ein blendfreies und ideal gestreutes Licht
-
integrierbare Gardinen
Lass dich noch heute persönlich beraten und sichere dir deinen Projektrabatt abhängig vom Auftragswert.
Du möchtest die Paneele gewerblich einsetzen? Registriere dich noch heute und profitiere von unserem Partnerprogramm und abgestimmten Konditionen.
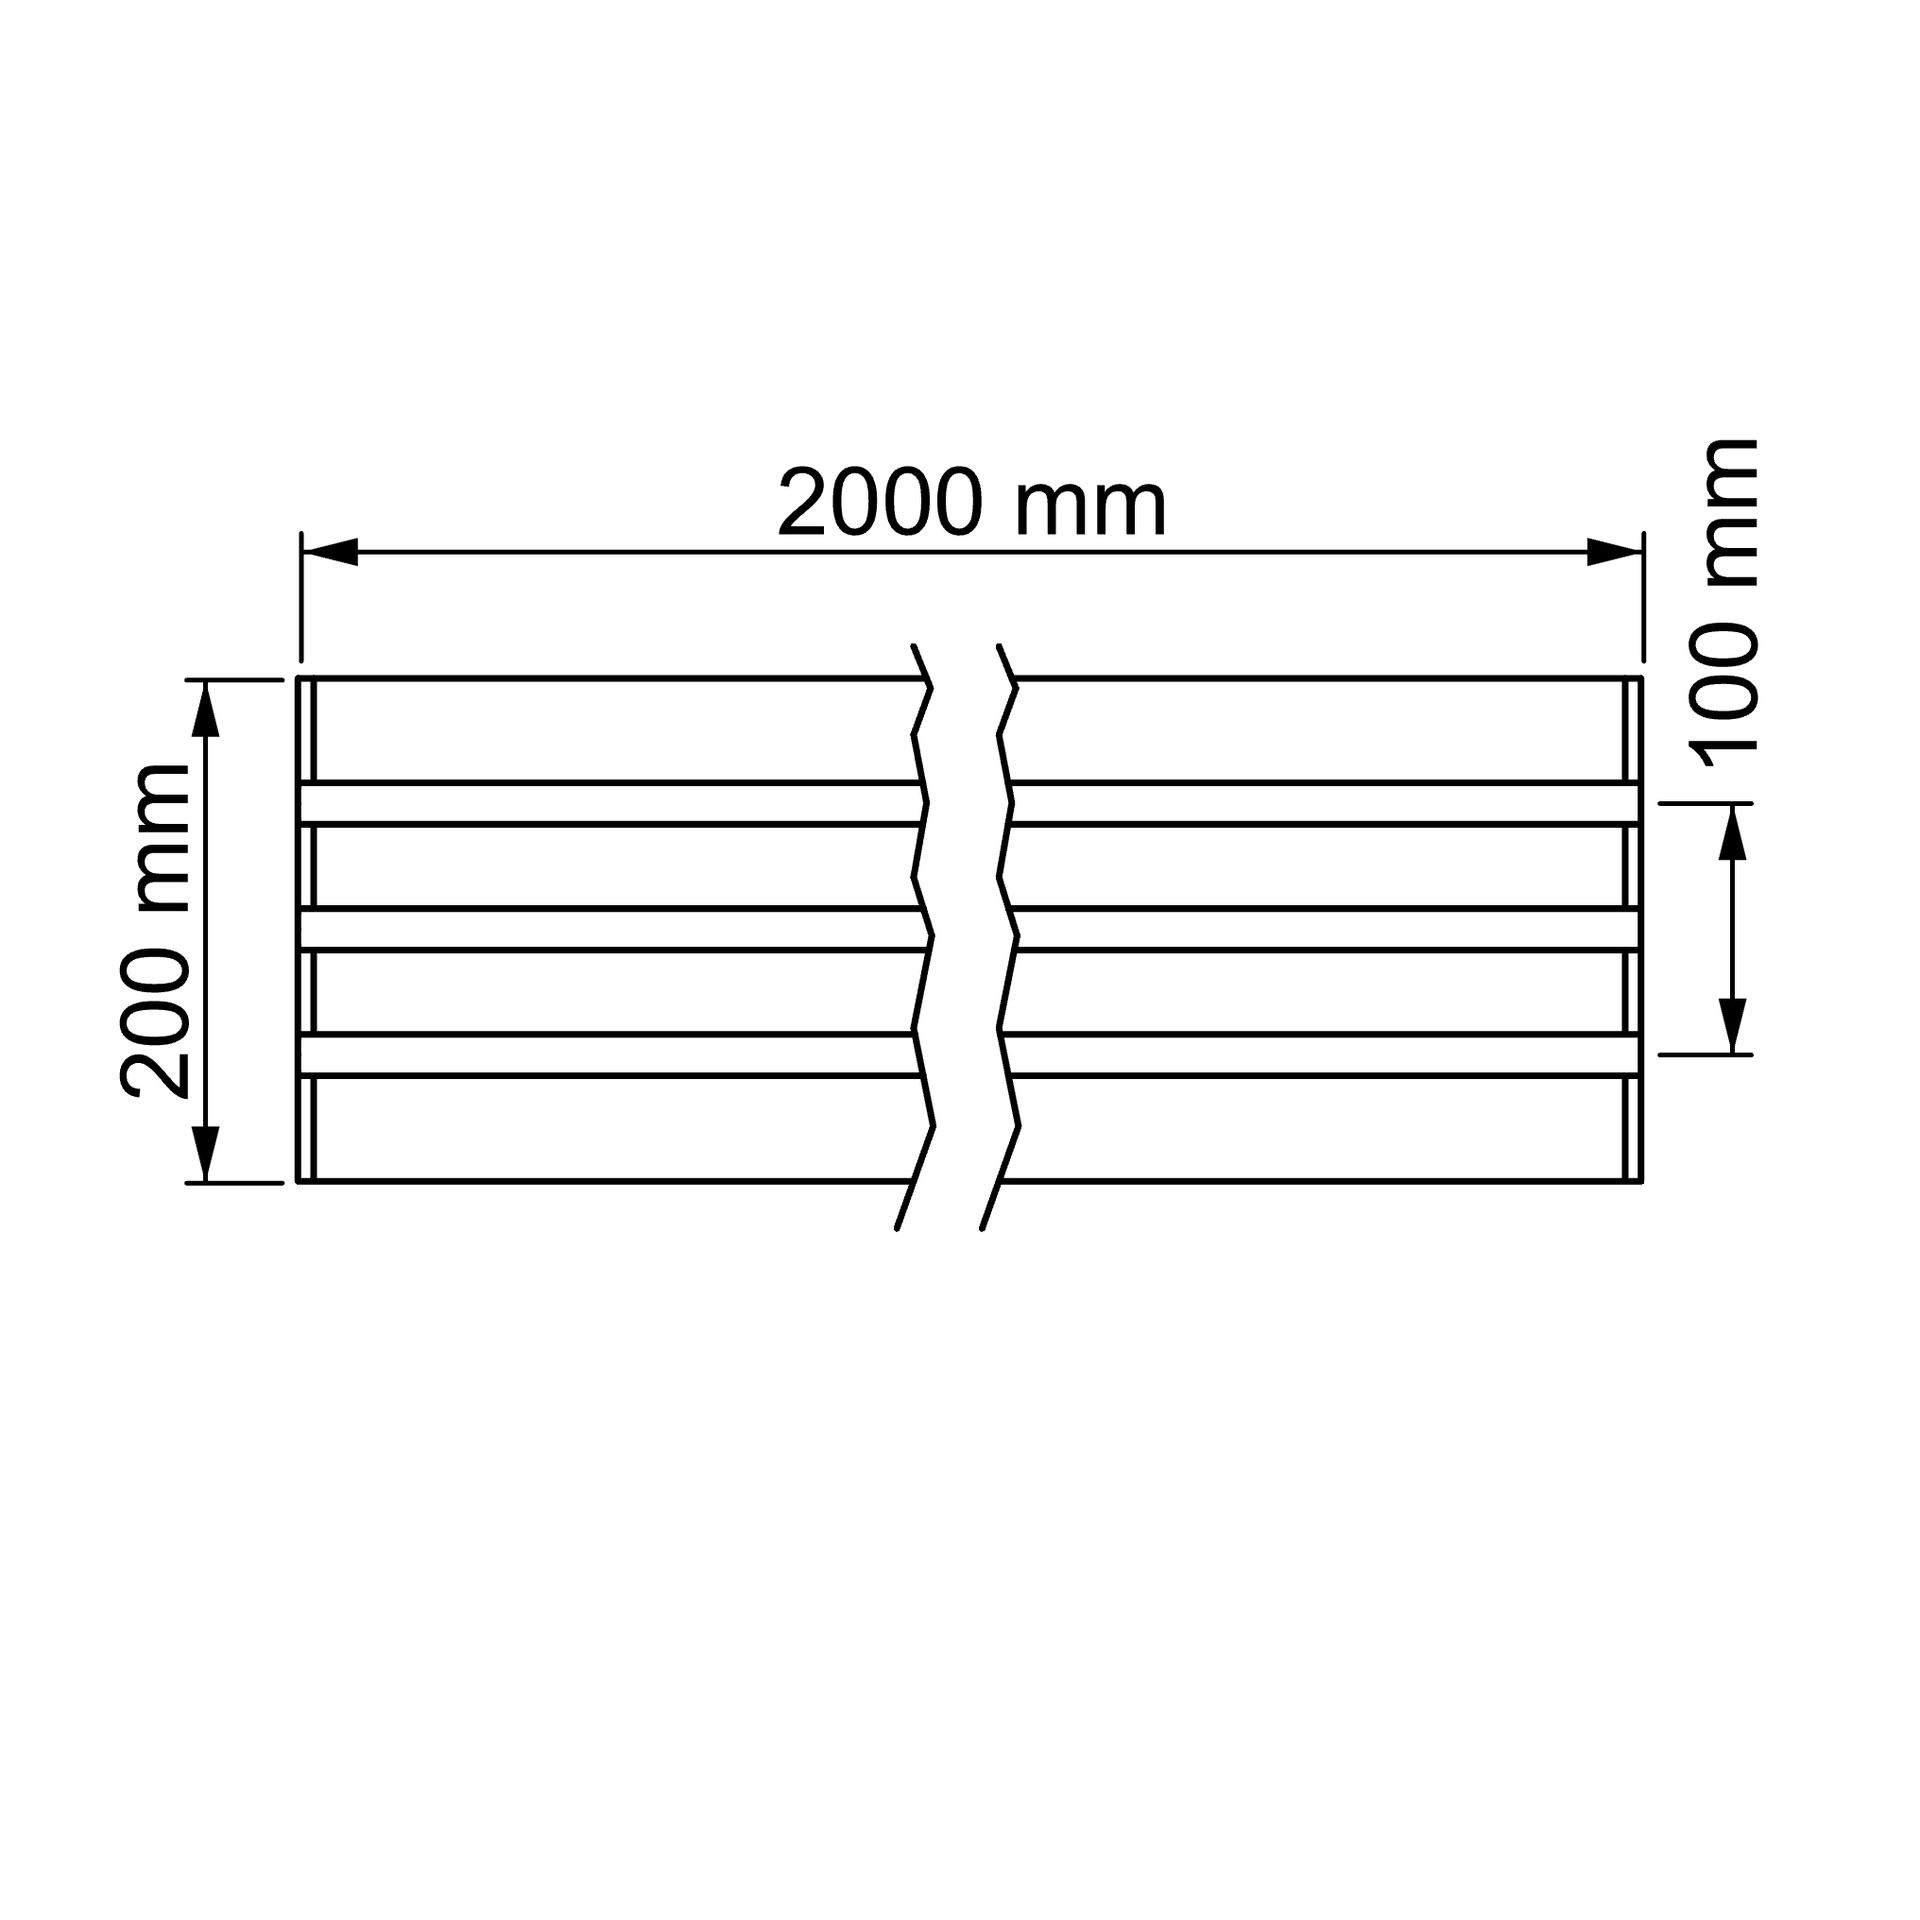
Vorgefertigte Gipselemente (Paneele) mit 1, 2 oder 3 Läufen

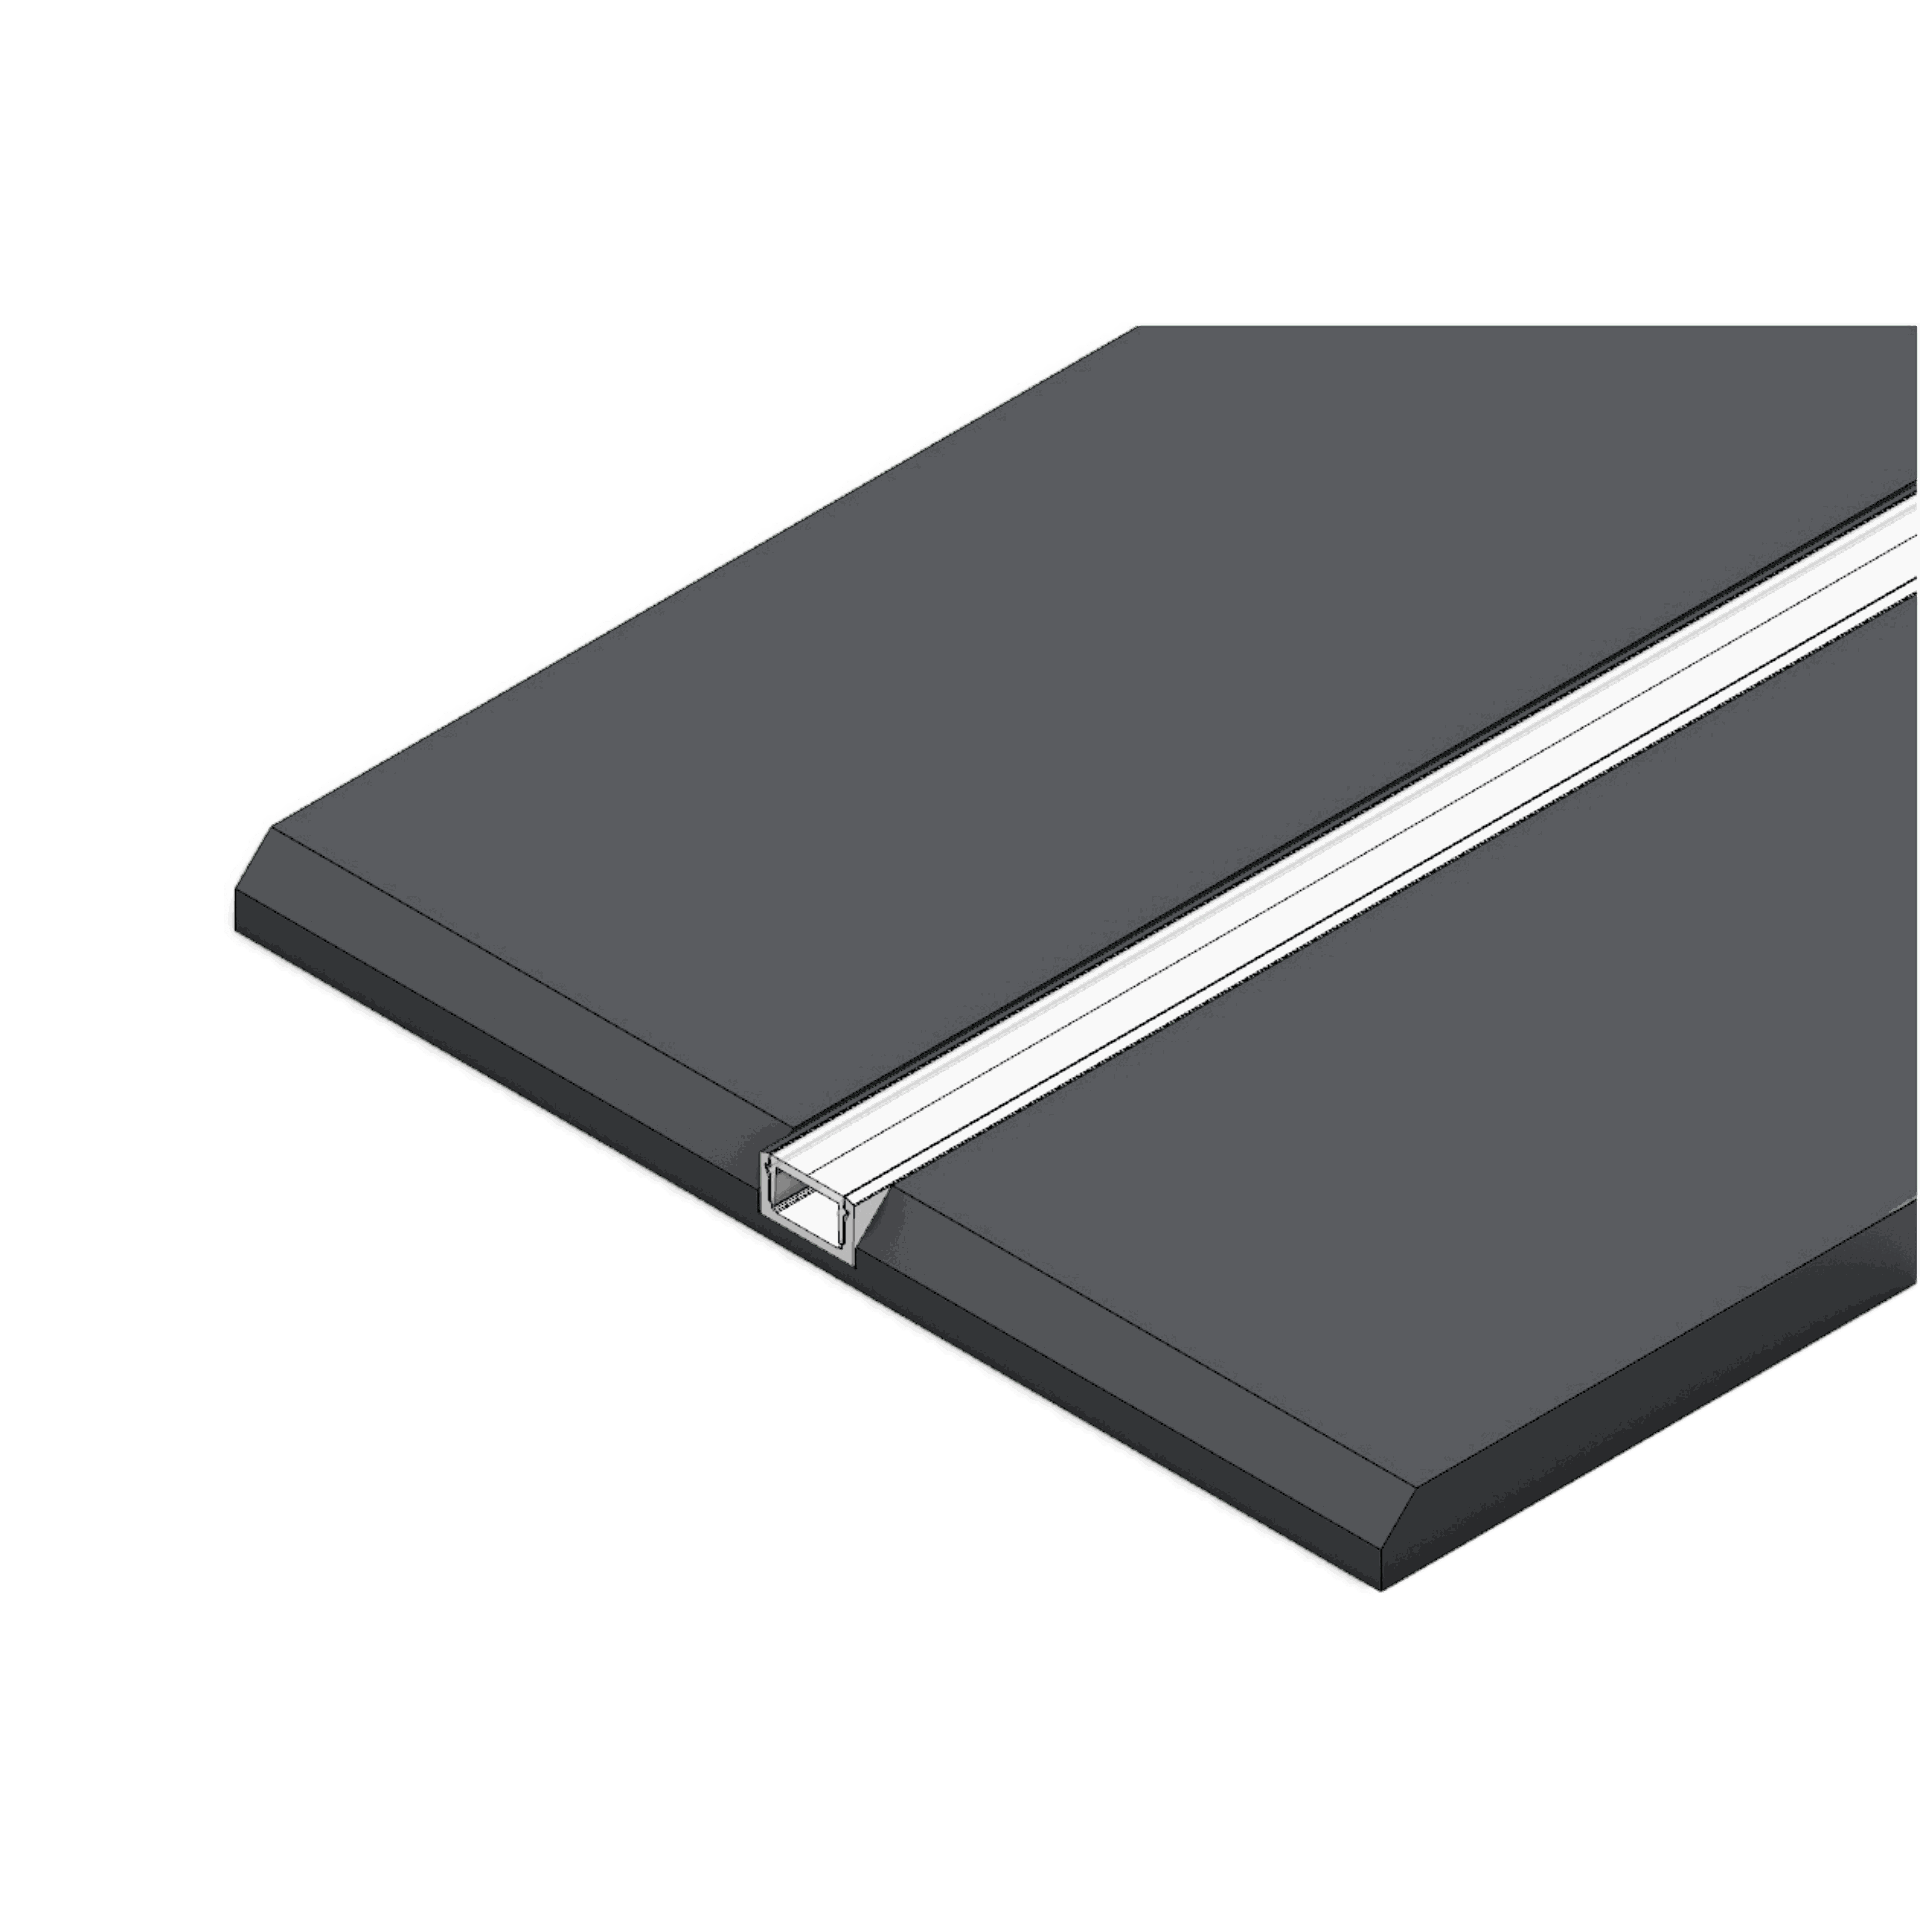
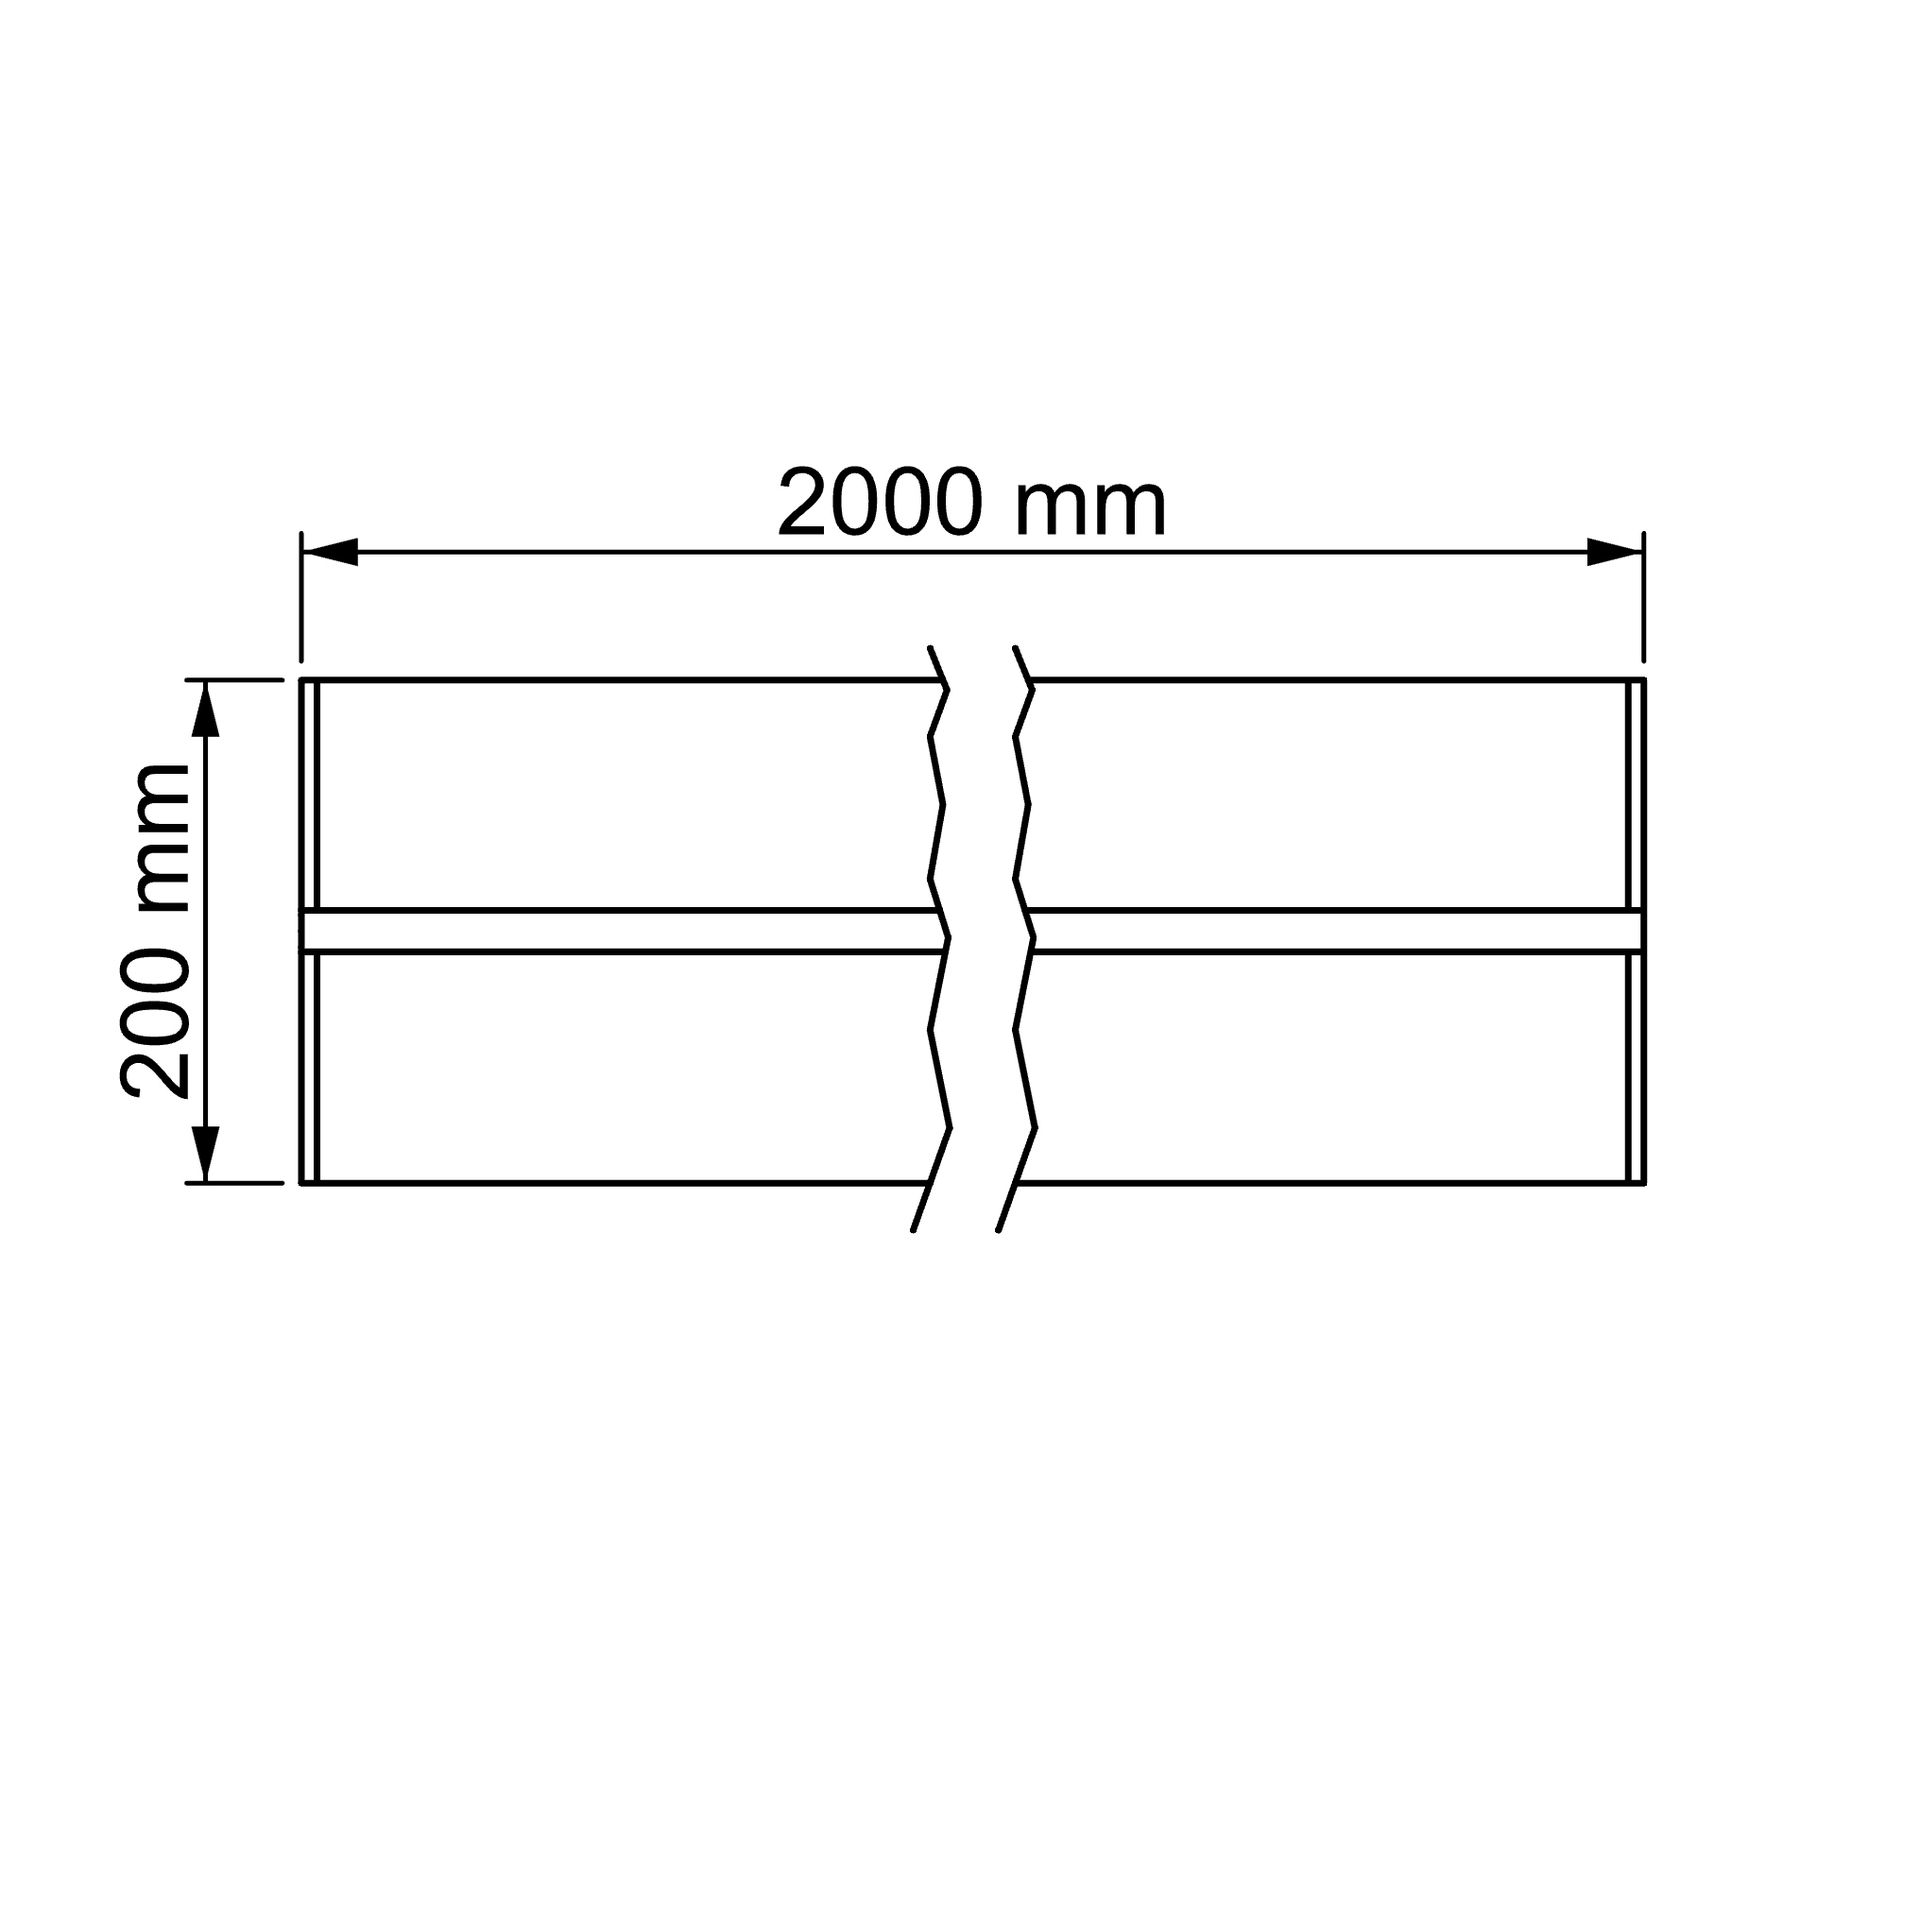
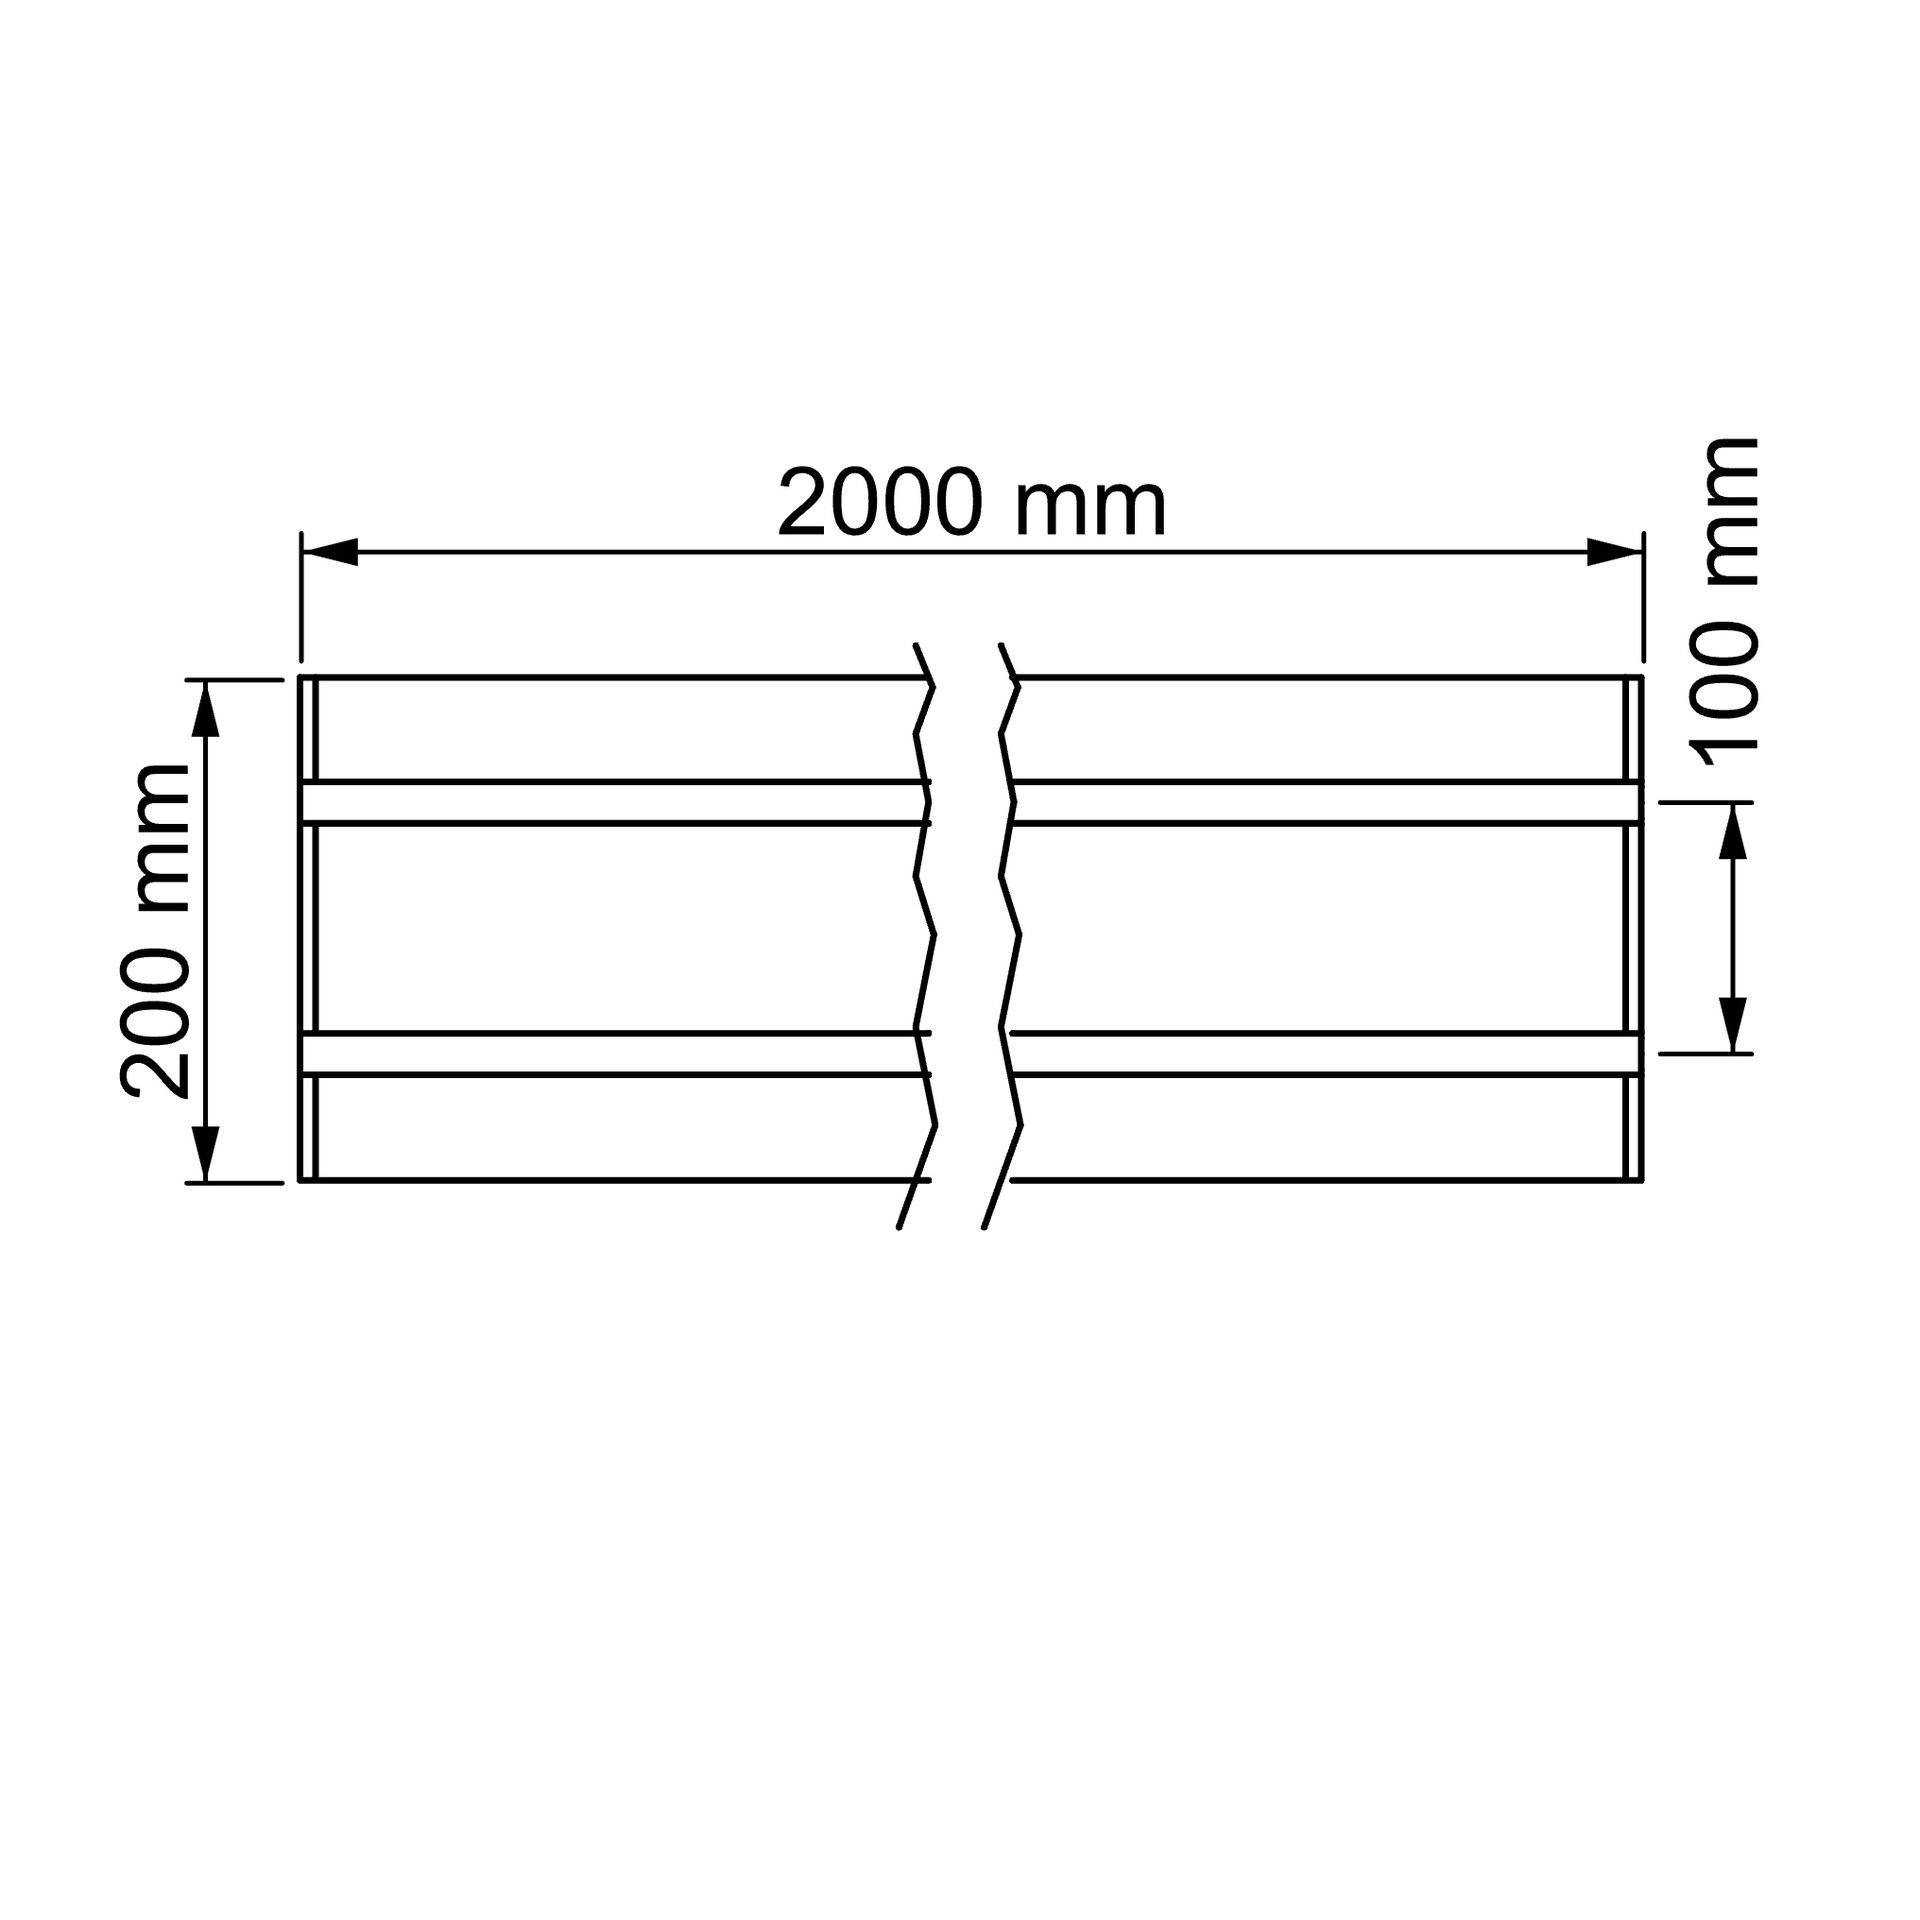
Alle Paneele haben 1, 2 oder 3 Läufe (Profile). Verschiedene Elemente mit einer Y-Anordnung erlauben zudem die Überführung von 1 auf 2 oder von 2 auf 3 Bahnen. Nachfolgend sind die Maße der Profile in den Bahnen dargestellt.
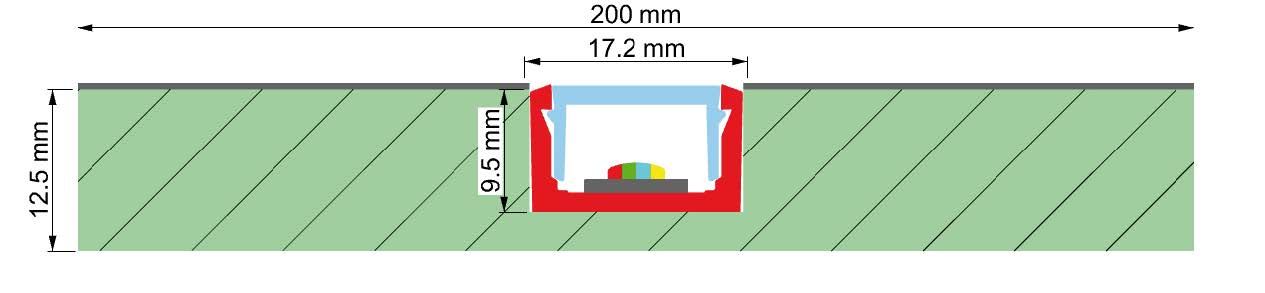
Einläufig
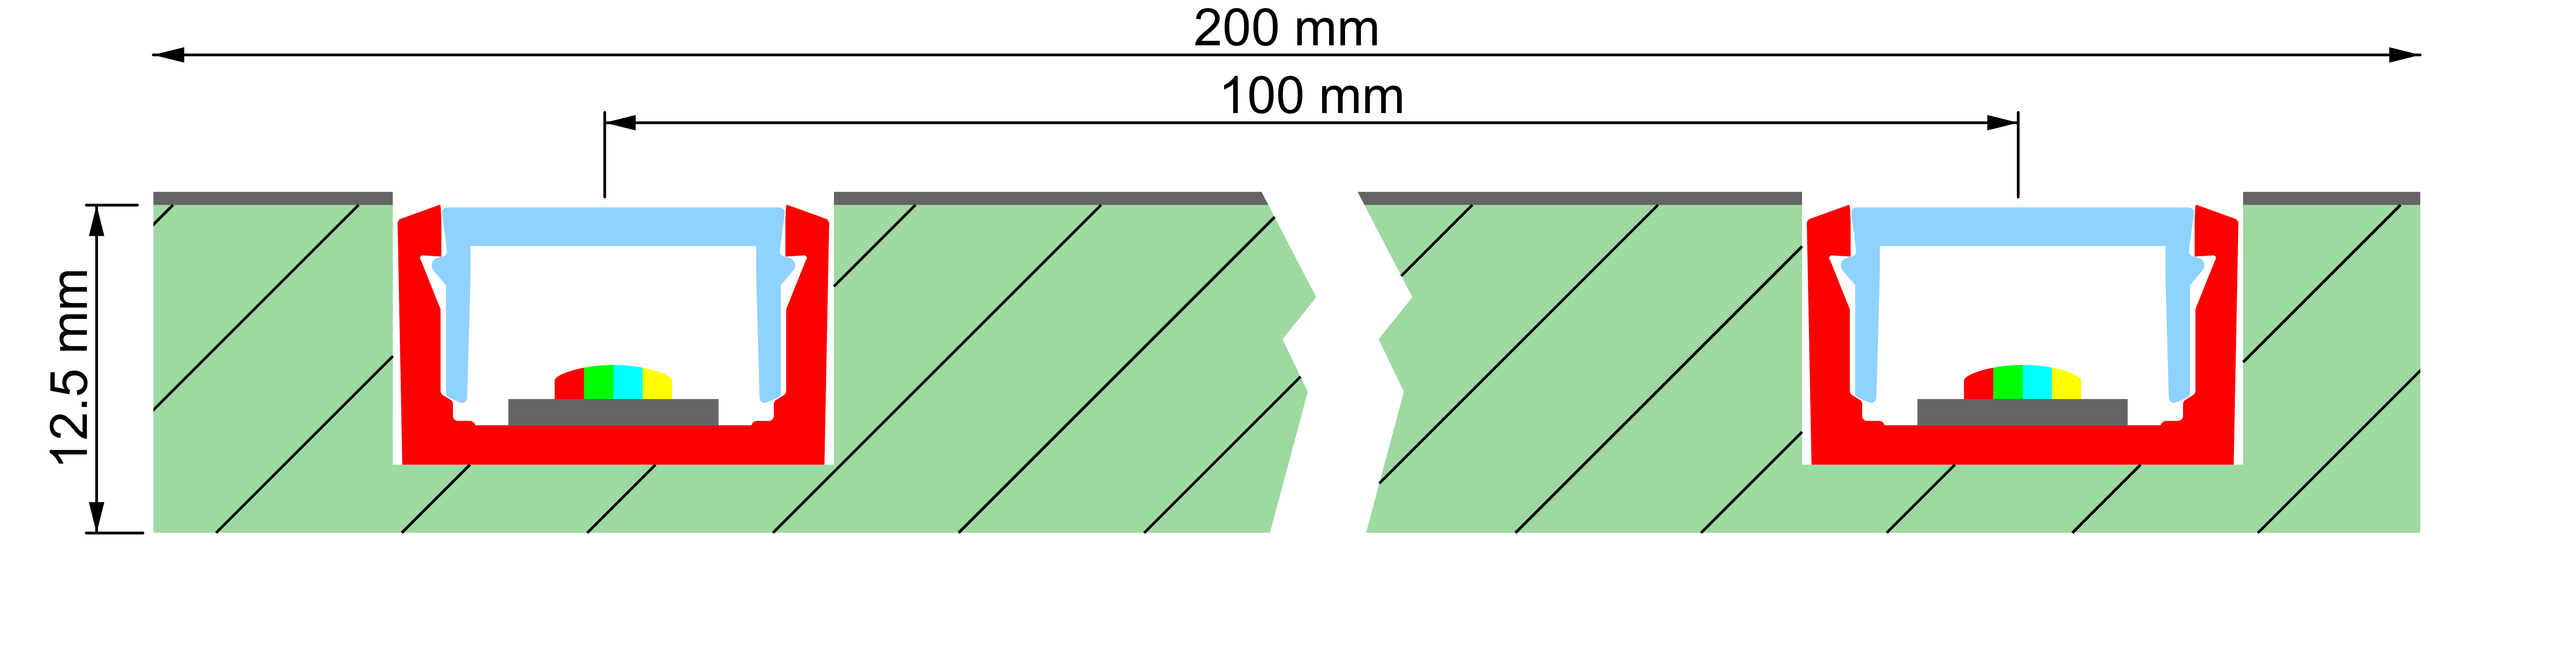
Zweiläufig
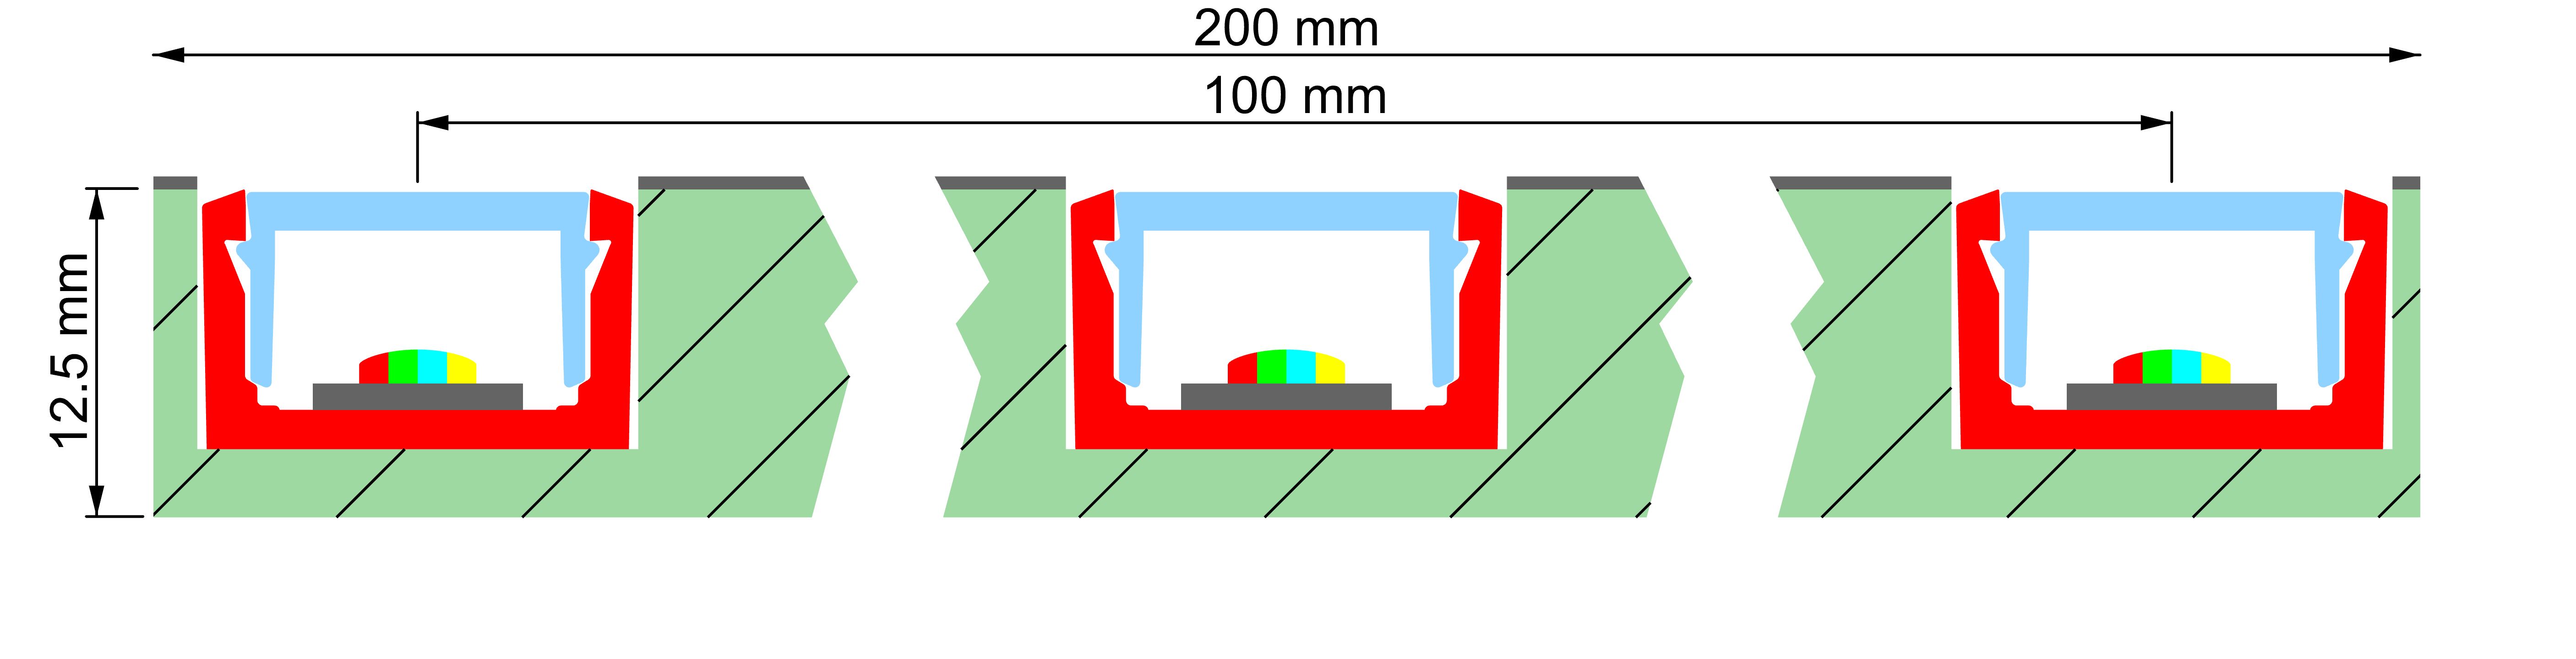
Dreiläufig
Gardine integrierbar
Als besonderes Highlight können mit dem passenden Zubehör in einer der integrierten Profilbahnen auch Vorhänge eingesetzt werden, anstatt Licht zu installieren. Dazu wird einfach eine Vorhangschiene statt einem LED-Lichtband in das Aluminiumprofil eingeschoben.
Von der Idee zum Ergebnis am praktischen Beispiel
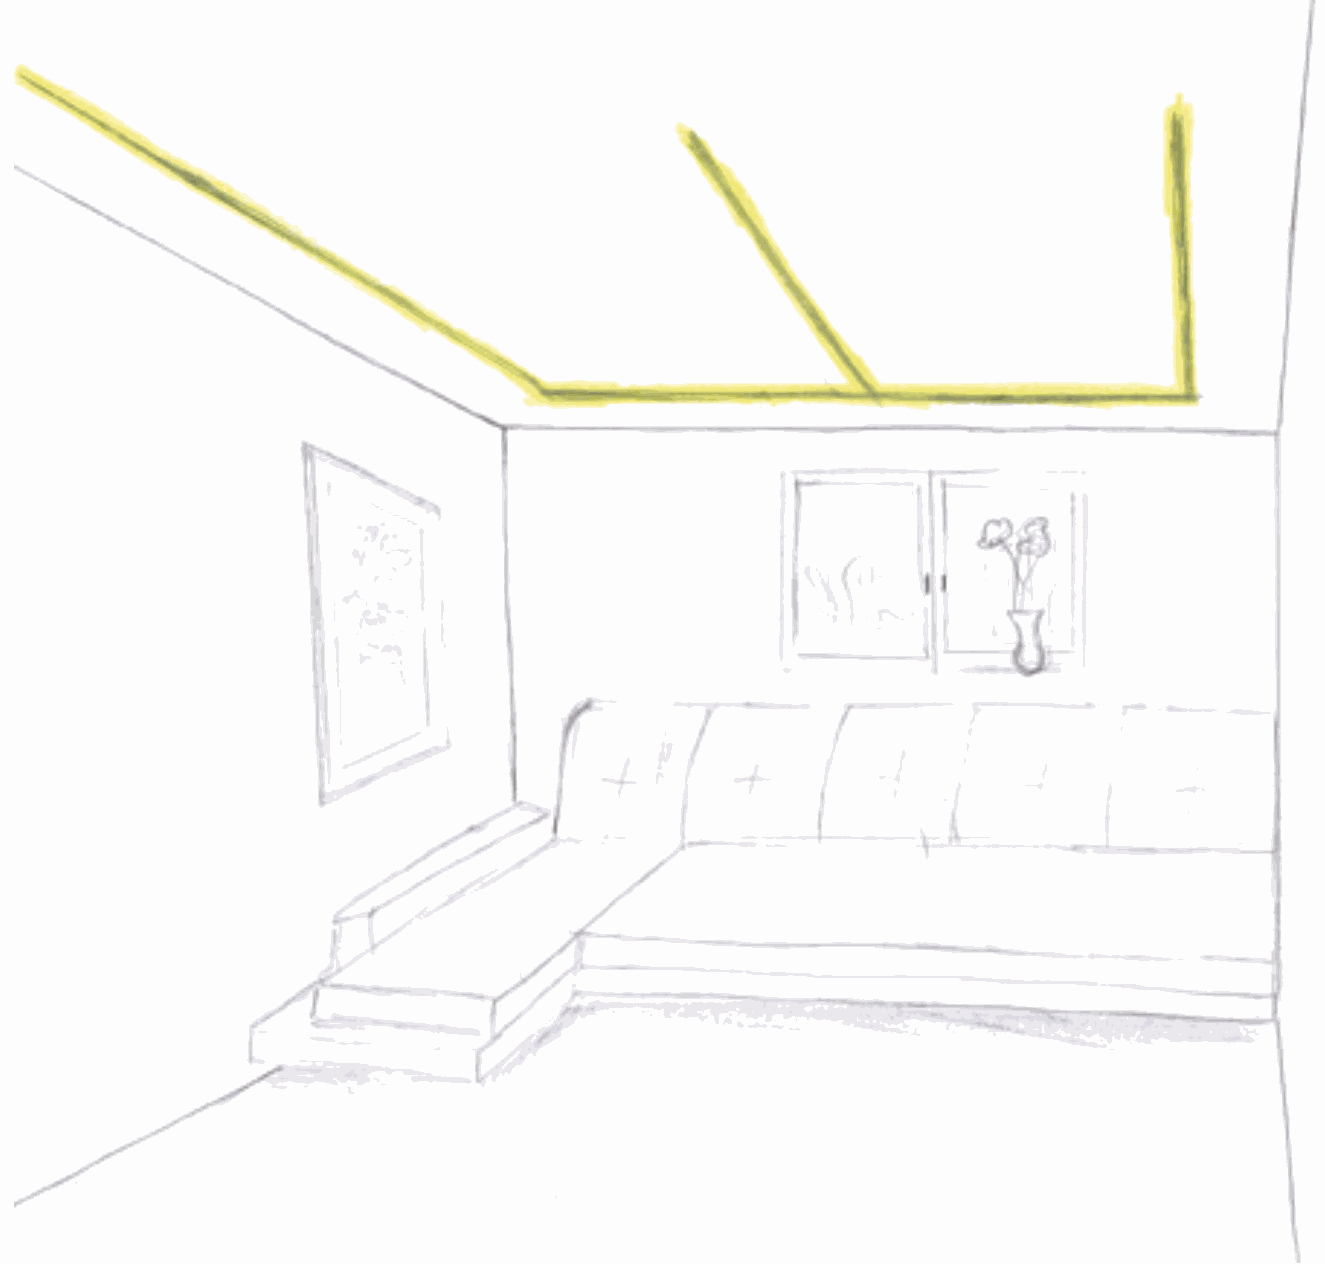
Ein Wohnzimmer erhält eine abgehängte Decke und soll über der Couchlandschaft mit ausreichend Licht ausgeleuchtet werden. Die Installation erfolgt mit einer Lichtbahn.
Optimale Vorgehensweise
-
Spätere Form festlegen und möglichst skizzieren
-
Benötigte Paneele planen & bestellen
-
Unterkonstruktion fertigstellen, ggf. Verstärkungen rechts und links der geplanten Lichtlinien einbringen, damit die Paneele einfach angeschraubt werden können.
-
Paneele in der gewünschten Form anschrauben
-
Anschlusskabel verlegen und Bohrungen zur Kabeldurchführung in die Profile einbringen
-
Mal- und Abdeckgummis (Lieferumfang) zum Schutz der Profile einbringen
-
Lücken in der Decke mit Gipsfaserplatten schließen
-
Kabel vor dem Finish auf Durchgang testen
-
Decke nach Bedarf spachteln, schleifen und Malerarbeiten durchführen
-
LEDs installieren und optional Gardinen einschieben.
Beachte: bei Verwendung der Winkel und T-Stücke müssen alle Winkel exakt 90° betragen. Ist dieses nicht gewährleistet, solltest du die Ecken und T-Stücke mit einer Gehrungssäge herstellen.
Die Idee und die Skizze dazu
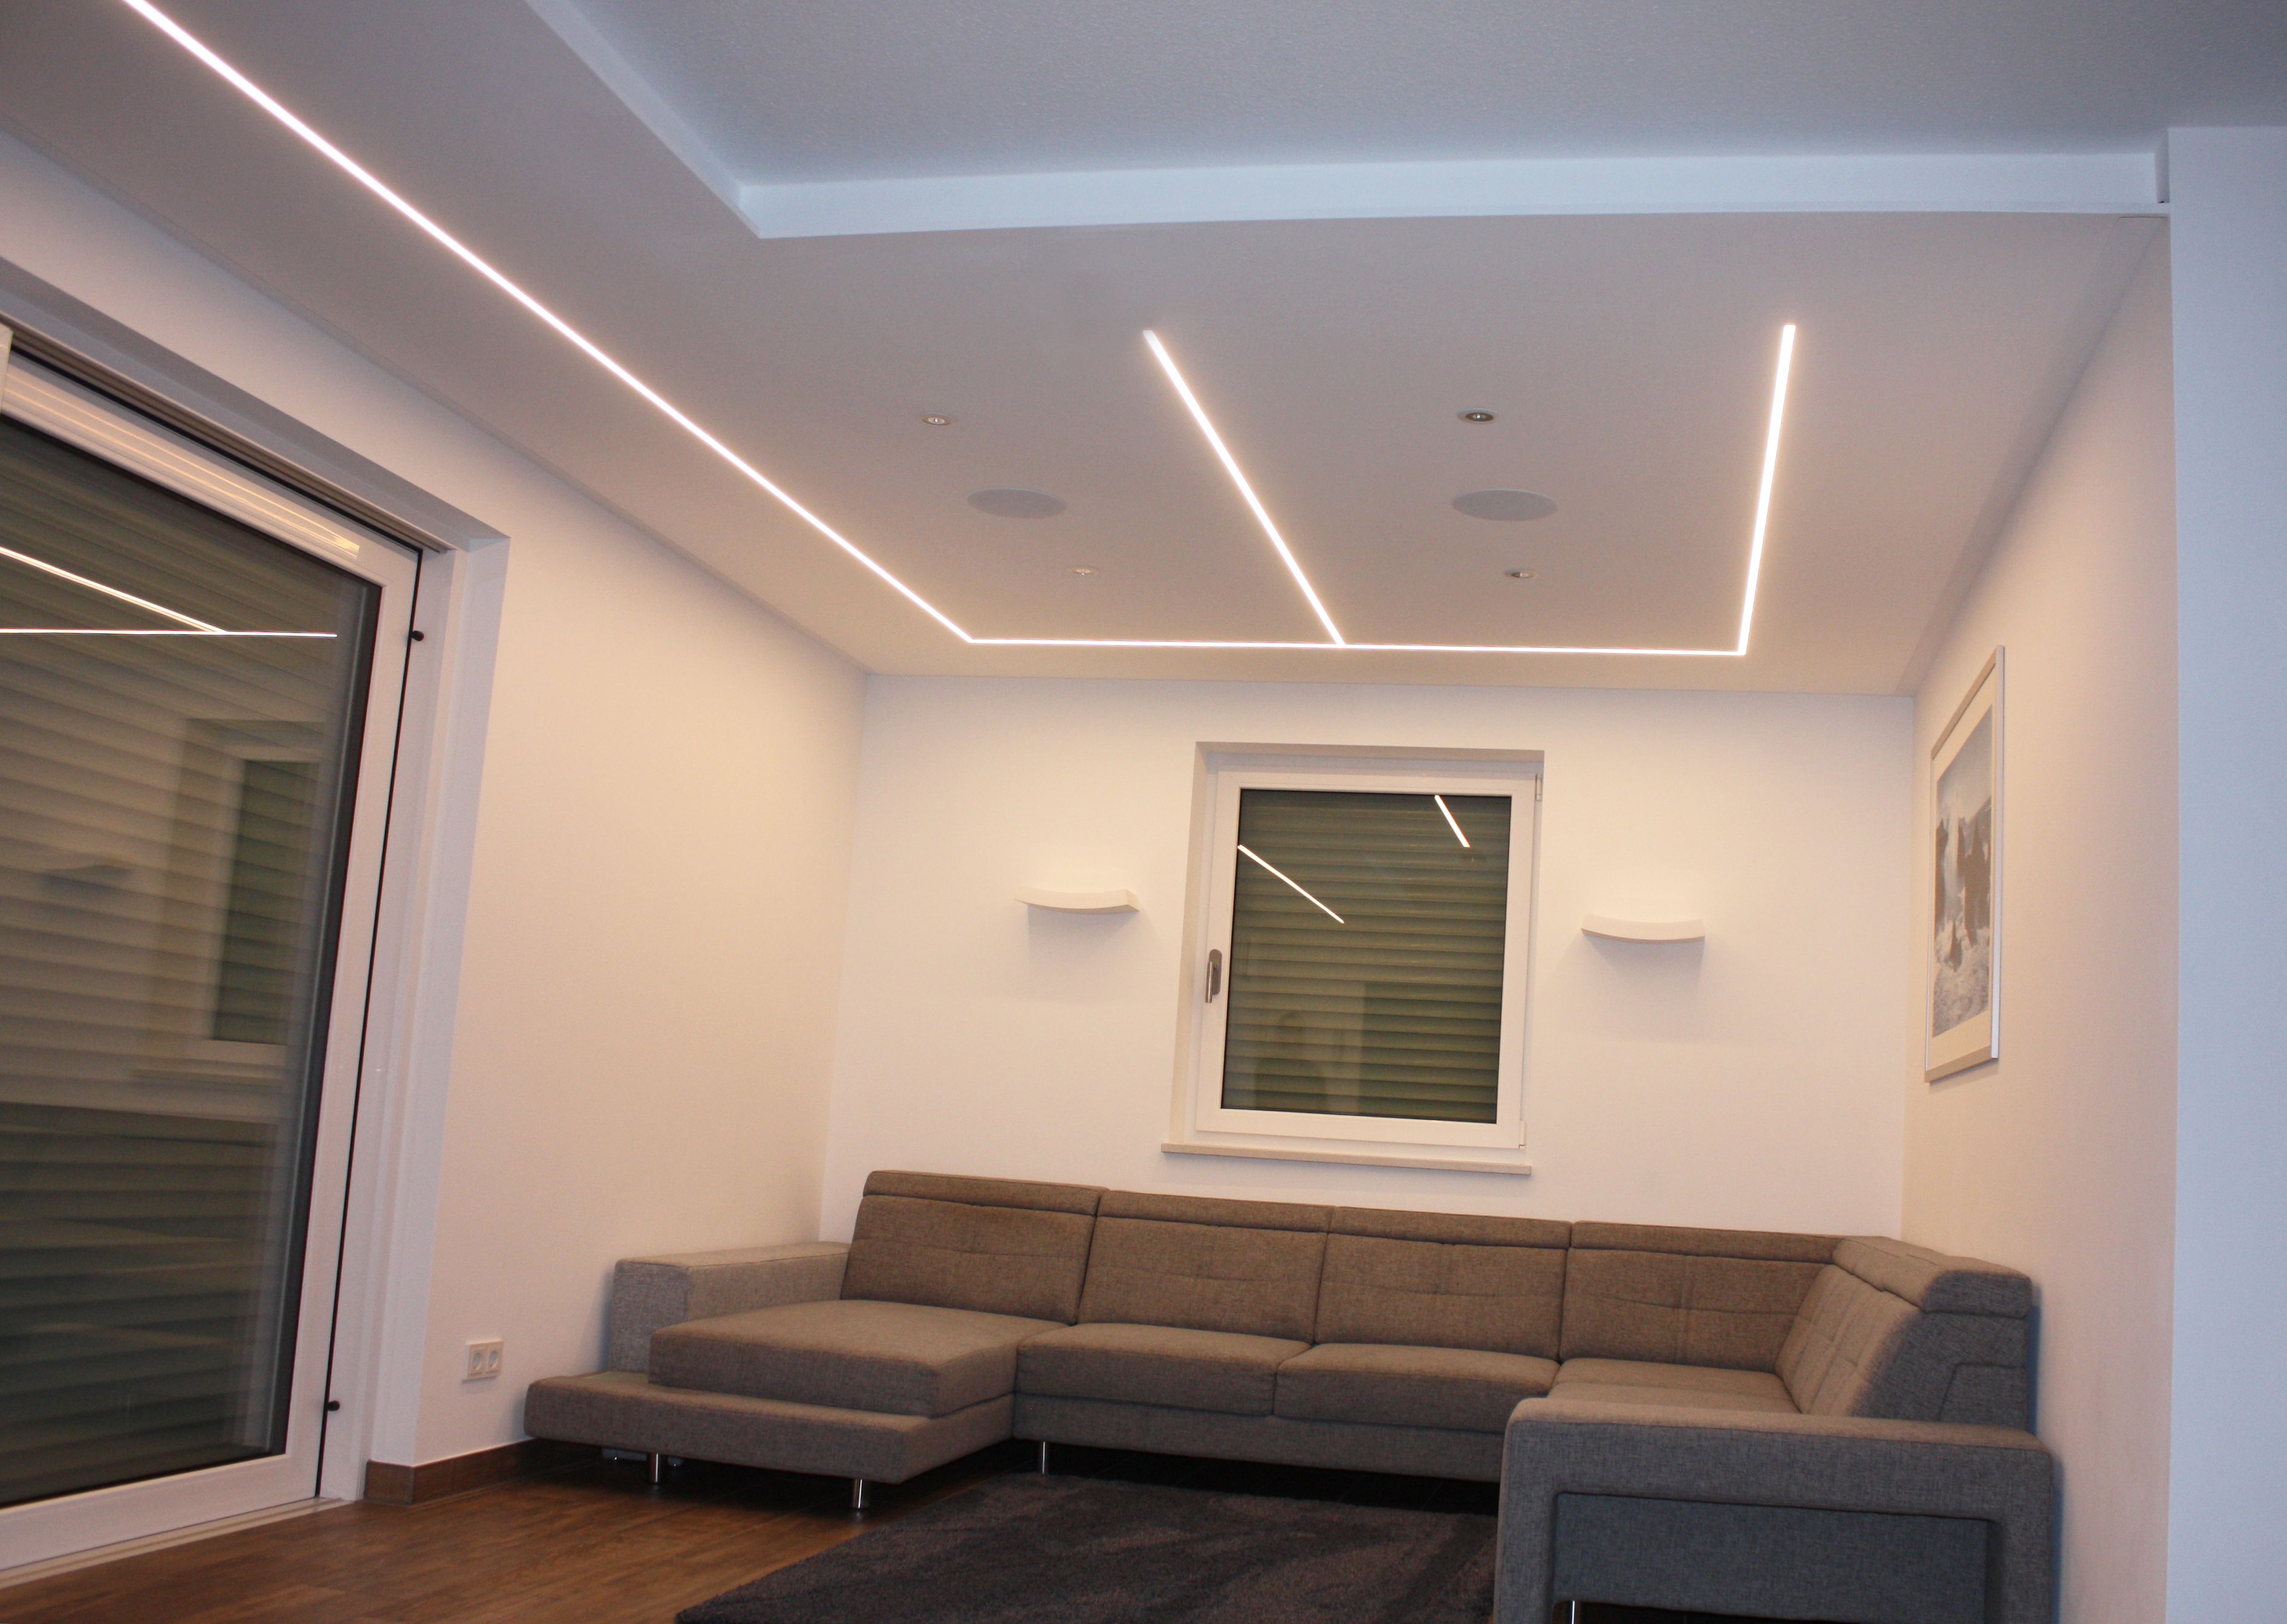
Das Ergebnis
Die Planung
Die gewünschte Form lässt sich aus drei einfachen Grundelementen herstellen. Es wird benötigt:
Vier lineare Paneele mit einer Bahn auf 200cm Länge. Diese werden bei Bedarf mit einer Kappsäge auf der Baustelle entsprechend gekürzt.
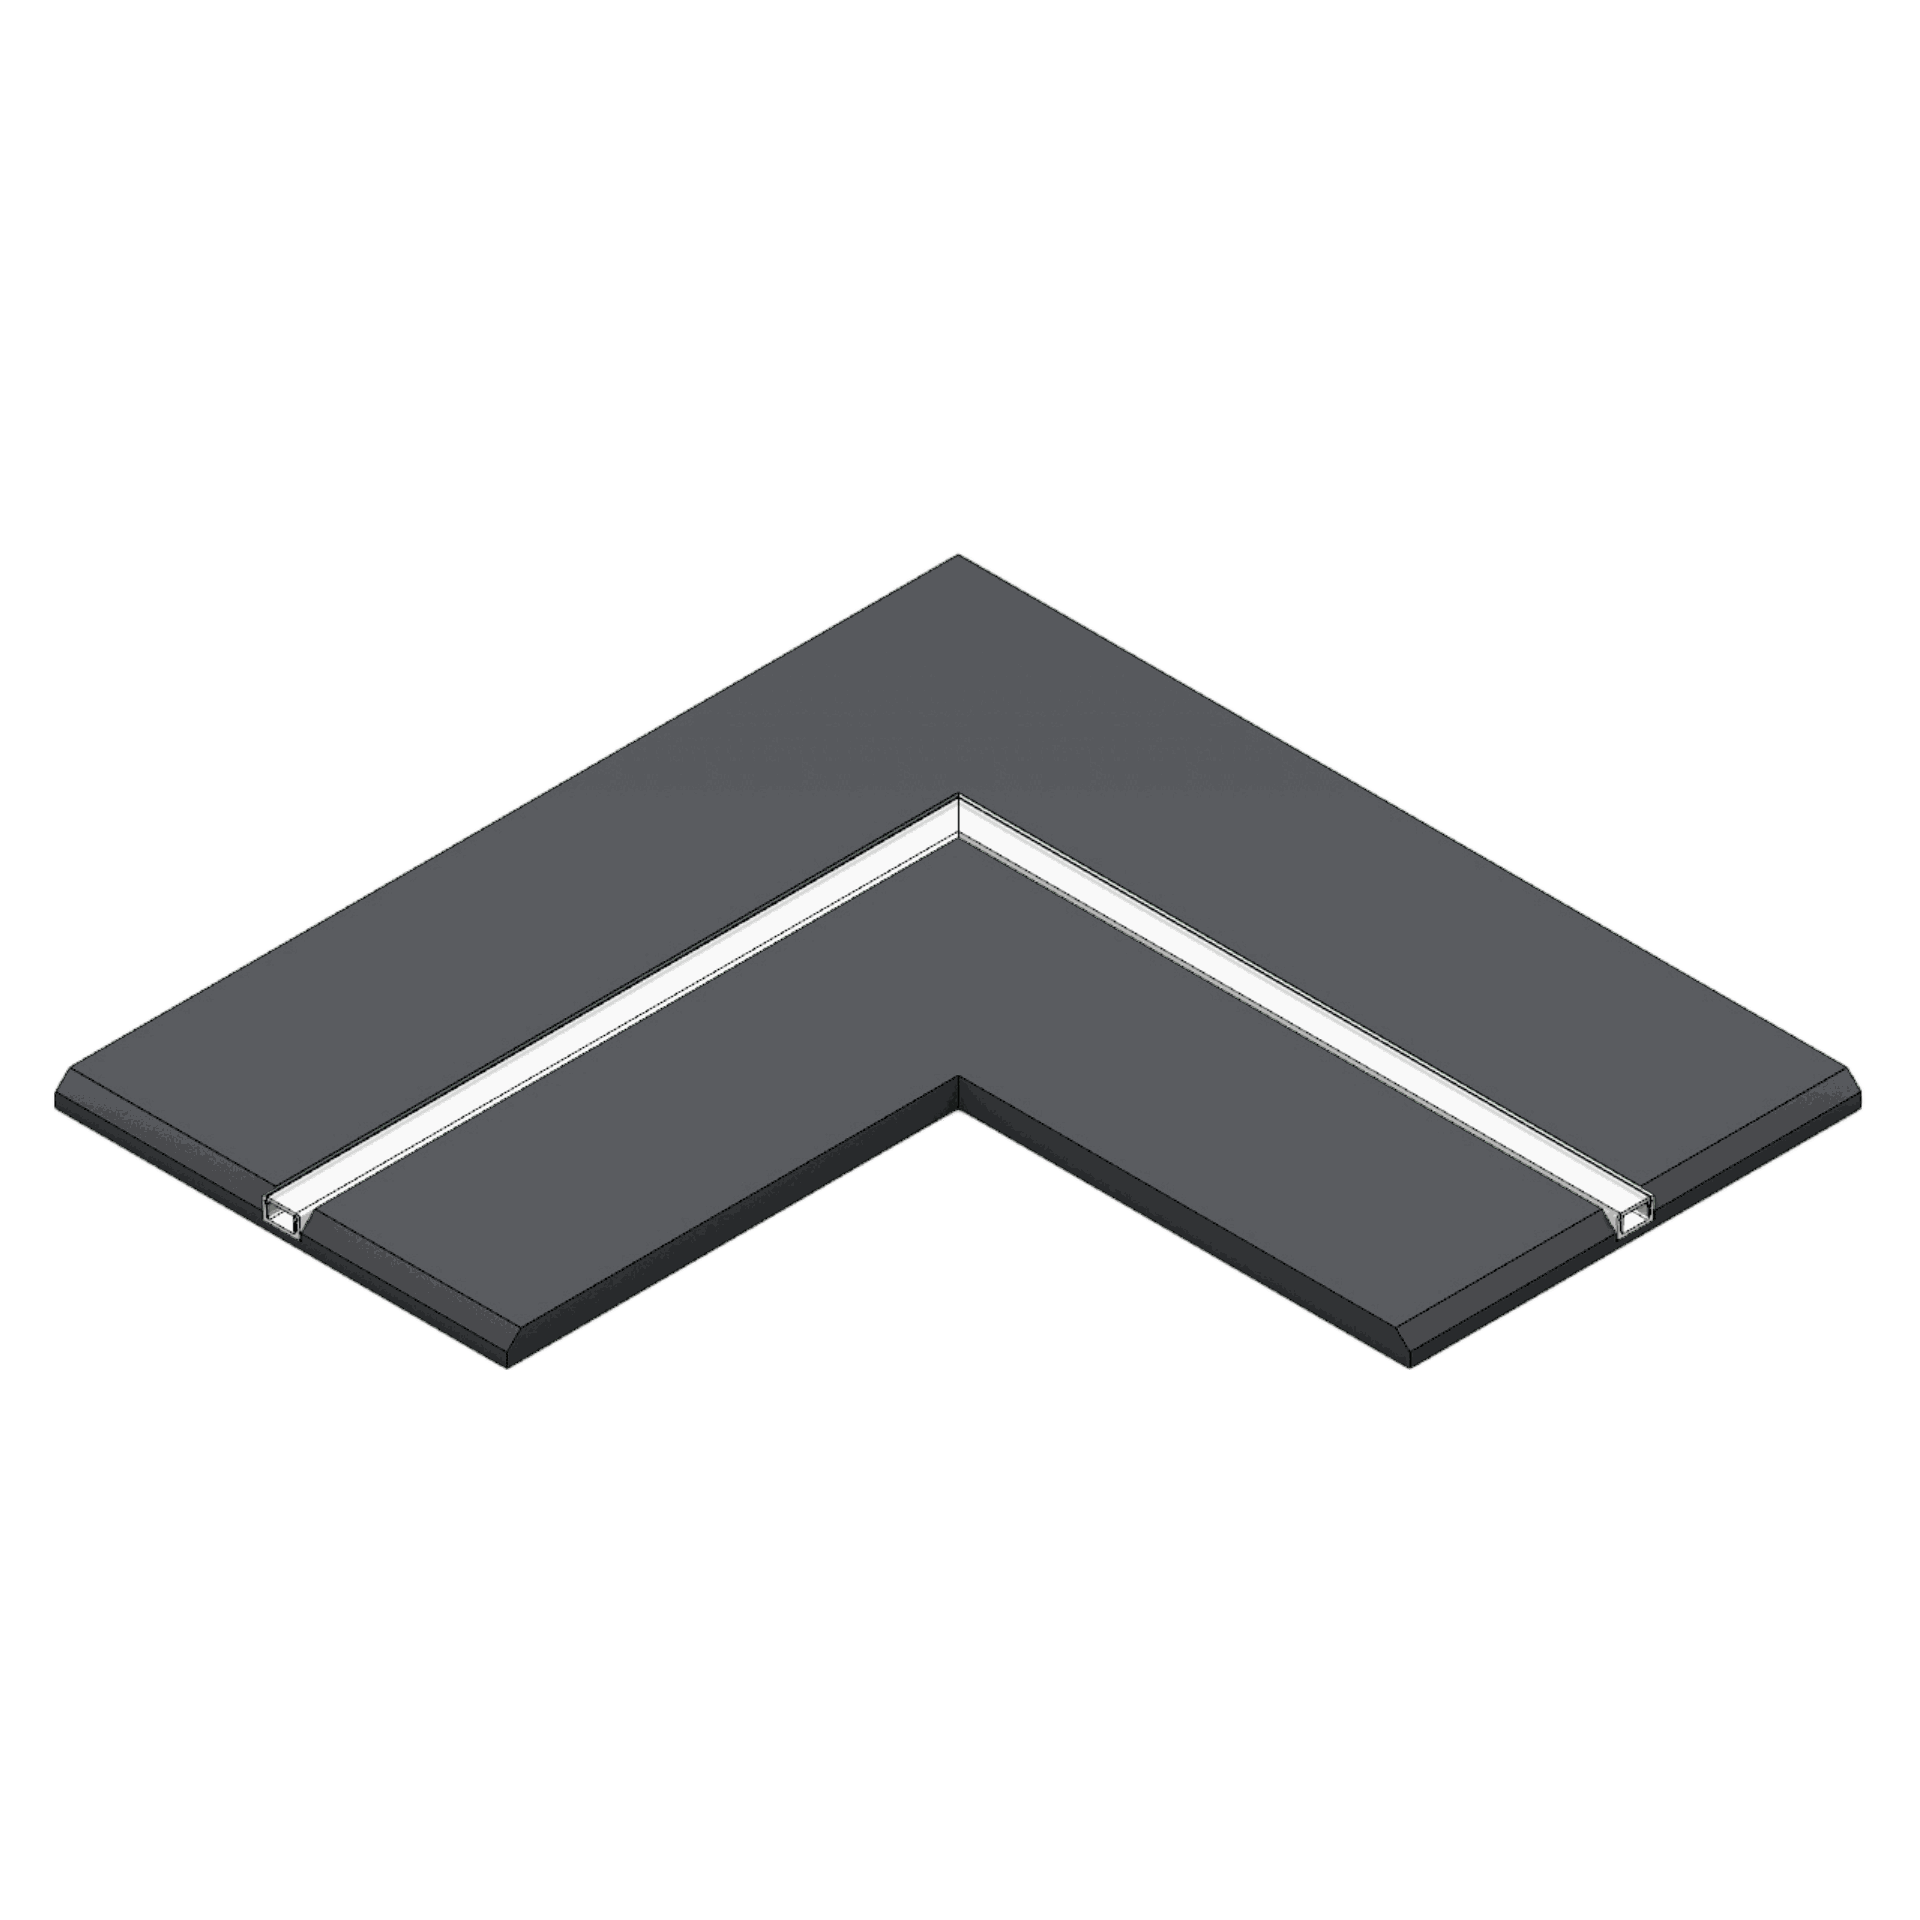
Für die beiden Ecken benötigst du 2 Eckpaneele mit einer Bahn.
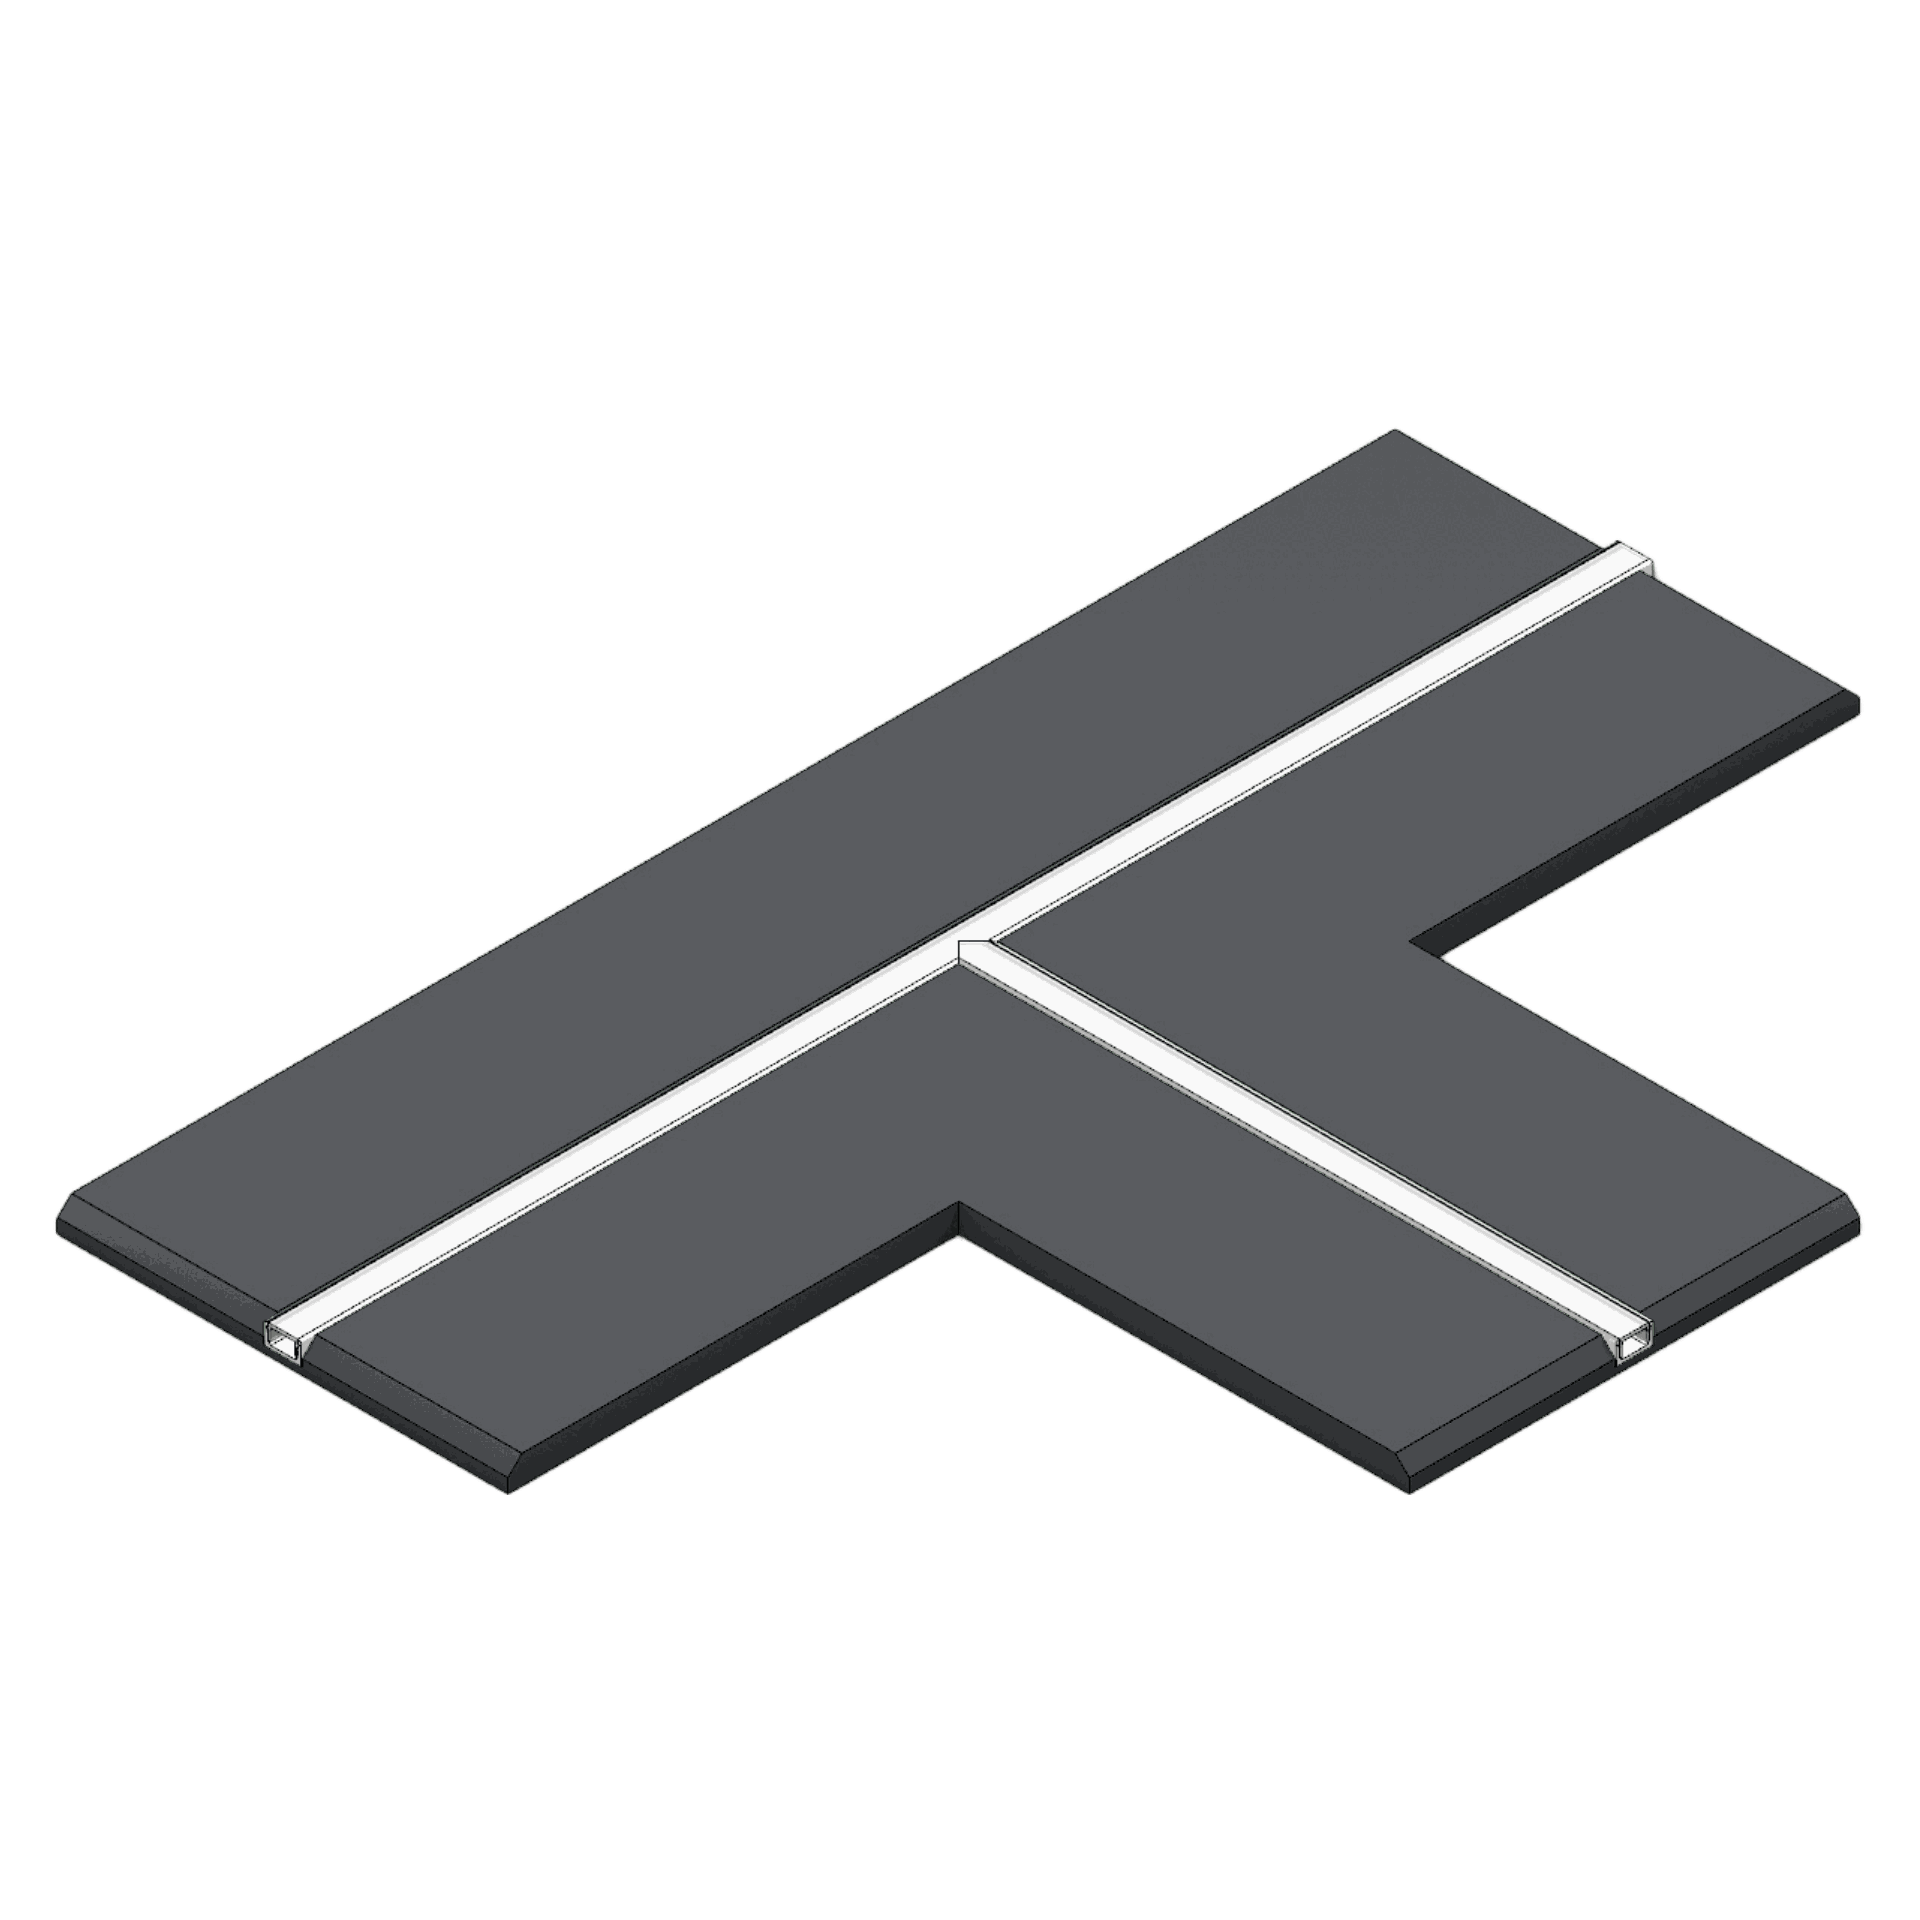
Und in der Mitte kommt ein T-Paneel zum Einsatz.
Die Ausführung
Die Paneele werden zuerst ausgerichtet und mit der Unterkonstruktion verschraubt. Die entstehenden Zwischenräume verschleißt man mit handelsüblichen Gipsplatten in 12,5 mm Stärke.
Für den elektrischen Anschluss sind kleine Bohrungen für die Kabel in die Profile einzubringen. In diese werden vor dem Schließen der Zwischenräume die Anschlusskabel für die LED-Lichtbänder verlegt.
Vor dem Spachteln, Schleifen und Streichen werden die Aluminiumprofile mit den mitgelieferten Mal- und Abdeckgummis verschlossen. Schon kann mit dem Finish begonnen werden.
Nach der Installation der LED-Lichtbänder werden die Profile mit passenden Diffusoren (Abdeckungen) in einer der drei Farbvarianten verschlossen.
Aufgrund der geringen Tiefe der Aluminiumprofile empfehlen wir den Einsatz des opalen Diffusors sowie ein LED-Lichtband mit einer hohen LED-Dichte von 140 LEDs pro Meter oder mehr.
Tipp
Zur Vermeidung von unbeleuchteten Ecken sollten die LED ein Segment länger als die Strecke ausgeführt sein. Der Überstand im LED-Lichtband lässt sich dann durch Bohrungen in den Profilecken auf die Konstruktion leiten. So strahlt das Licht bis in die Ecken.
Verfügbare Formen
Gerades Profil | 1
Gerades Profil | 2
Gerades Profil | 3
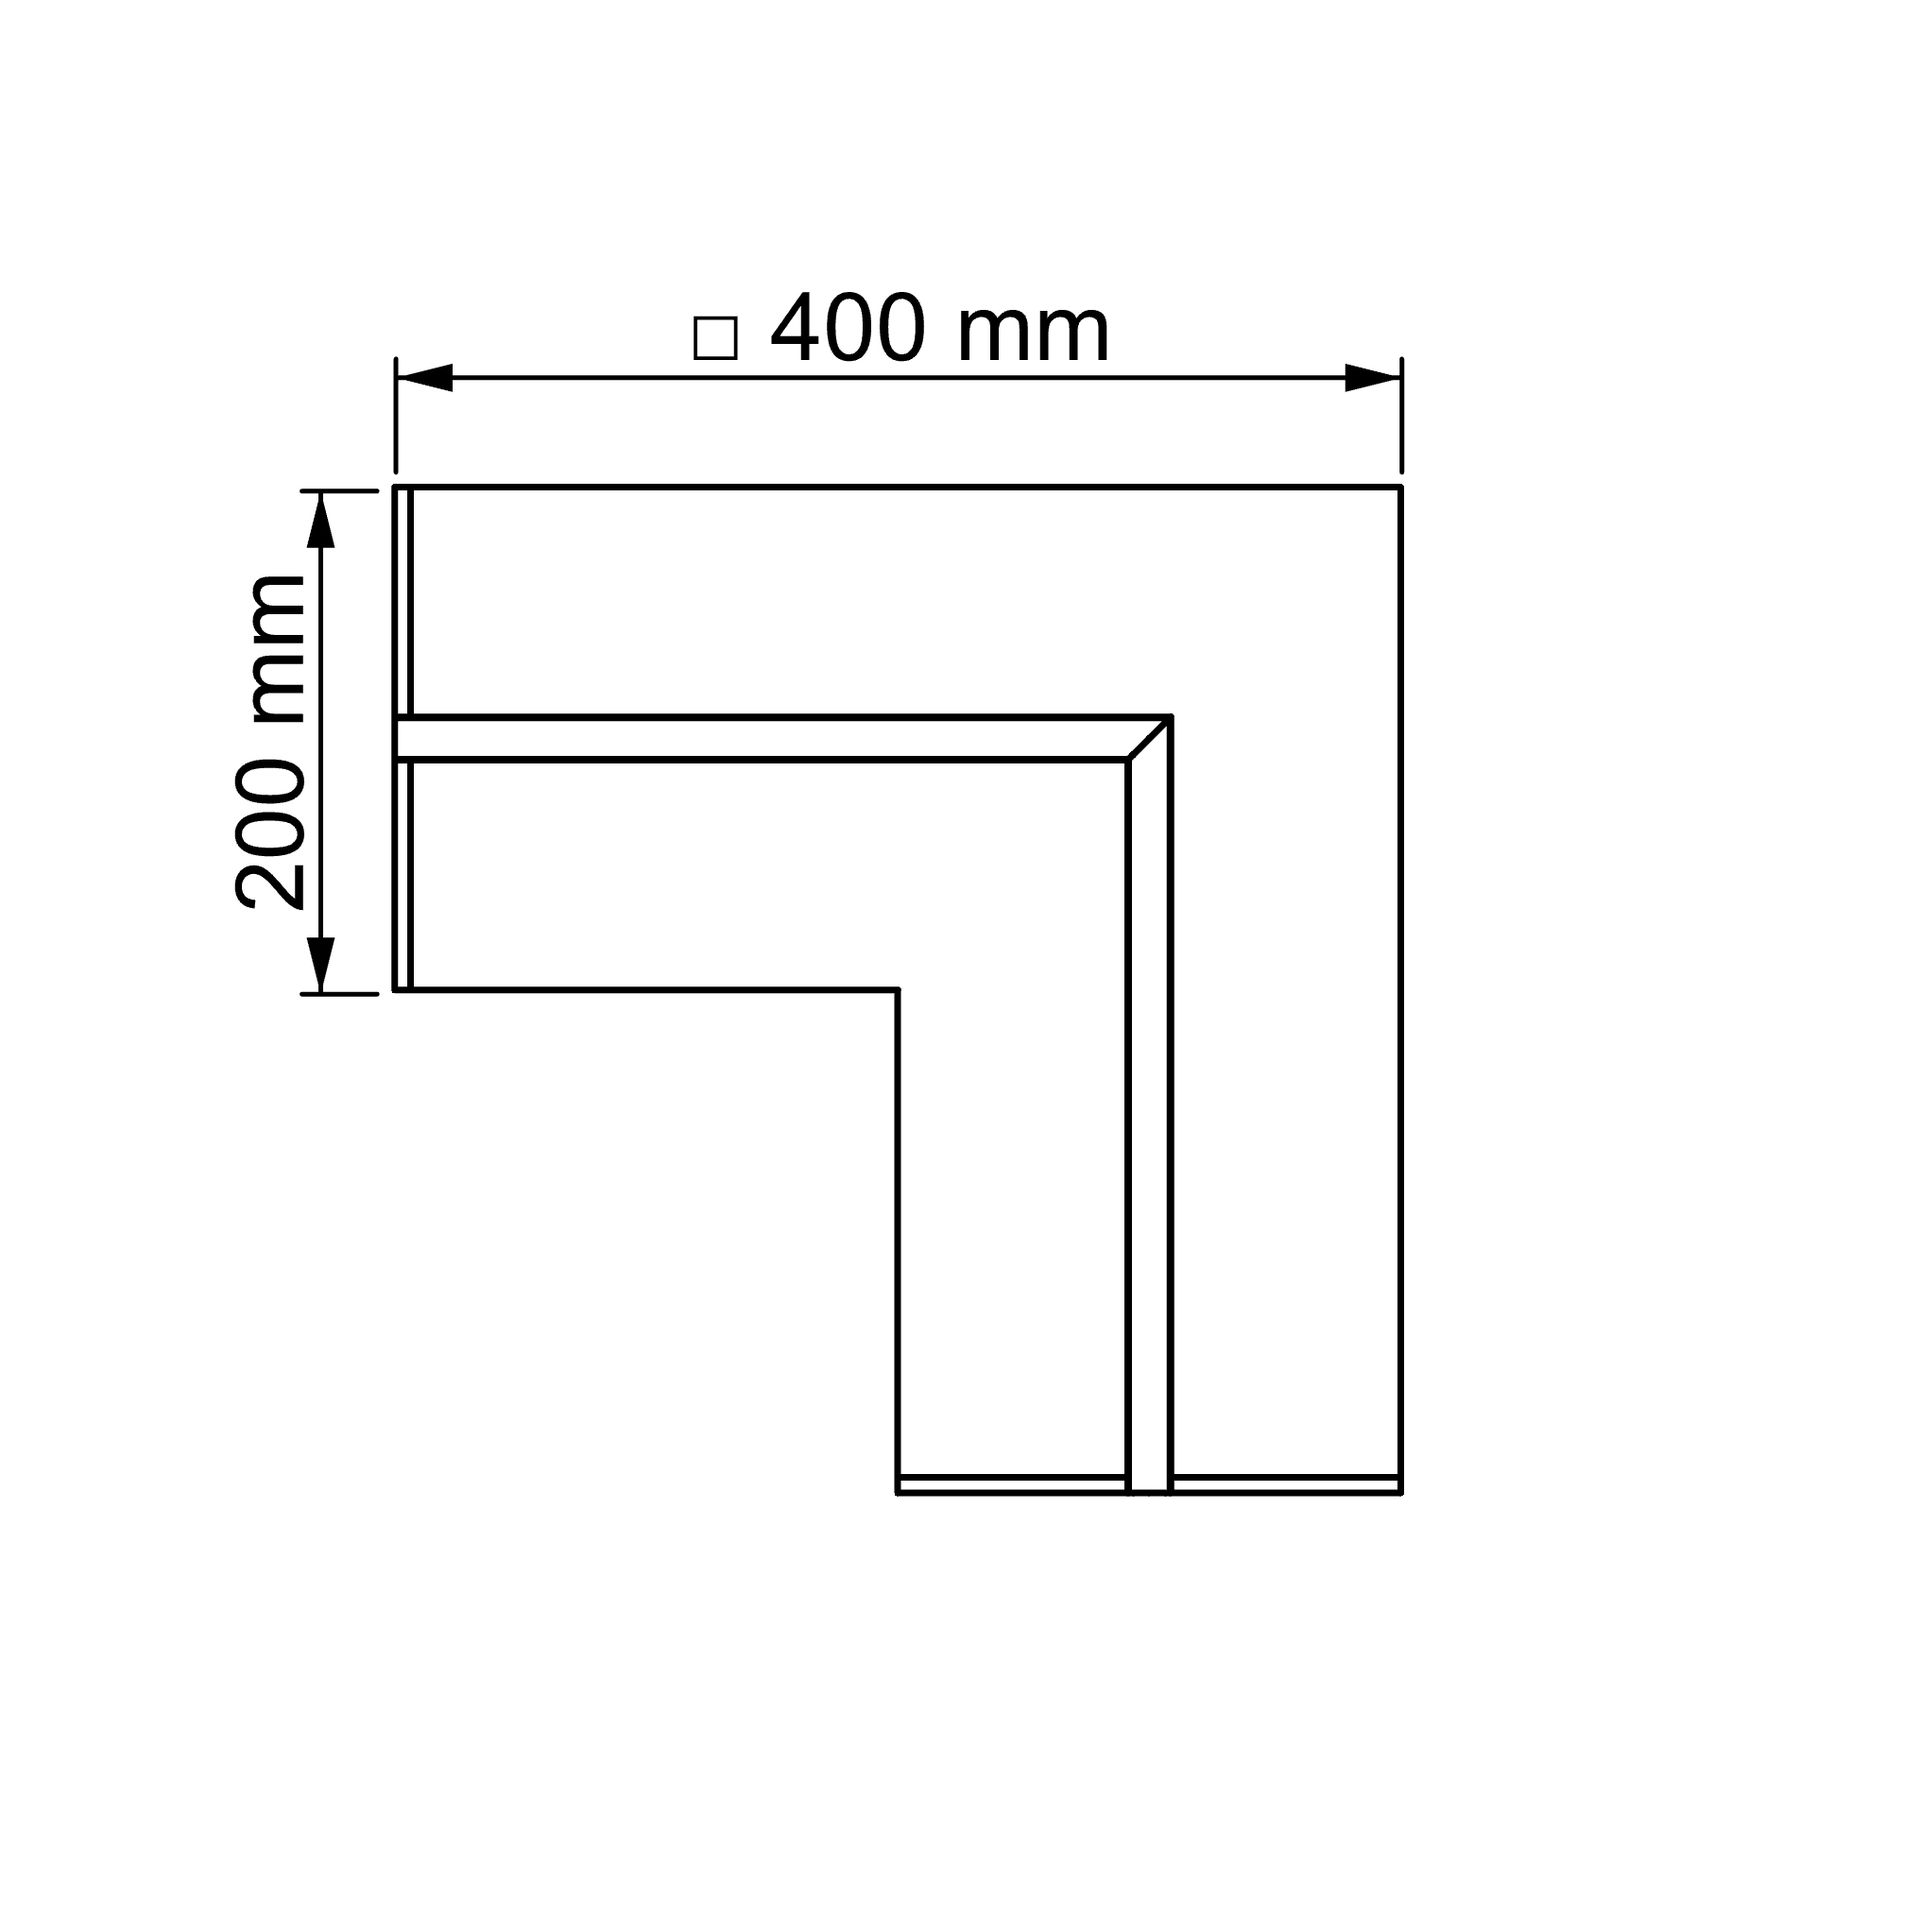
Ecke | 1
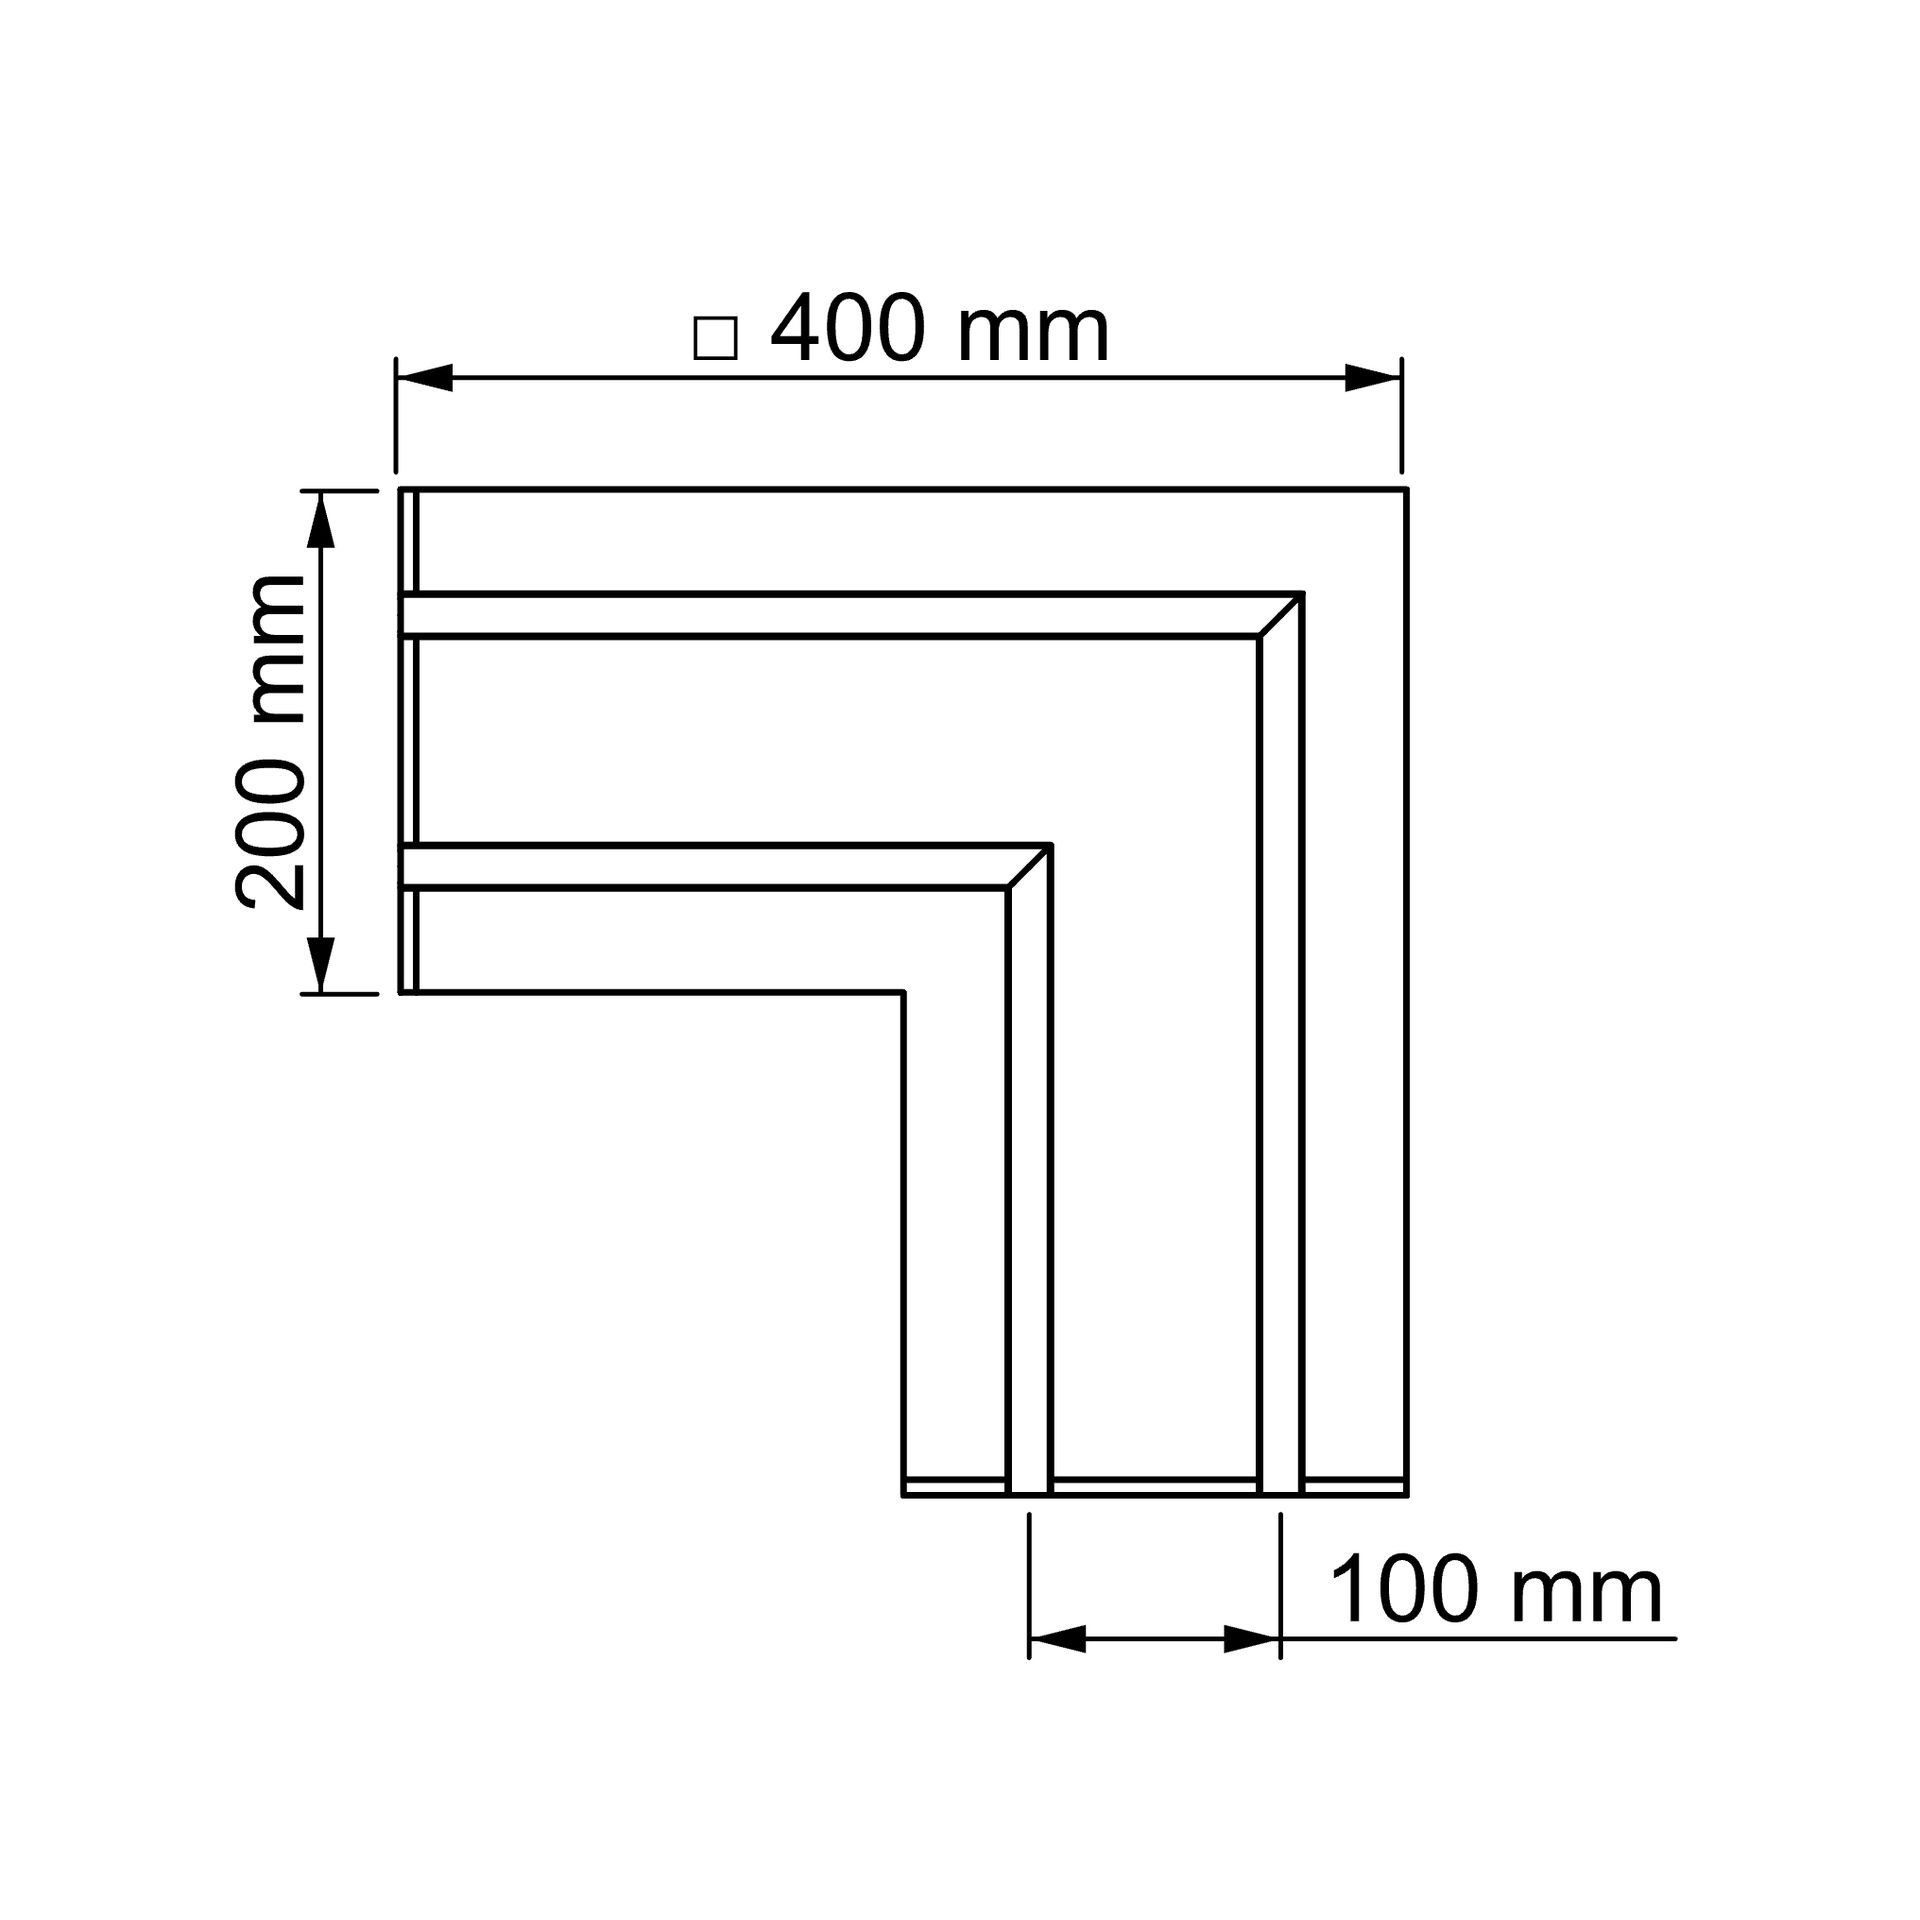
Ecke | 2
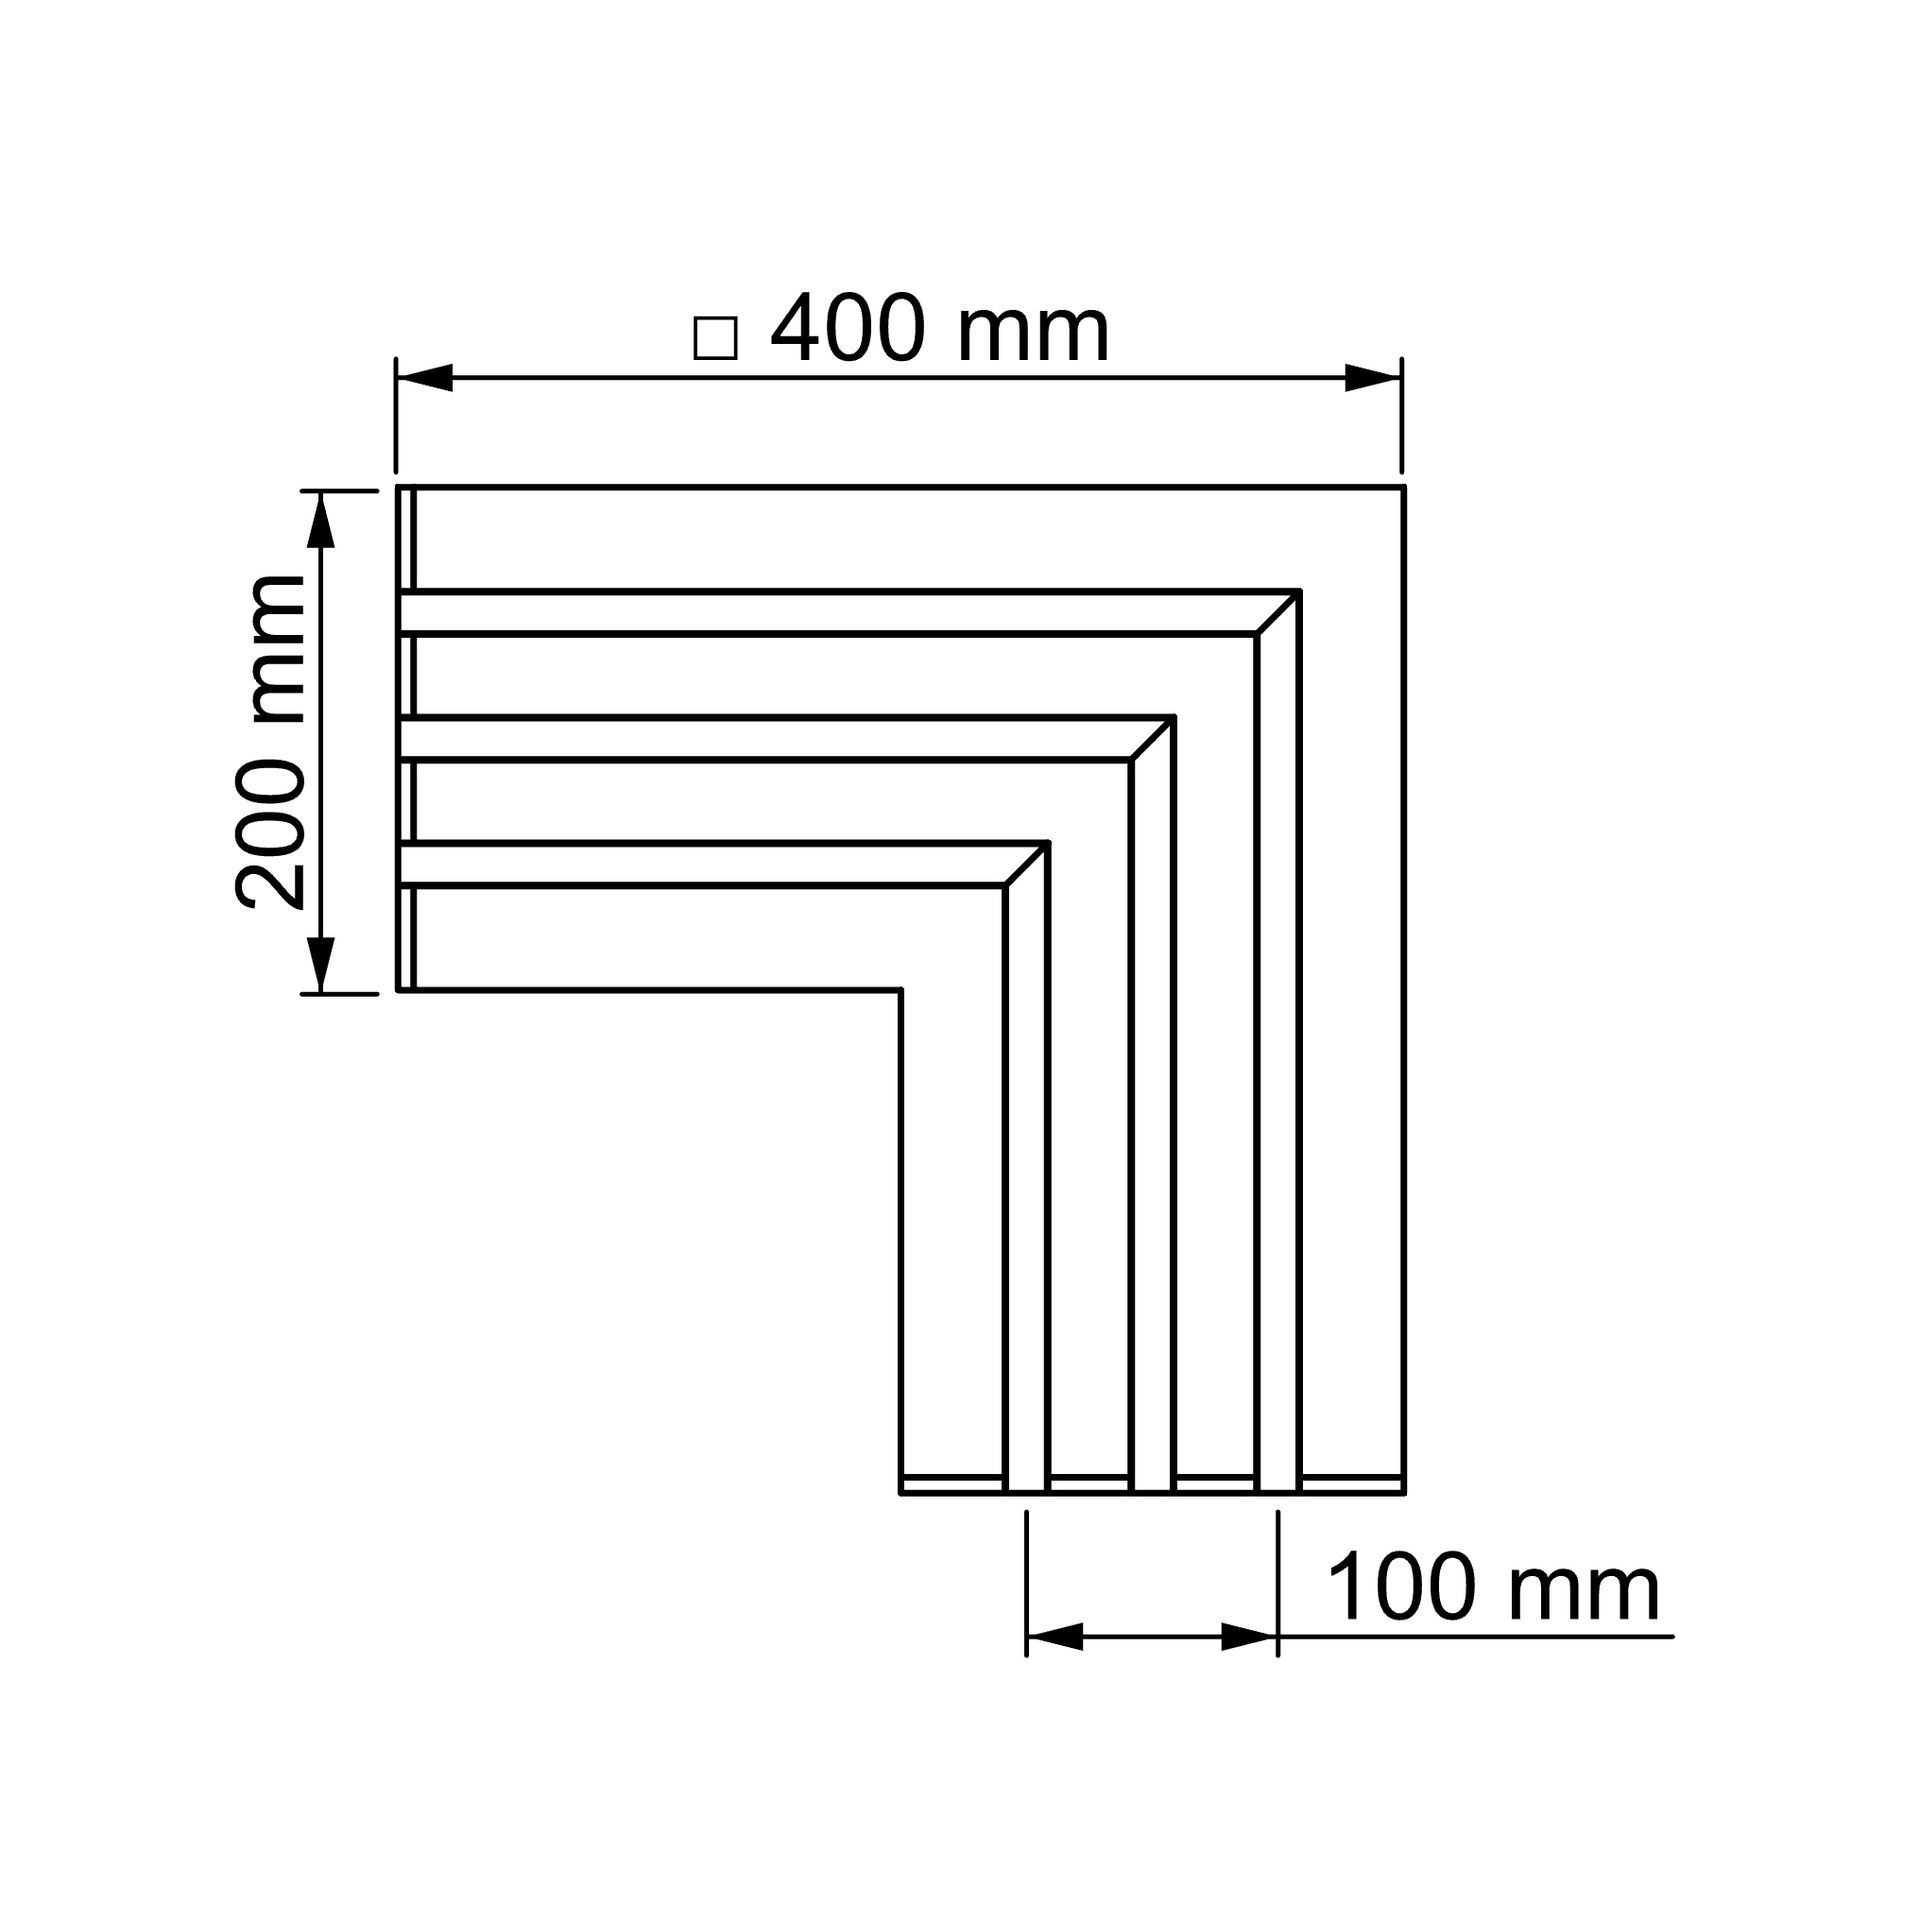
Ecke | 3
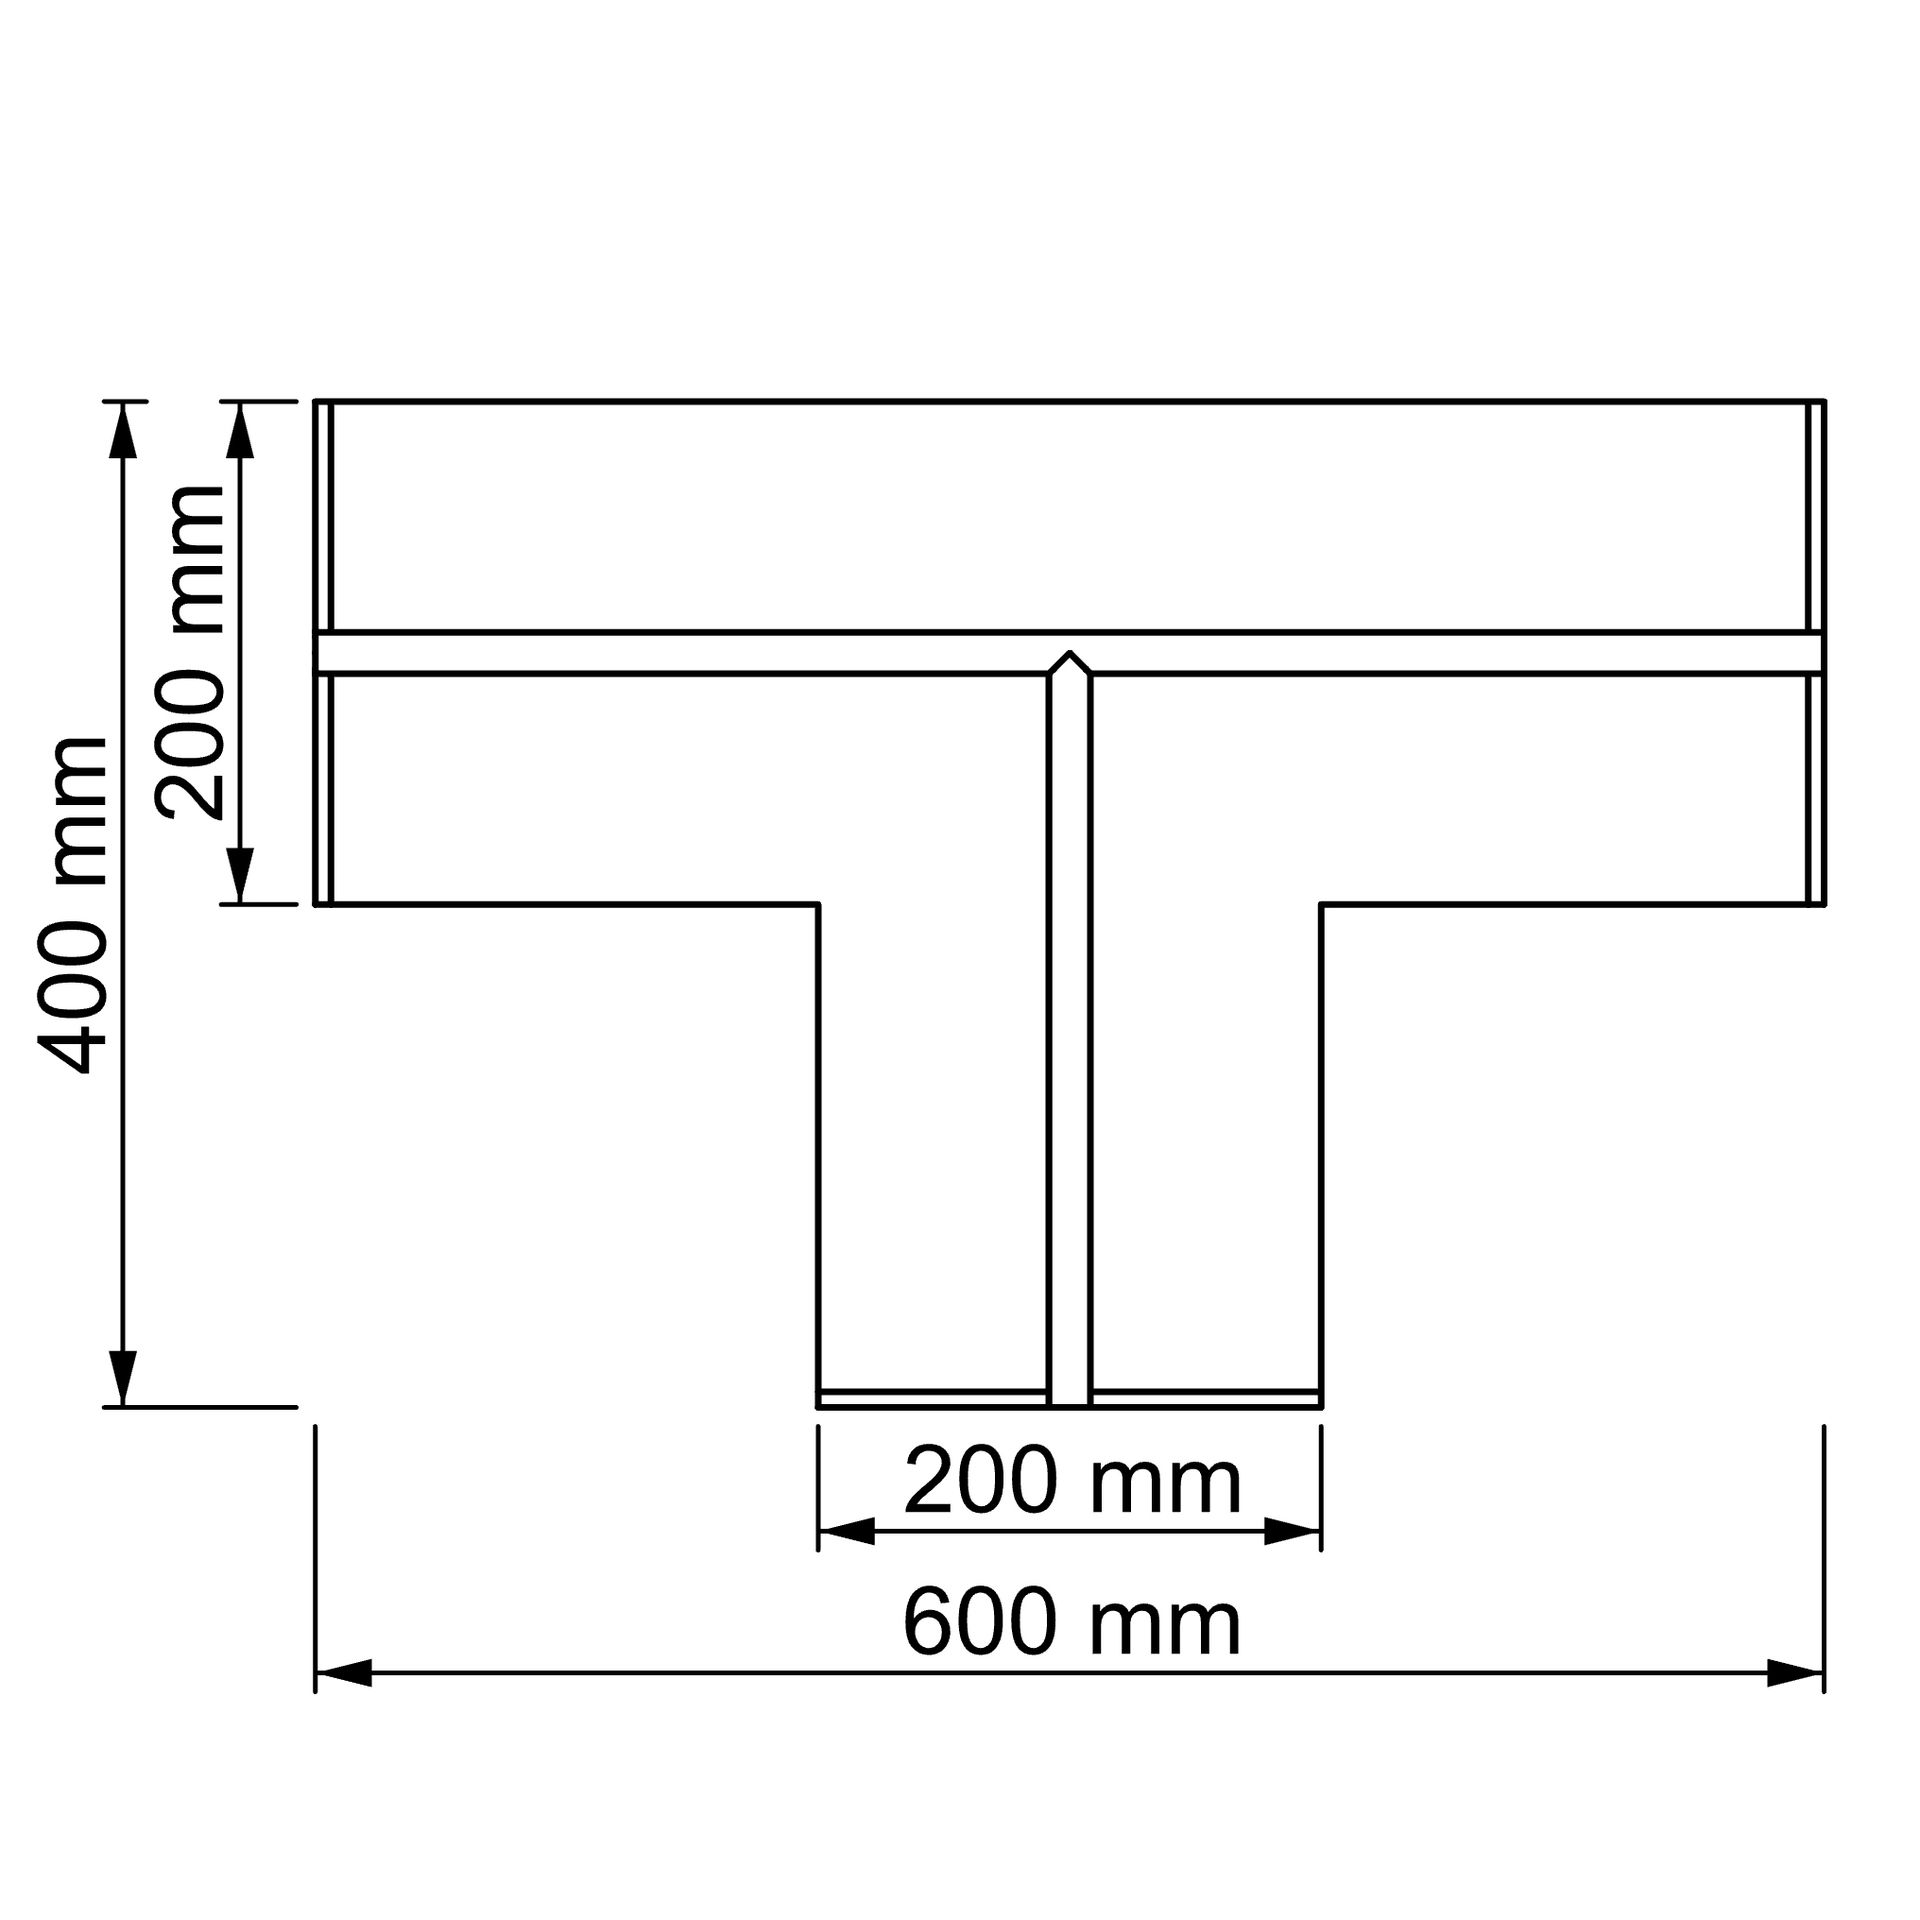
T-Element | 1
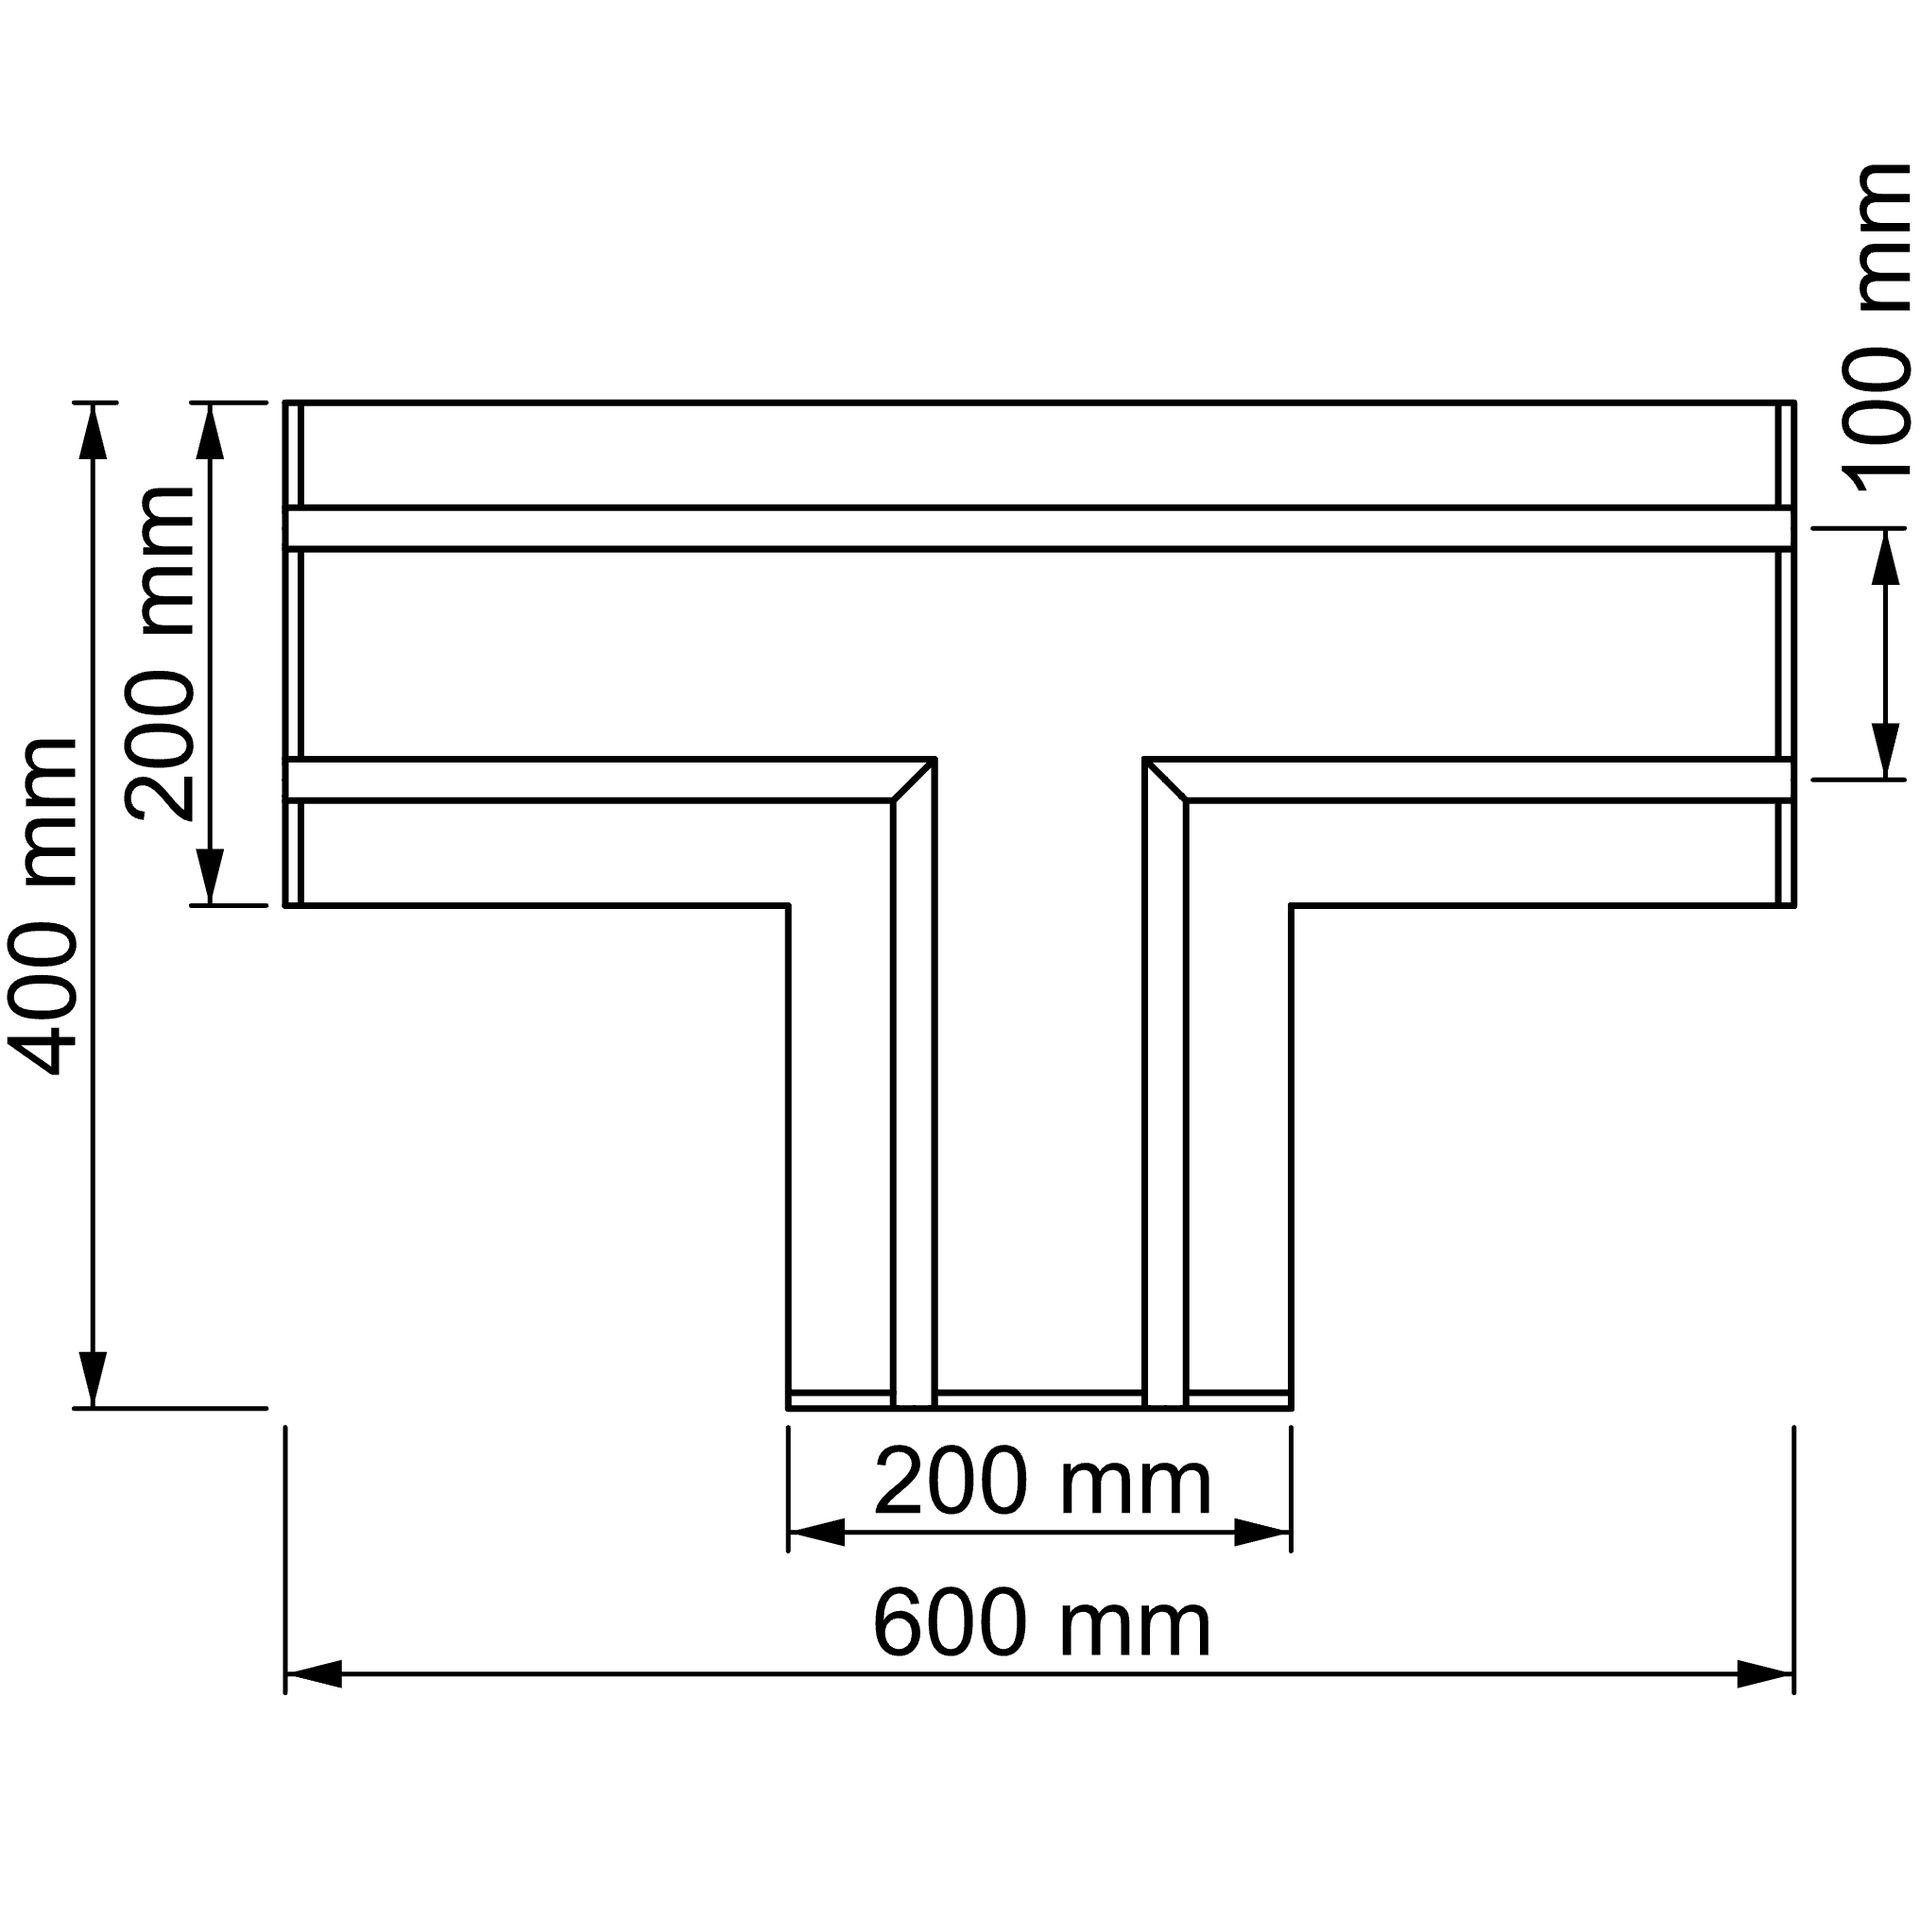
T-Element | 2
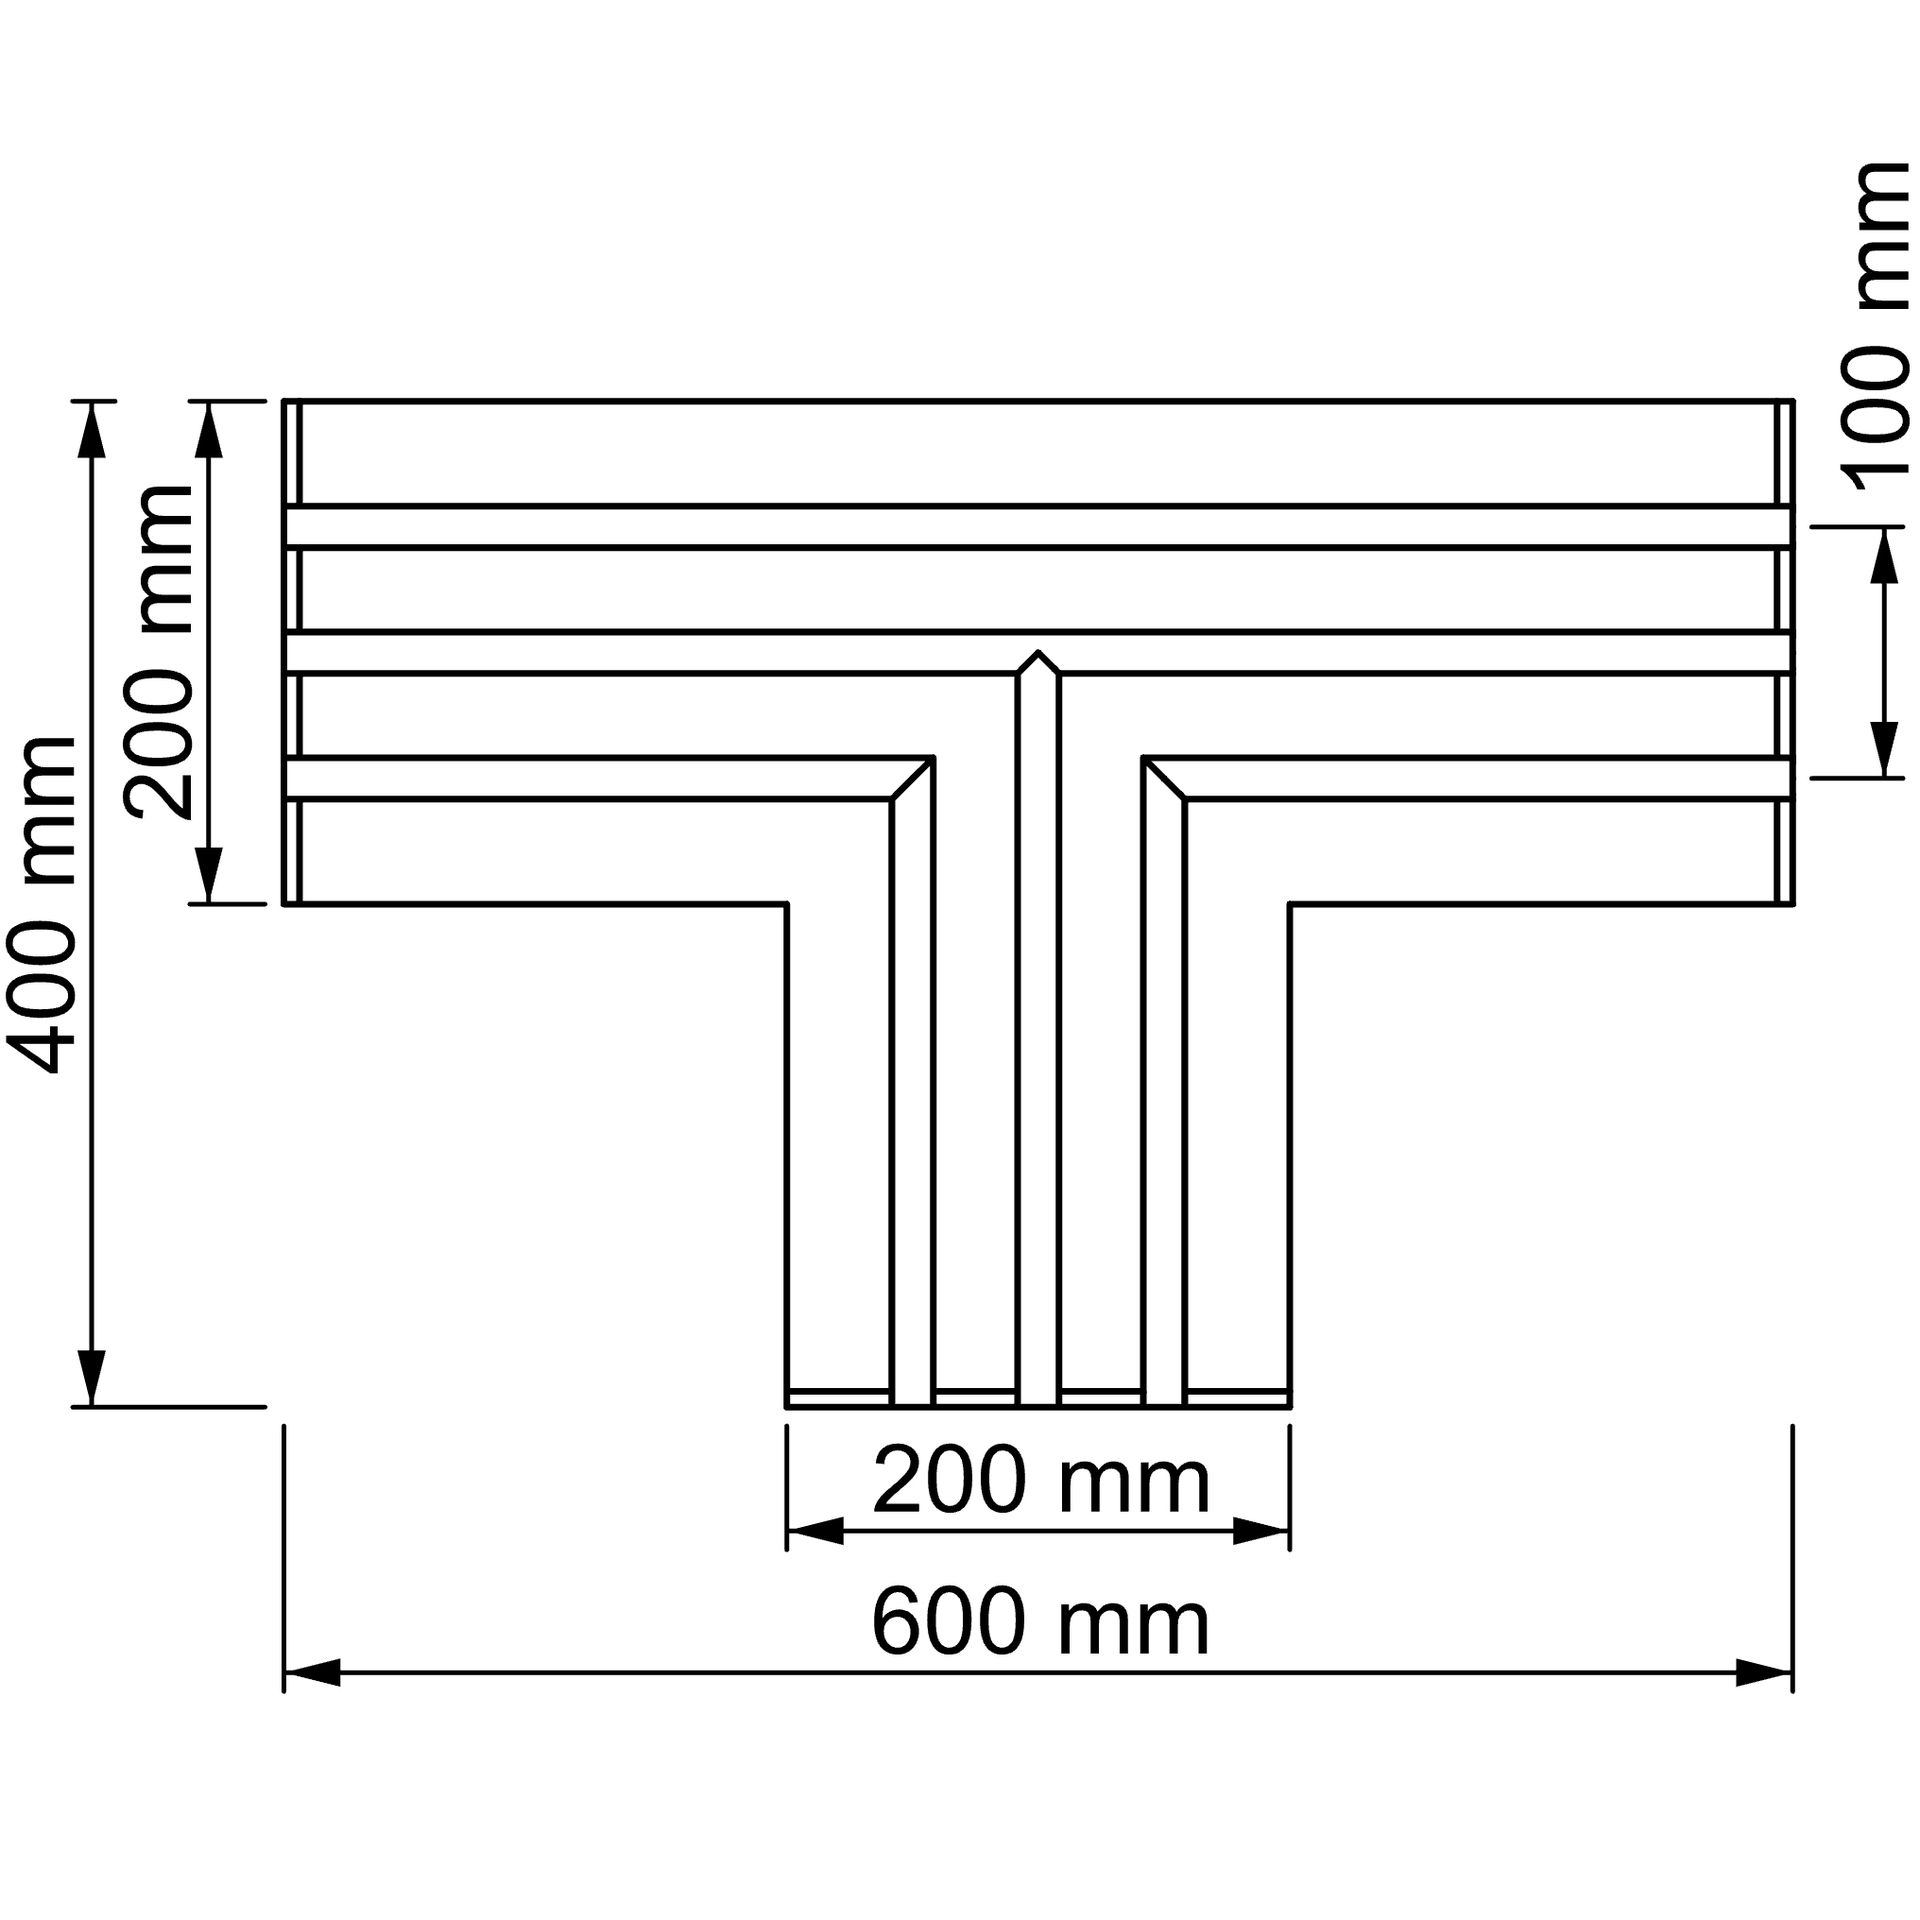
T-Element | 3
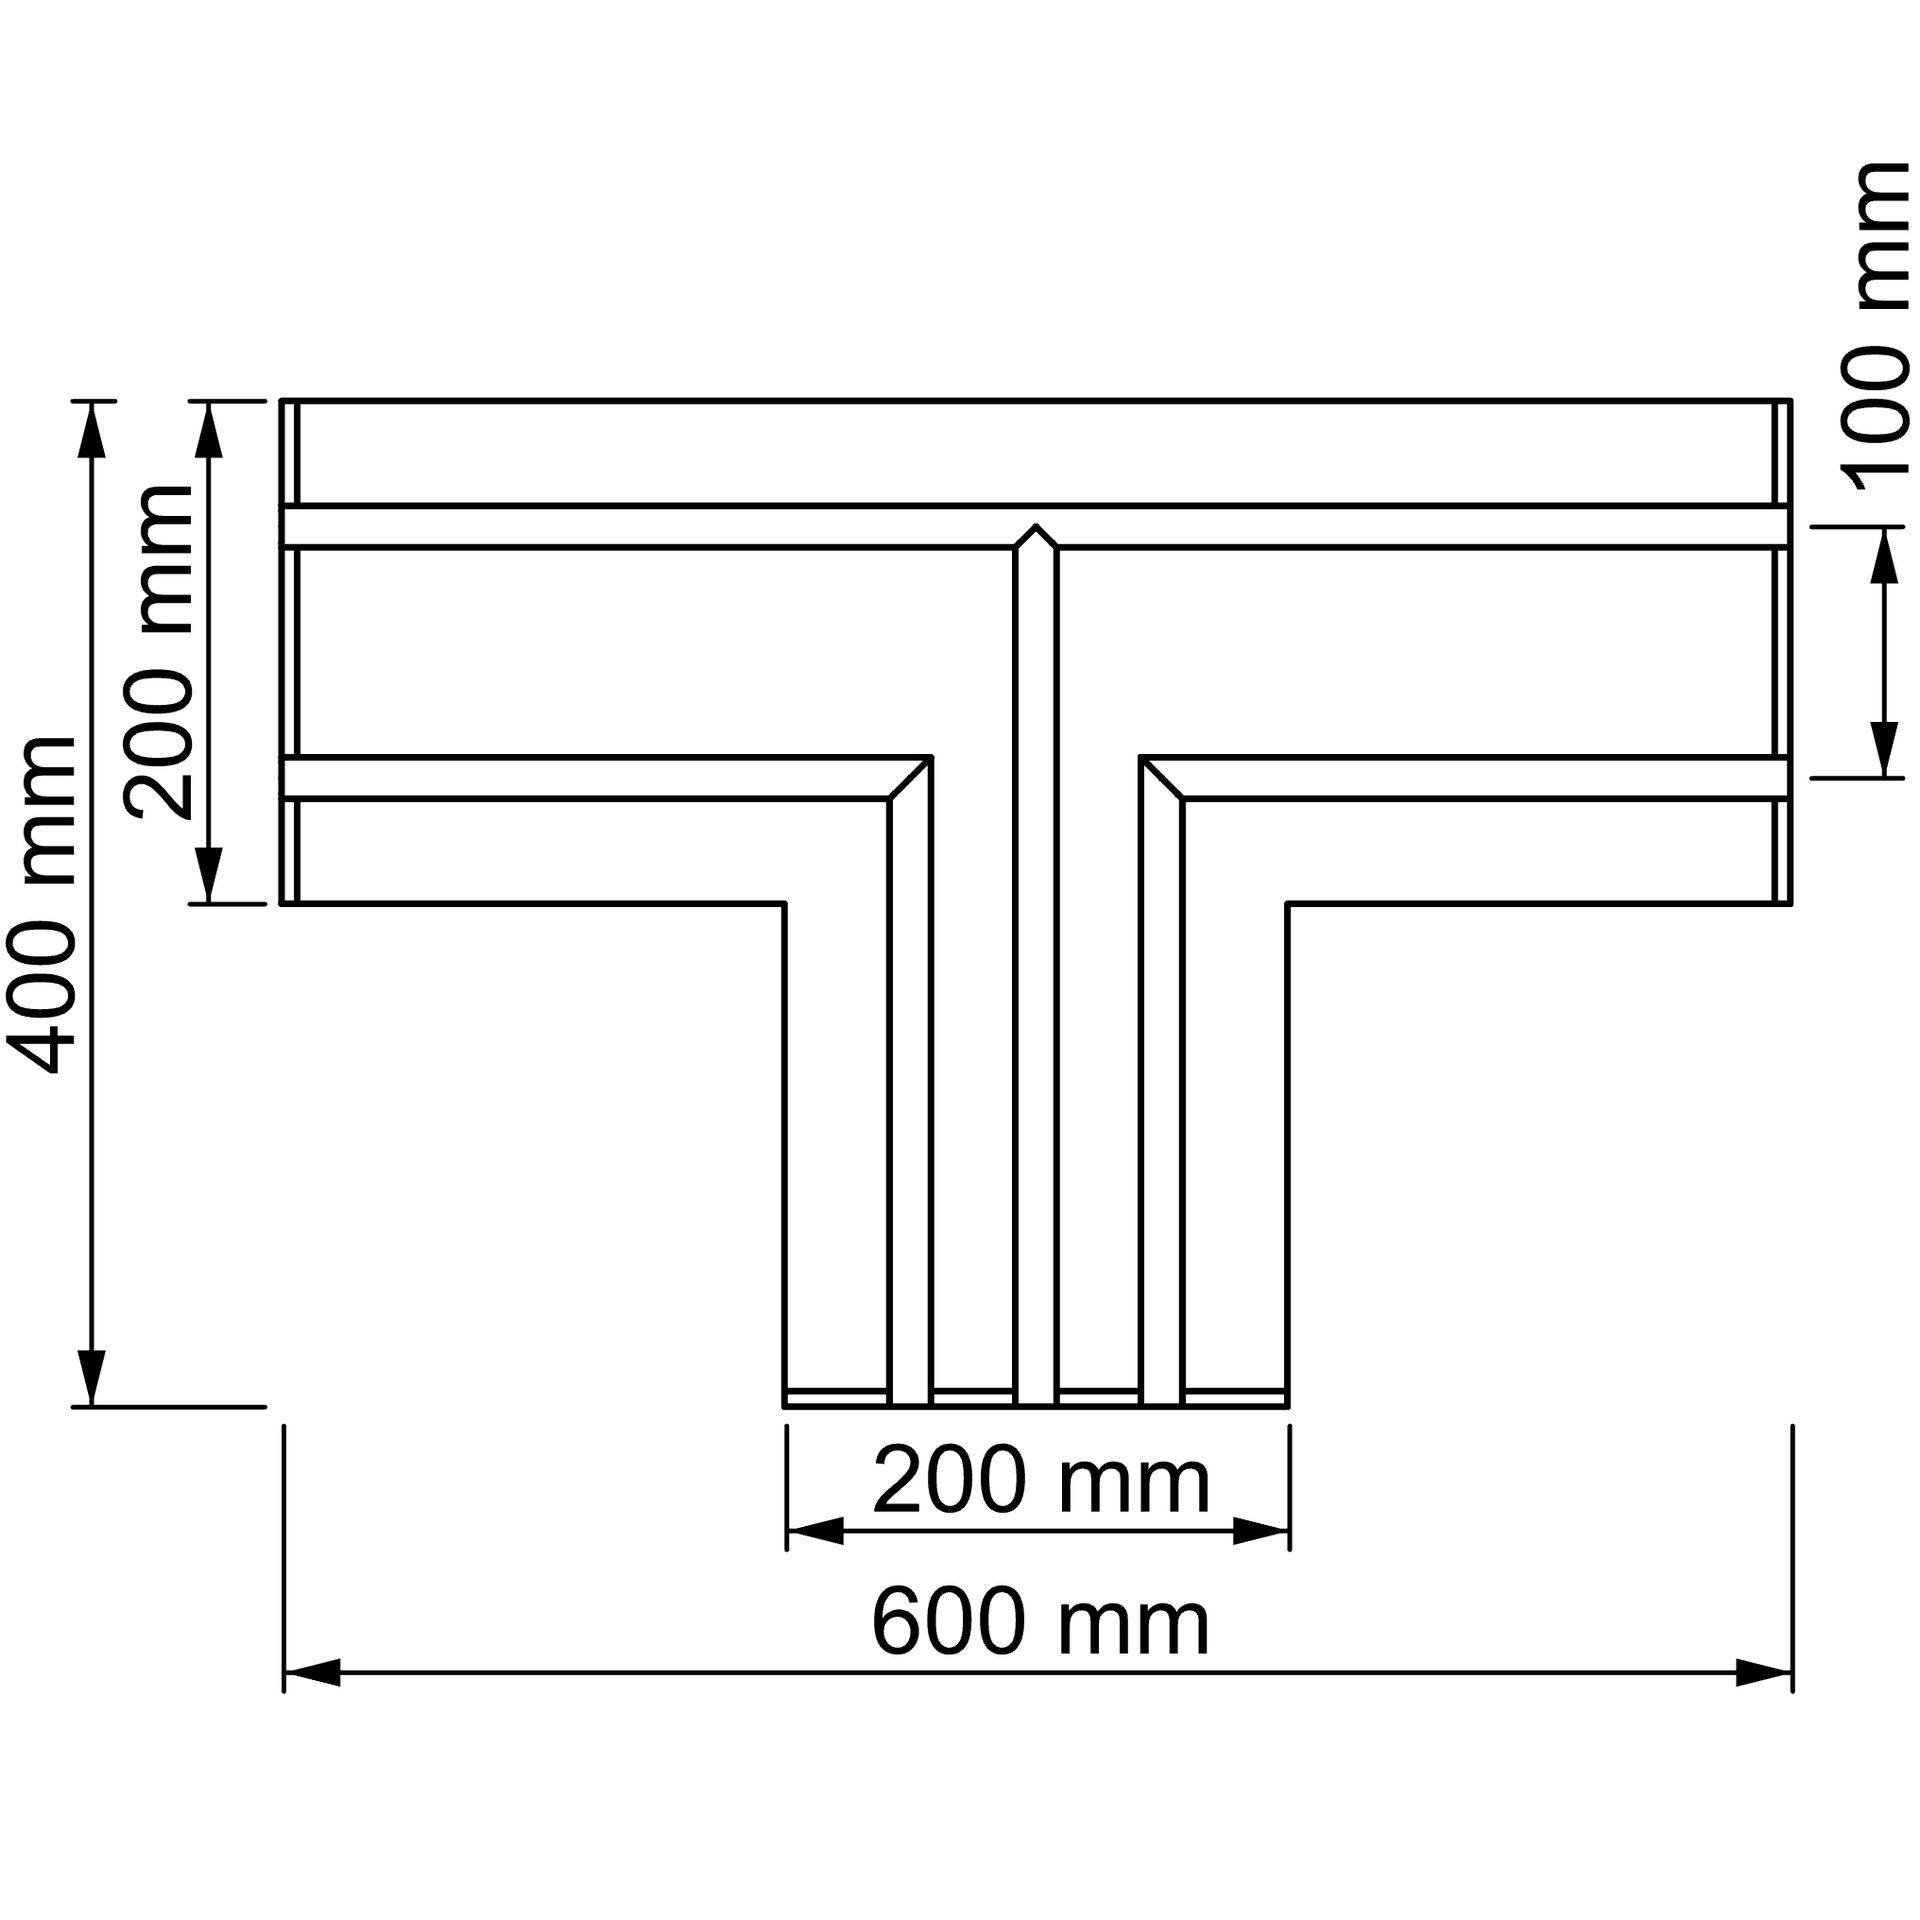
T-Element | 2-3
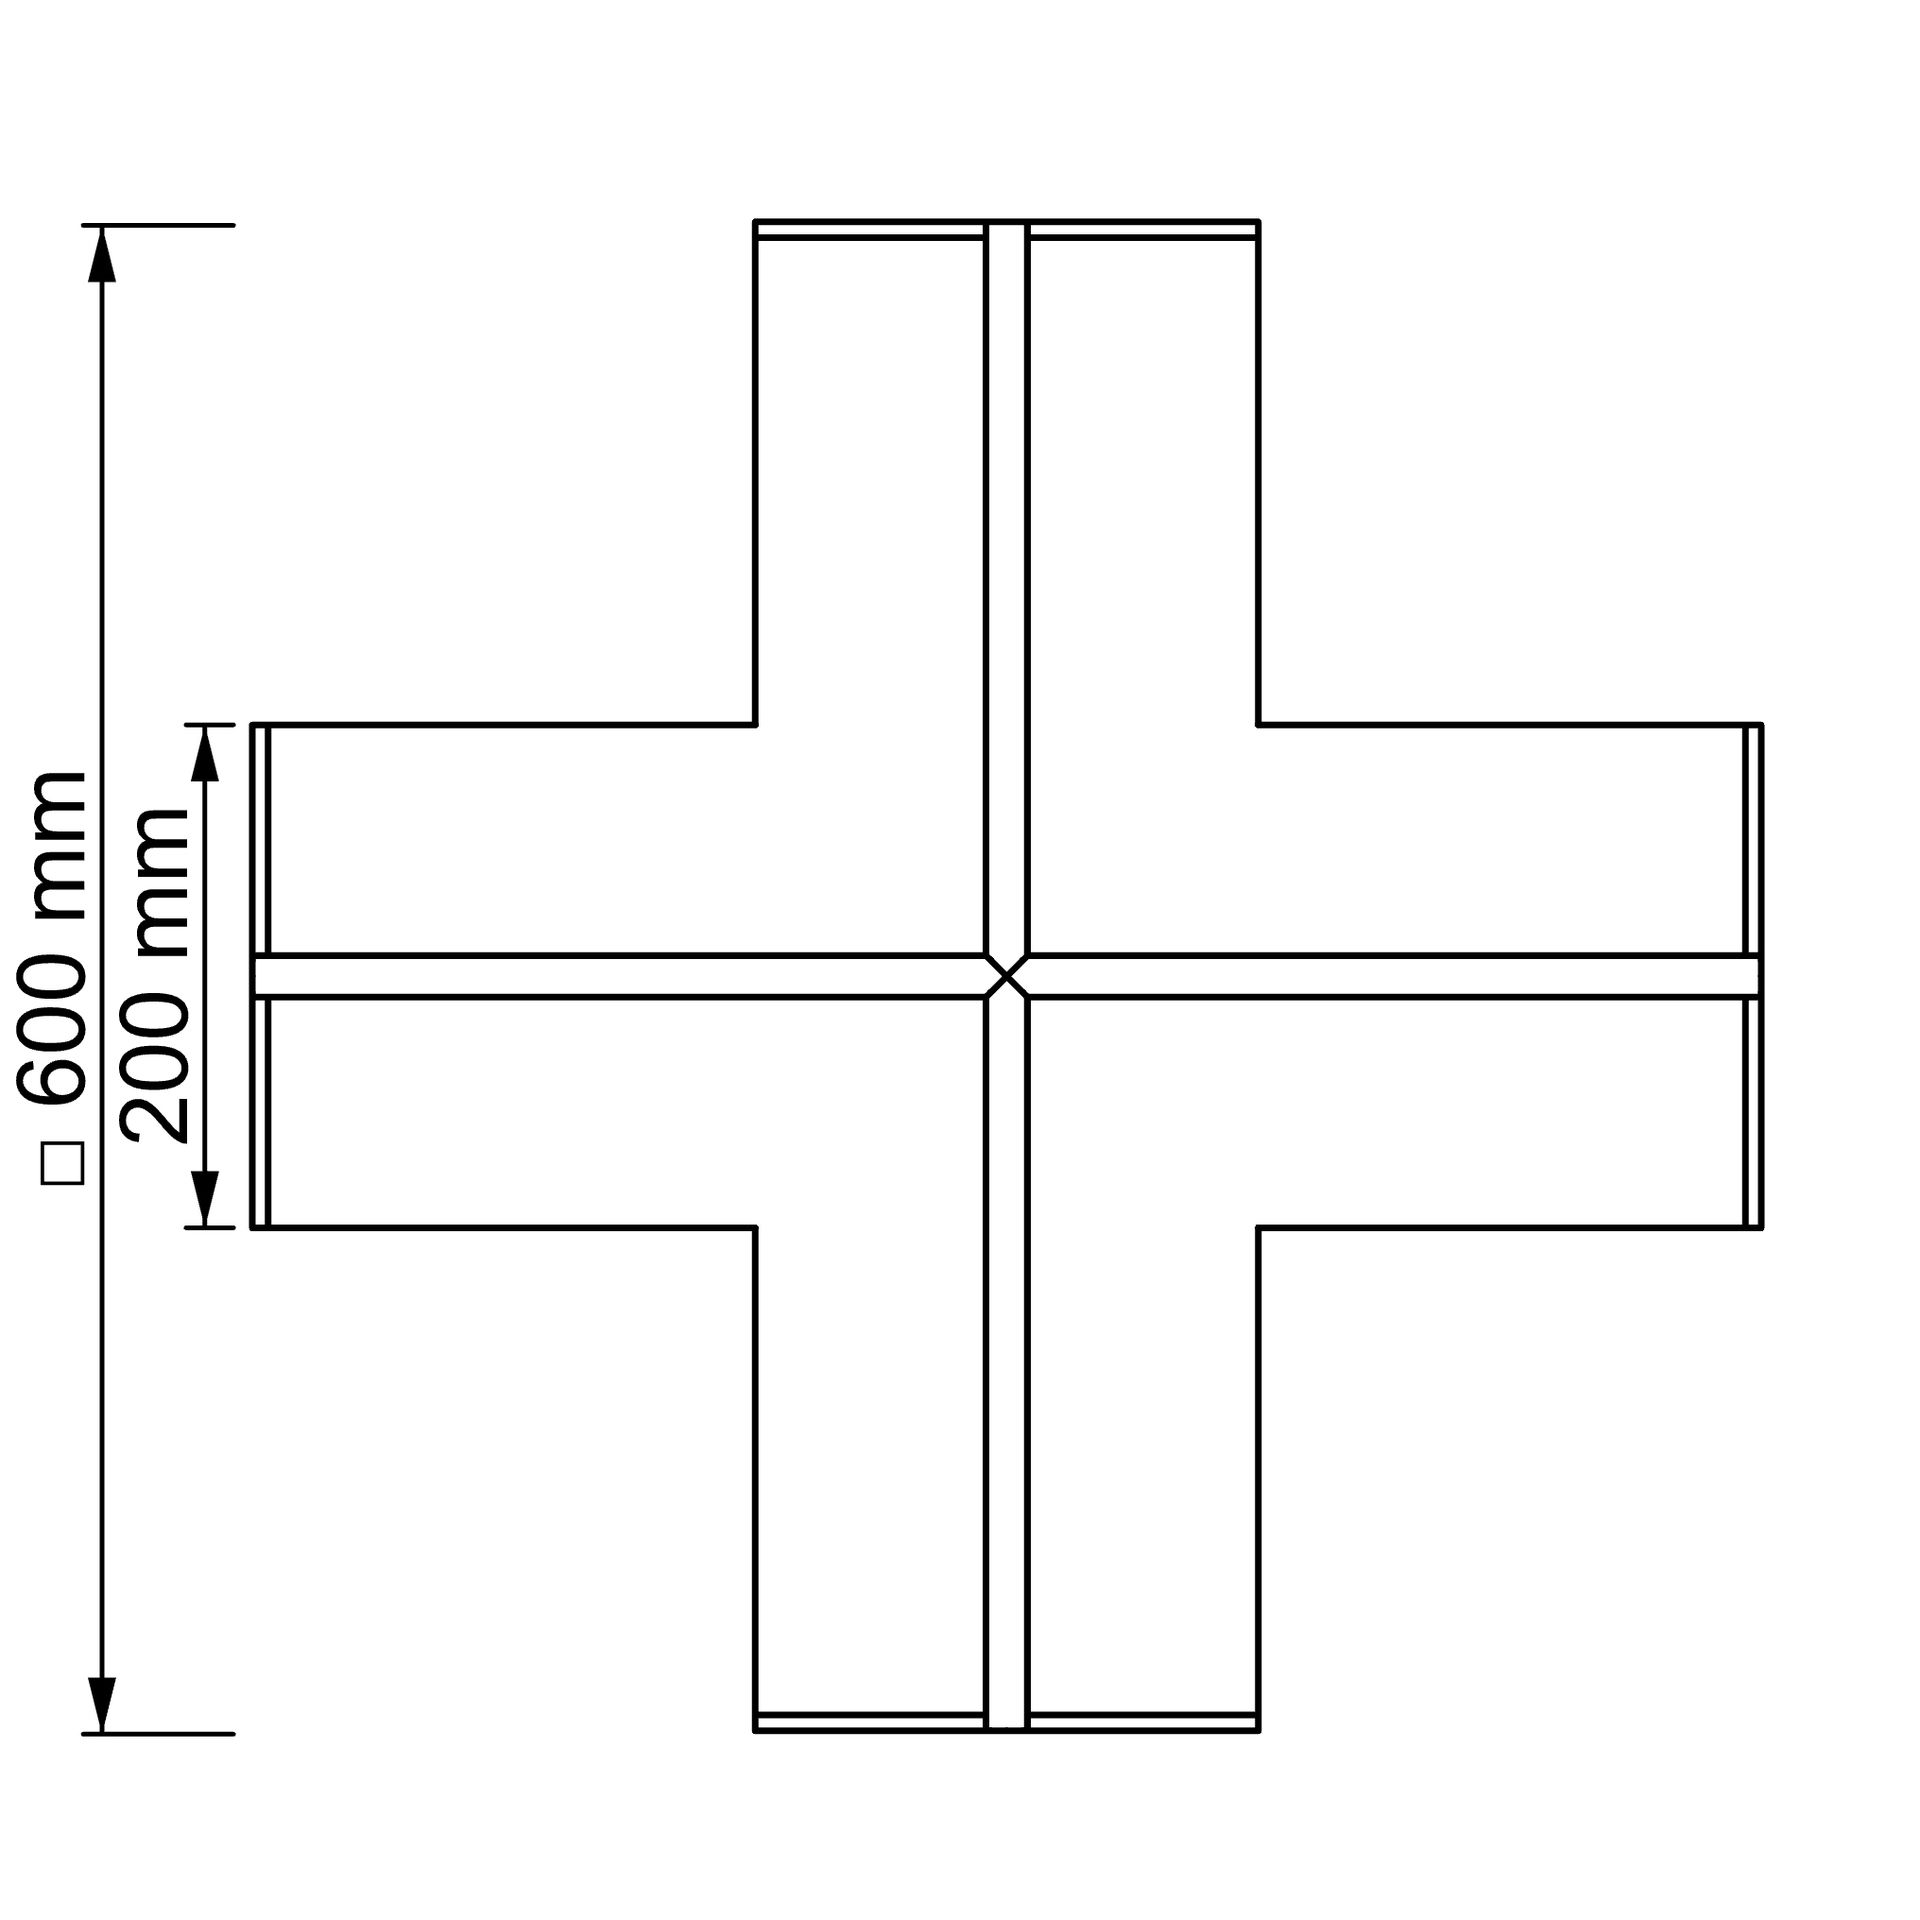
Kreuz | 1
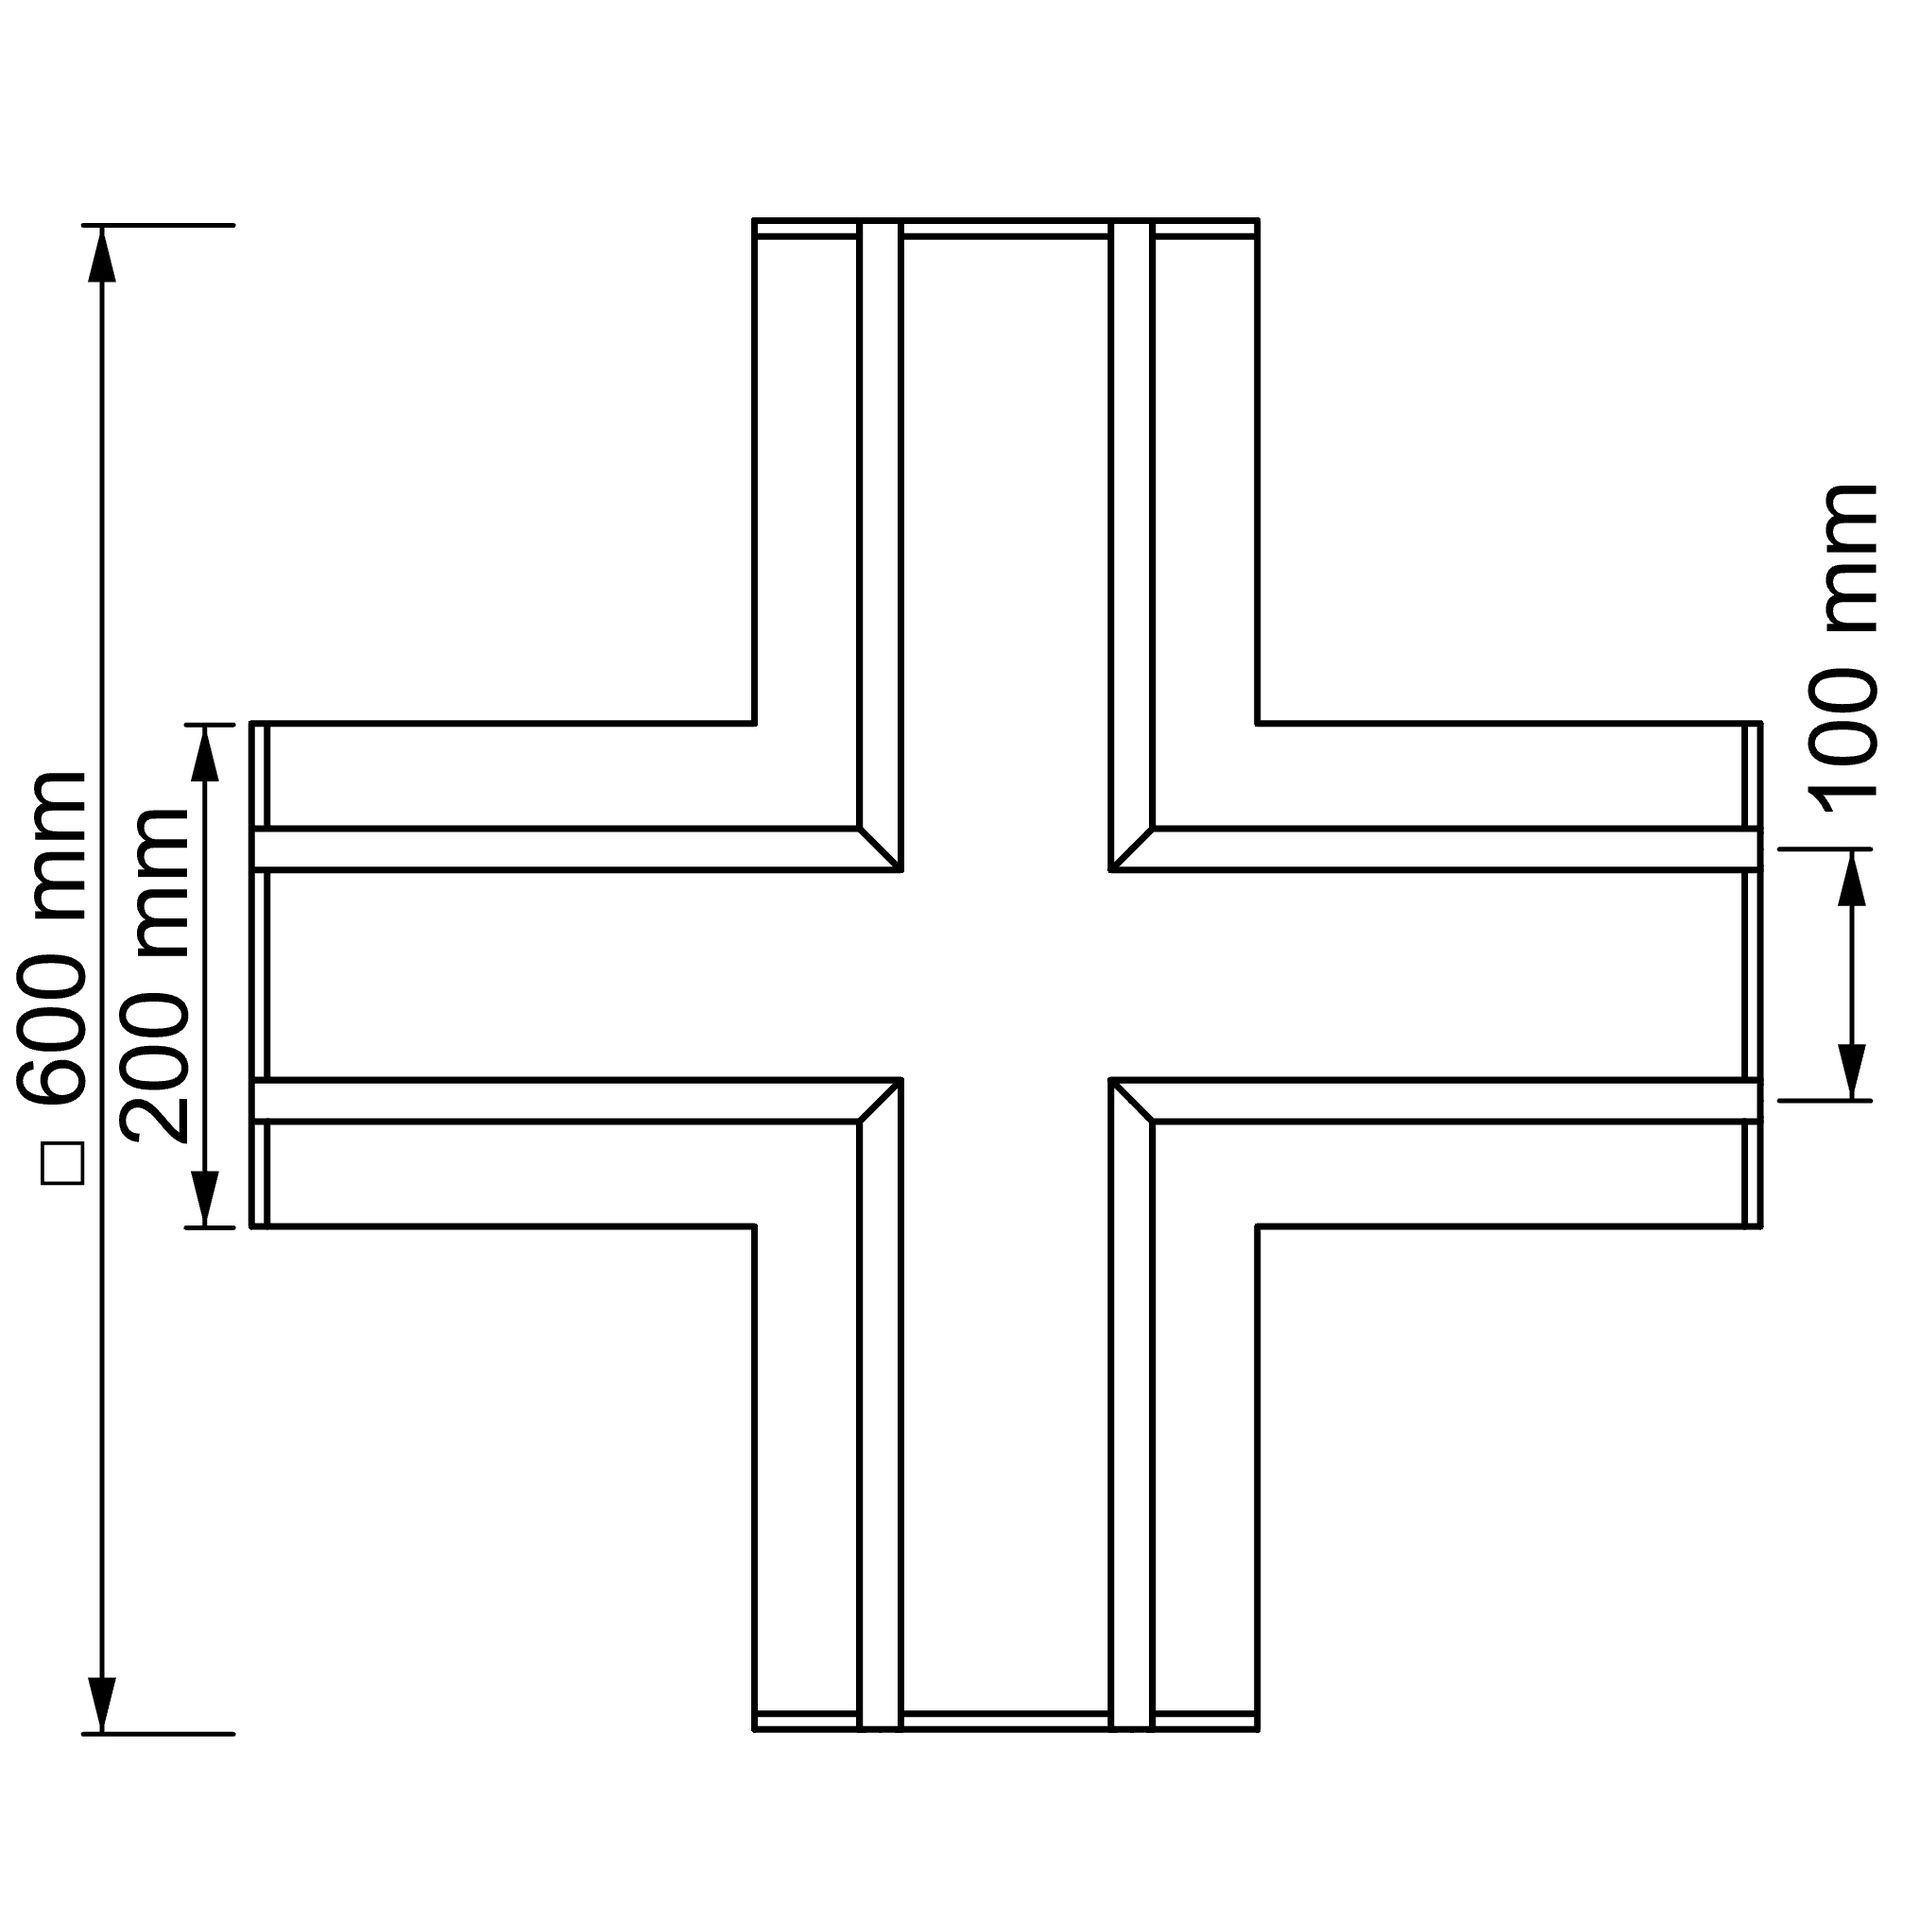
Kreuz | 2

Kreuz | 3
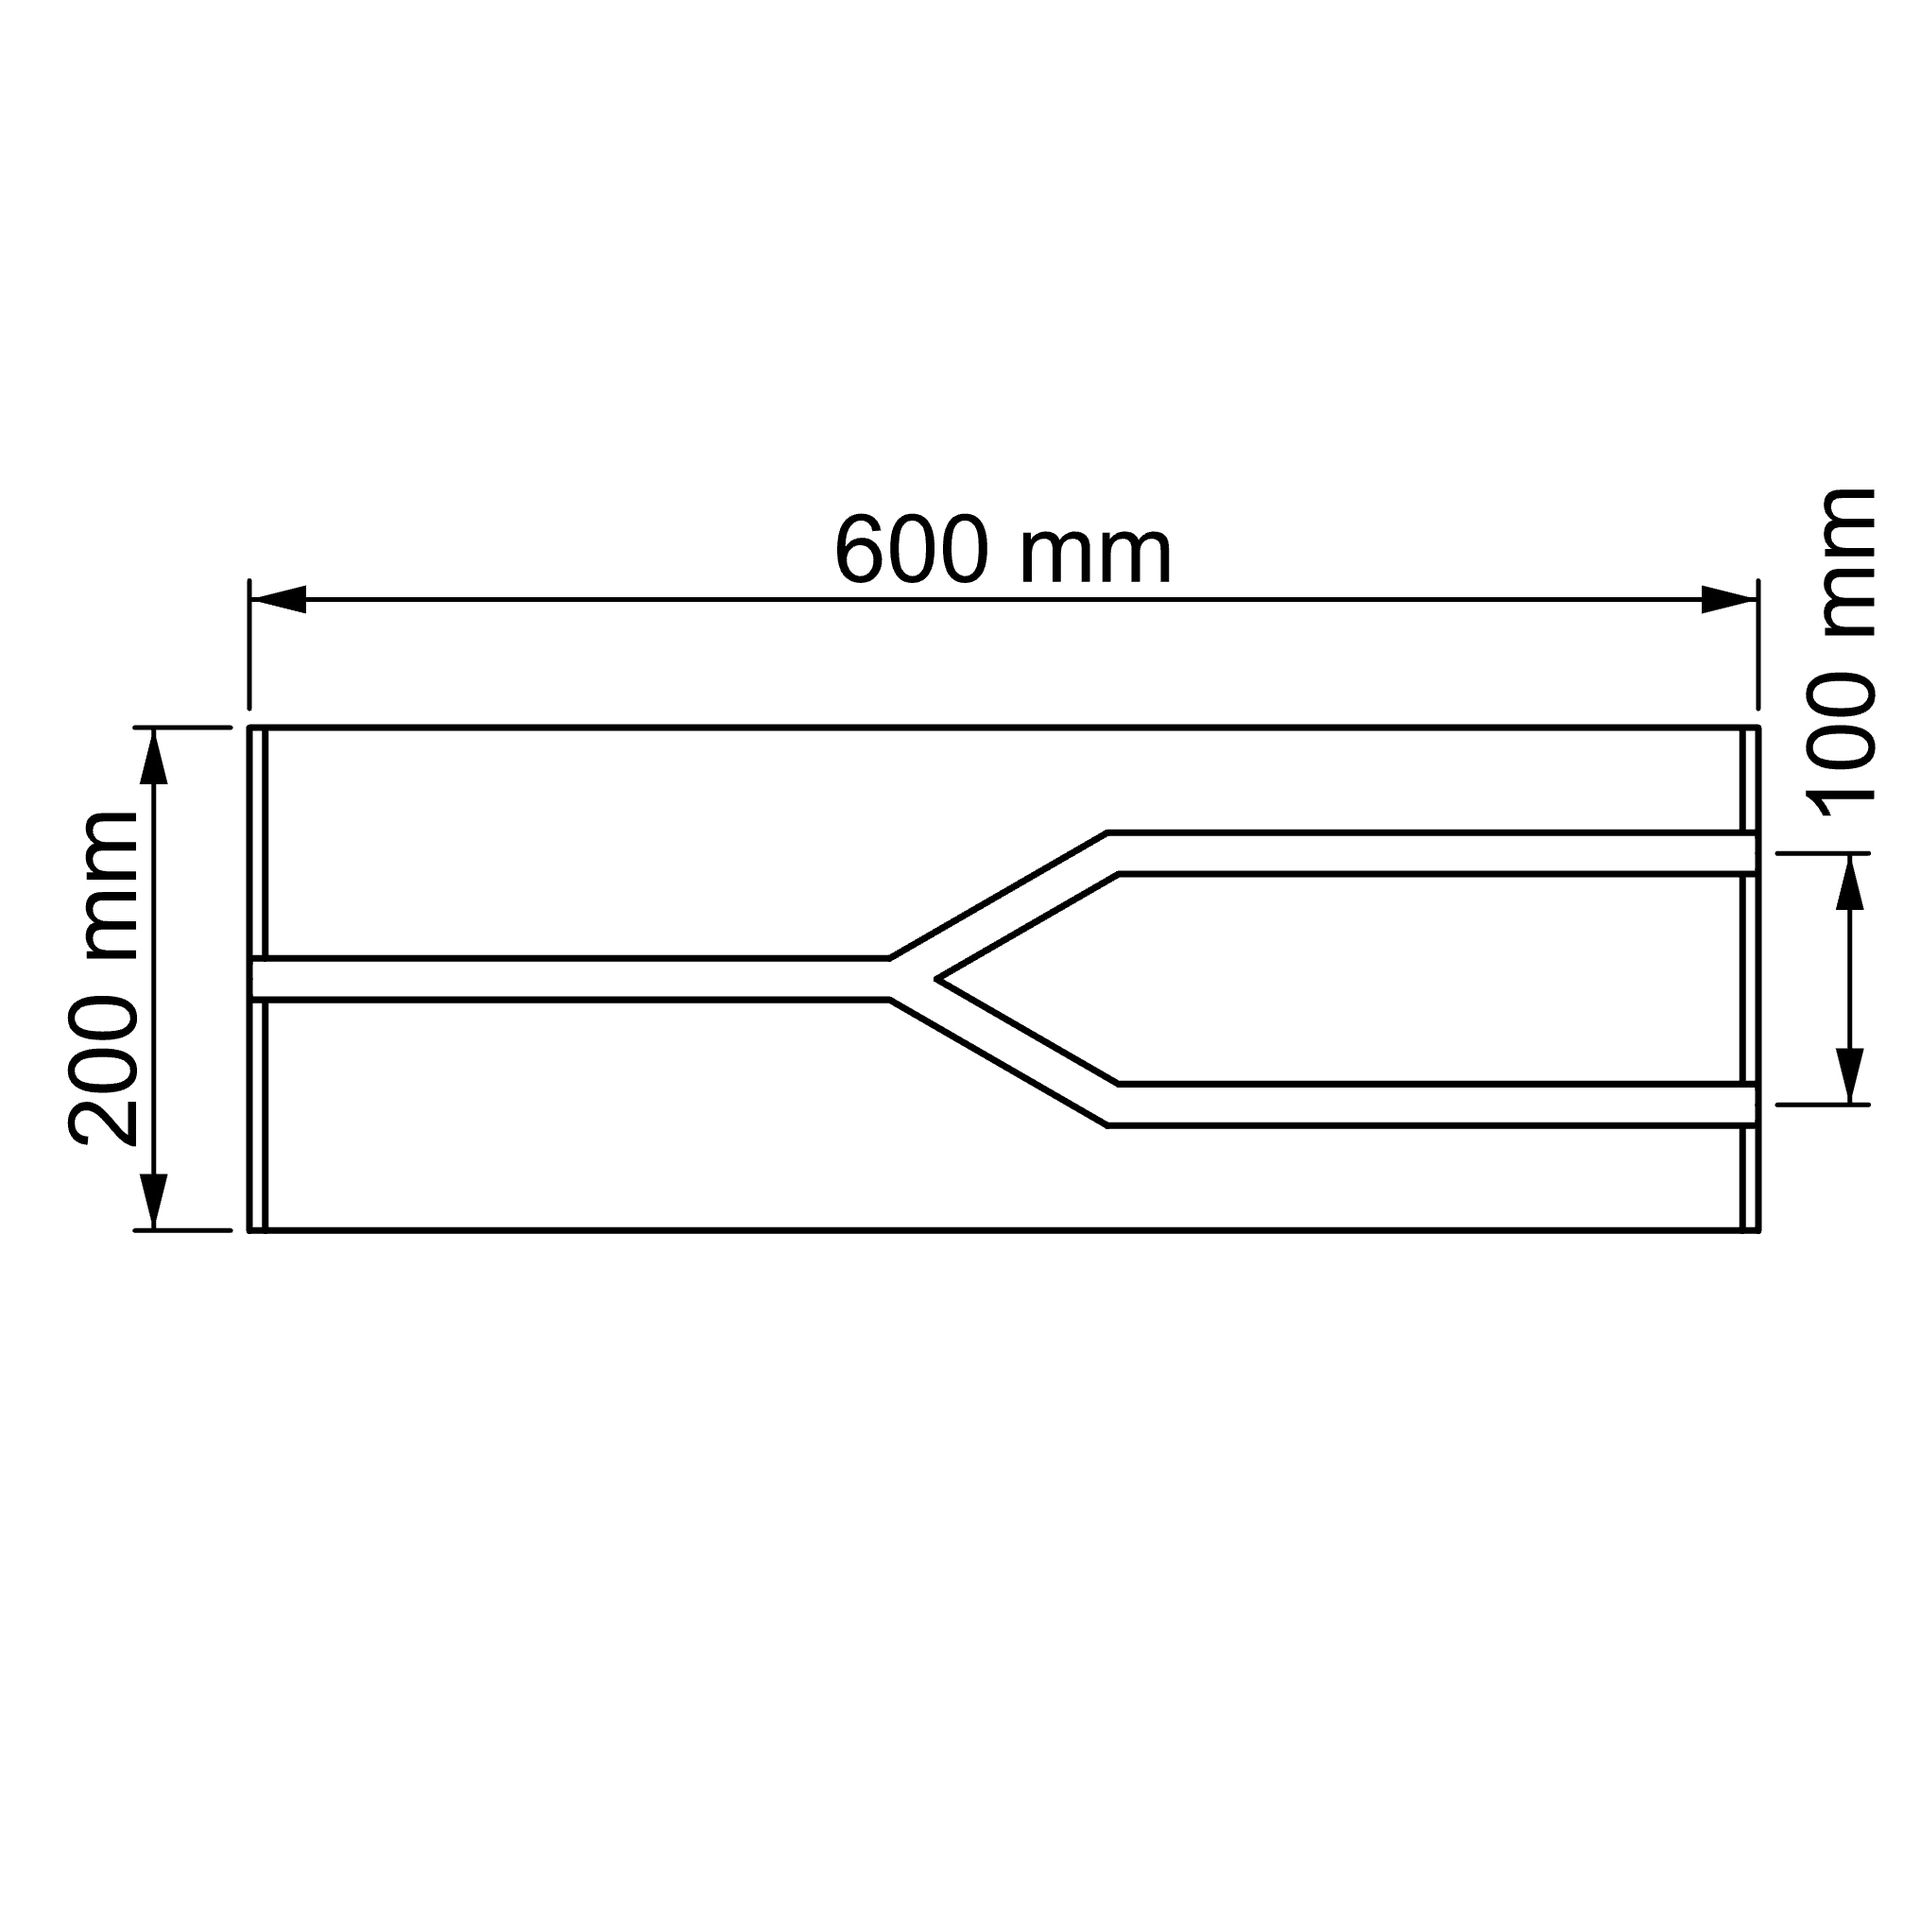
Y-Element | 1-2
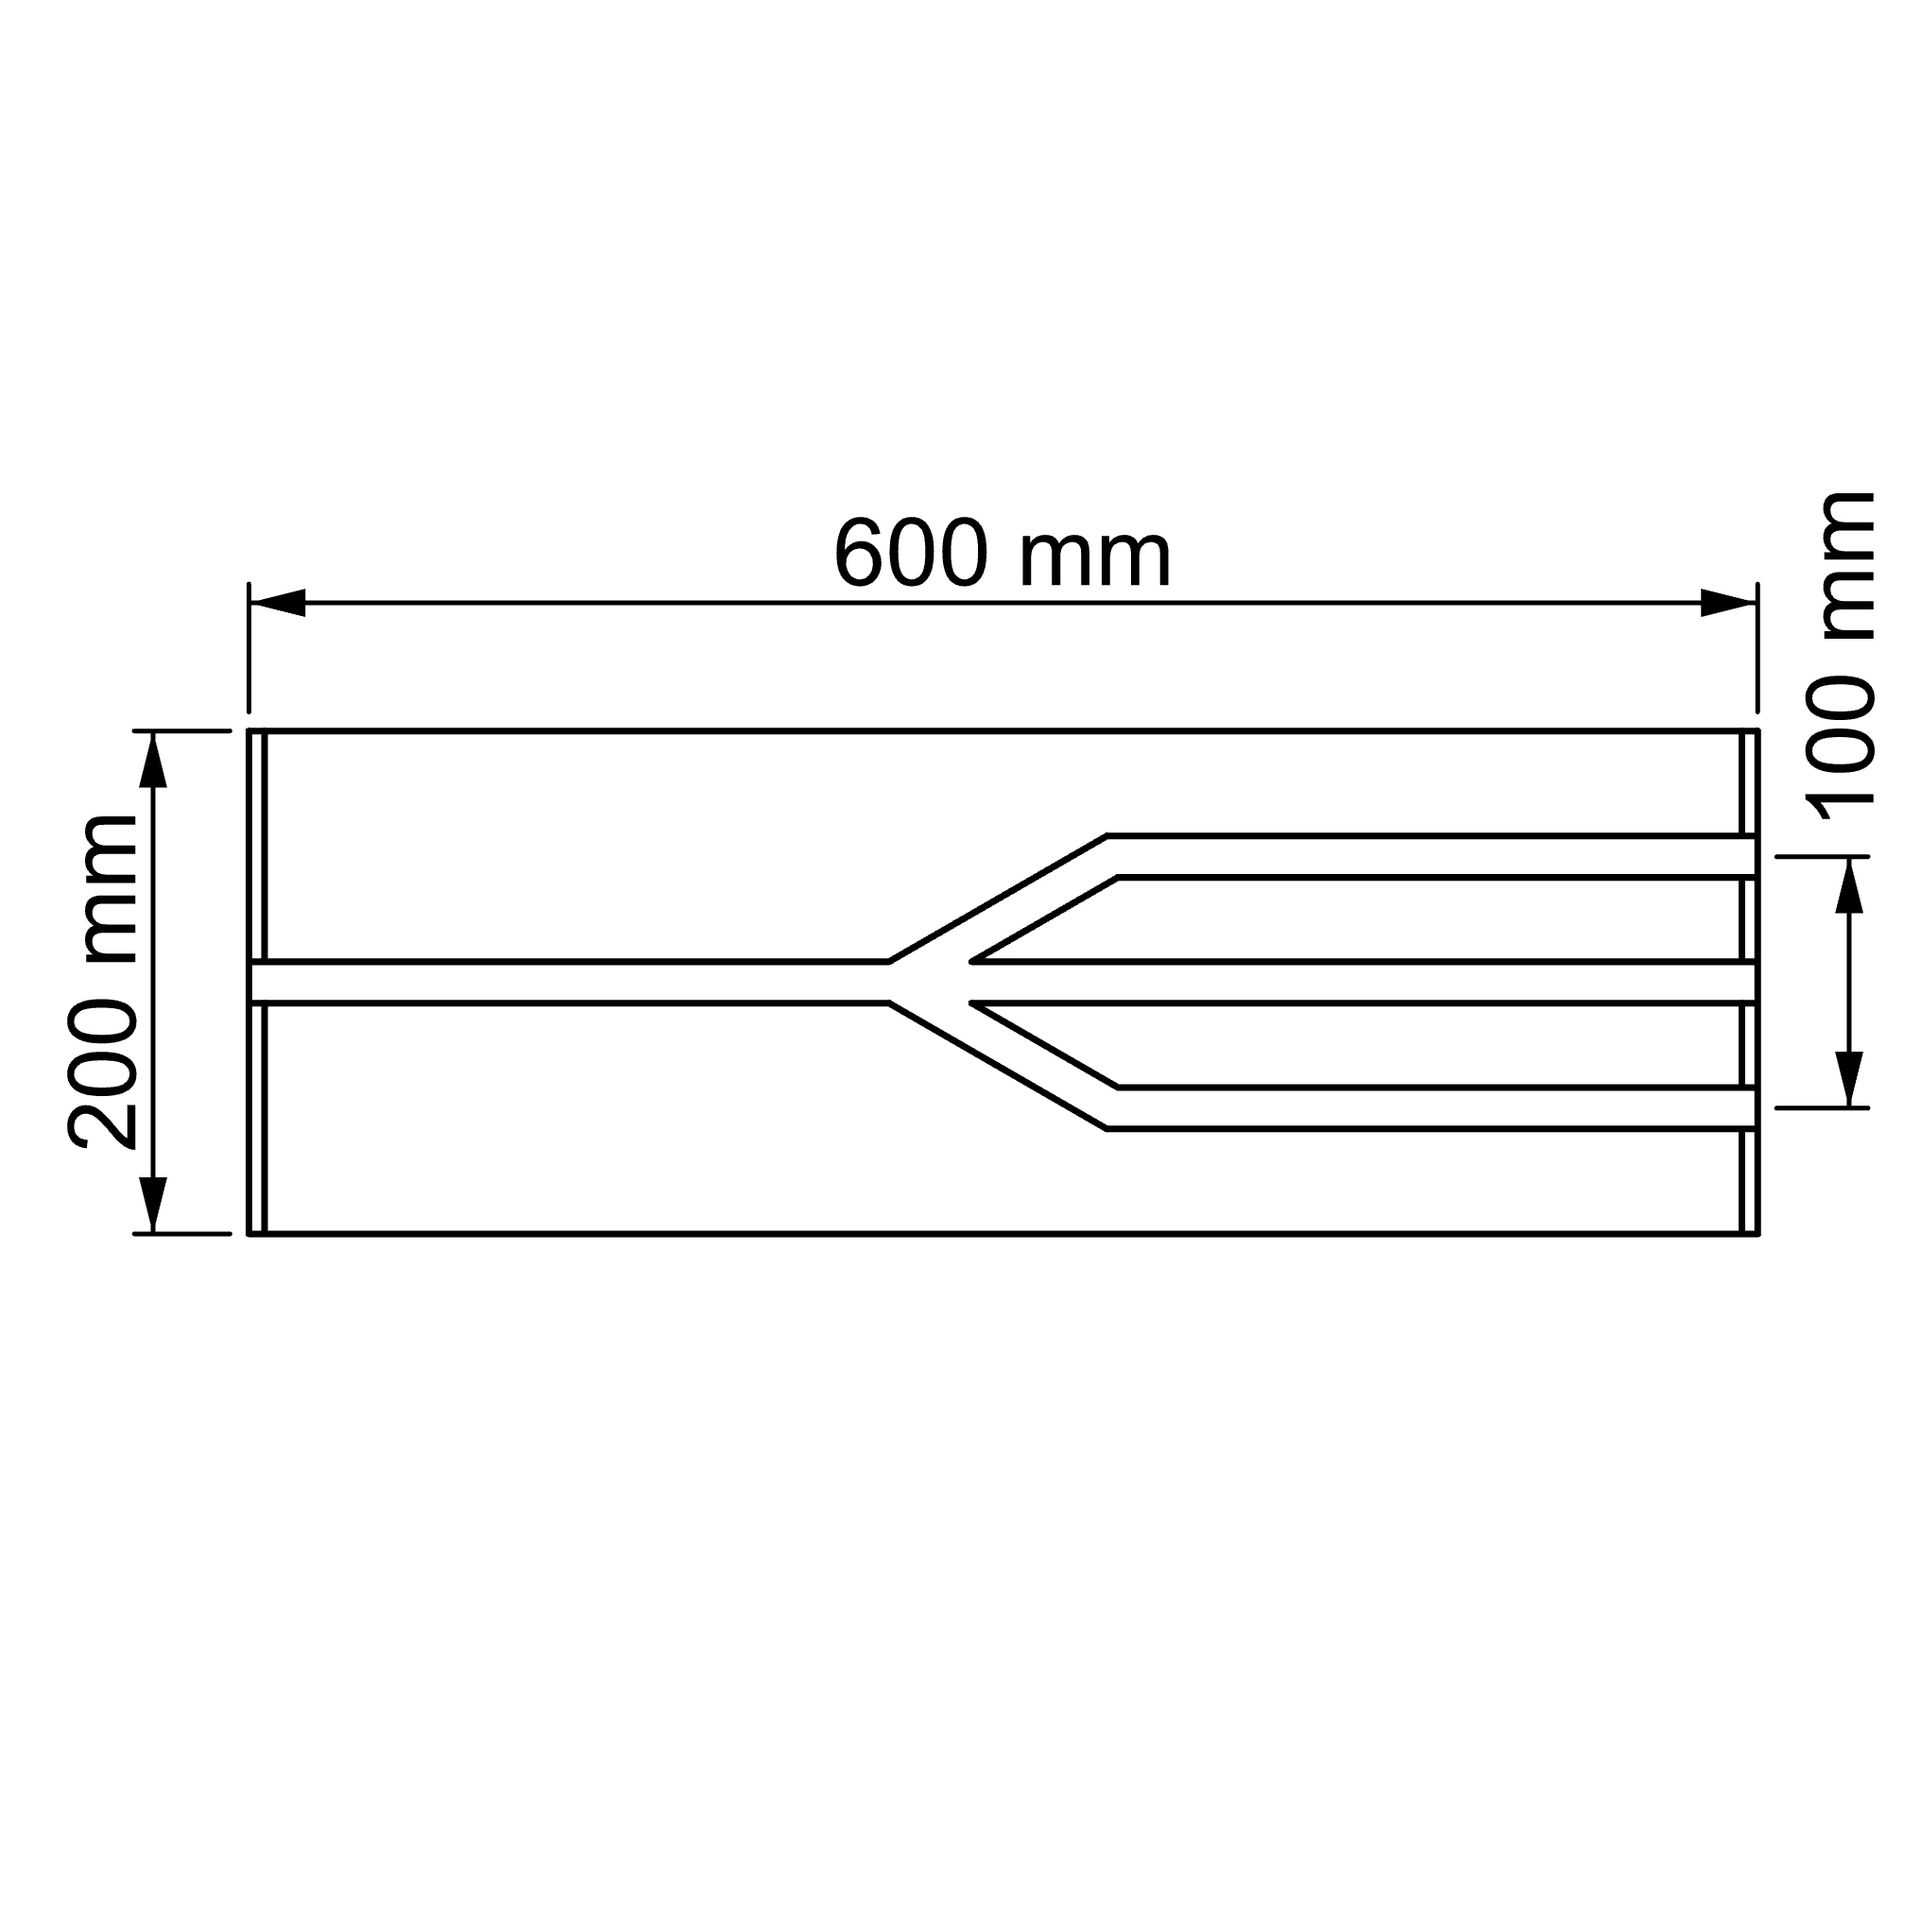
Y-Element | 2-3
Sieh dir bitte das Video zur Montage an.
Durch klicken auf die Play-Schaltflächen werden einige personenbezogene Daten von dir zur Plattform: Youtube weitergeleitet. Mit einem Klick auf diese Schaltflächen erklärst durch dich damit einverstanden, dass wir deine persönlichen Daten (insbesondere deine aktuelle IP-Adresse) an den Betreiber der Plattform übermitteln.
Montagevideo
Beliebte Produkte aus der DL-Serie

Um diese Web App auf Ihrem iPhone/iPad zu installieren, drücken Sie ![]() und dann Hinzufügen zum Startbildschirm.
und dann Hinzufügen zum Startbildschirm.